使用Arduino直接发声

通常如果想让Arduino发出声音需要额外的配备,比如:Mp3解码器,Wav专用播放器或者语音合成的模块等等。

但是理论上因为Arduino具有模拟输出,所以应该可以直接输出波形给喇叭(这个还是必须的,我随便选了一个8欧1.5瓦的)。

arduinos

随手搜索了一下,国外真有人这样做了。原理上来说就是先用工具将音频转化为WAV, Arduino 的存储空间有限,这里只能使用单声道 8000Hz 采样率,然后通过控制模拟端口将数据发送出来。从我的实验来看,Arduino Uno(Flash Memory 32 KB 【参考1】)可以存放大约4s左右的音频(编译之后在 31K左右)。

具体的做法是:

1.硬件方面,喇叭负极连接到GND,正极连接到Pin11

2.在Arduino程序中使用下面这个库

damellis-PCM-ae3f463

3.选择音频文件,然后转化为 WAV 8000Hz Mono 格式(我Switch Sound File coverter 感觉不错,免费的)

wavcover

软件下载 switchsetup

4.最后用参考2提供工具,将wav转化为数组的定义(需要注意这个工具需要 javaw.exe 支持)

EncodeAudio-windows

5.编译之后 Upload 即可

用Windows自带的录音机录下来的

狼嚎

工具转化为 wav 8K mono

狼嚎

最后生成的程序

playback

做出来的样子

http://www.tudou.com/programs/view/SzuxR6-7oKI/?resourceId=414535982_06_02_99

参考:

1.http://kb.open.eefocus.com/index.php?title=Arduino_Uno Arduino Uno

2.http://highlowtech.org/?p=1963

soundarduino

===============================================================================
2015.2.23 补充:我在编译时发生“error: ‘OCR2A’ undeclared (first use in this function)” 这样一系列的错误,搜索了一下,是因为最近一直在玩 Arduino Pro Micro,它的芯片是 ATmega32u4 ,而这个芯片没有 Timer2 , 只有 0, 1, 3 和 4。IDE中重新切换回Uno再次编译即可。参考 http://forum.arduino.cc/index.php?topic=237770.0

再补充参考2给出来的那个转换工具

EncodeAudio-windows

再给出一个完整的Arduino程序例子
playback1

Step to UEFI (15) —– 命令行参数 Again

前面介绍过 UEFI 下获得命令行参数的方法。这次尝试用 C Lib 来实现。

需要获取的参数直接用下面的代码进行输出

for (i=0;i<Argc; i++)
{
printf(“Arg[%d]: %s\n”,i,Argv[i]);
}

惊奇的发现,只能输出每个参数的第一个字母,一下子蒙了。琢磨了好长时间,忽然想起来这个应该是 unicode导致的。正常情况下

“abc”这样的ascii在unicode中会被存为 “97 00 98 0 99 0”,遇到 00 printf 自动就给截断了

顺手查了一下 \StdLib\Include\stdio.h ,其中提到了这个事情

If an l length modifier is present, the argument shall be a
pointer to the initial element of an array of wchar_t type. Wide
characters from the array are converted to multibyte characters
(each as if by a call to the wcrtomb function, with the conversion
state described by an mbstate_t object initialized to zero before
the first wide character is converted) up to and including a
terminating null wide character. The resulting multibyte characters
are written up to (but not including) the terminating null
character (byte). If no precision is specified, the array shall
contain a null wide character. If a precision is specified, no more
than that many bytes are written (including shift sequences, if
any), and the array shall contain a null wide character if, to
equal the multibyte character sequence length given by the
precision, the function would need to access a wide character one
past the end of the array. In no case is a partial multibyte
character written.

那我再试试

for (i=0;i<Argc; i++)
{
printf(“Arg[%d]: %ls\n”,i,Argv[i]);
}

结果依旧。不知道为什么了,如果有了解的朋友可以给我写邮件告诉我。

好在我们还有 Print 和 wprintf 可以绕过去。最后写了一个程序,主要代码如下

#include  <Uefi.h>
#include  <Library/UefiLib.h>
#include  <Library/ShellCEntryLib.h>

#include  <stdio.h>
#include <wchar.h>
/***
  Demonstrates basic workings of the main() function by displaying a
  welcoming message.

  Note that the UEFI command line is composed of 16-bit UCS2 wide characters.
  The easiest way to access the command line parameters is to cast Argv as:
      wchar_t **wArgv = (wchar_t **)Argv;

  @param[in]  Argc    Number of argument tokens pointed to by Argv.
  @param[in]  Argv    Array of Argc pointers to command line tokens.

  @retval  0         The application exited normally.
  @retval  Other     An error occurred.
***/
int
EFIAPI
main (
  IN int Argc,
  IN char **Argv
  )
{
  int i;
  printf("You have input %d args\n",Argc);

  printf("\nExp1. If we use \" printf(\"Arg[%%d]: %%s\\n\",i,Argv[i]);\n");
  for (i=0;i<Argc; i++)  
   {
	printf("Arg[%d]: %s\n",i,Argv[i]);
   }
  
  printf("\nExp2. If we use \" printf(\"Arg[%%d]: %%ls\\n\",i,Argv[i]);\n");
  for (i=0;i<Argc; i++)  
   {
	printf("Arg[%d]: %ls\n",i,Argv[i]);
   }
   
  printf("\nExp3. If we use \" Print(L\"Arg[%%d]: %%s\\n\",i,Argv[i]);\n");
  for (i=0;i<Argc; i++)  
   {
	Print(L"Arg[%d]: %s\n",i,Argv[i]);
   }

  printf("\nExp4. If we use \" wprintf(L\"Arg[%%d]: %%s\\n\",i,Argv[i]);\n");
  for (i=0;i<Argc; i++)  
   {
	wprintf(L"Arg[%d]: %ls\n",i,Argv[i]);
   }   
  return EFI_SUCCESS;
}


最终的运行结果

argv

代码下载:Main (和前面几篇文章一样,请用 AppPkg 编译)

Step to UEFI (14) —– EADK clock()

除了前面介绍的tm struct 和 time_t定义,标准C的库还有clock_t的定义。相比前面两者,这个是一个更加单纯的“计时”定义,前两者更像是日期时间的定义。

对于 clock_t ,在 EadkPkg_A2\StdLib\Include\time.h 有如下定义

/** An arithmetic type capable of representing values returned by clock(); **/
#ifdef _EFI_CLOCK_T
  typedef _EFI_CLOCK_T  clock_t;
  #undef _EFI_CLOCK_T
#endif


在 StdLib\Include\sys\EfiCdefs.h 有下面的定义

#define _EFI_CLOCK_T      UINT64


和 clock_t 配合的还有CLOCKS_PER_SEC ,定义了一秒中的Clock数

EadkPkg_A2\StdLib\Include\time.h

#define CLOCKS_PER_SEC  __getCPS()


这个函数的具体实现在 EadkPkg_A2\StdLib\LibC\Time\Time.c

clock_t
EFIAPI
__getCPS(void)
{
  return gMD->ClocksPerSecond;
}


函数 clock() 的作用是取得从程序开始运行的处理器时钟数。特别需要注意:在NT32模拟环境中和实际环境中,这个函数是不同的。之前提到过,如果想在NT32环境中正常使用C Library,必须在AppPkg.dsc中做一些修改

[LibraryClasses.IA32]
  #TimerLib|PerformancePkg/Library/DxeTscTimerLib/DxeTscTimerLib.inf
  ## Comment out the above line and un-comment the line below for running under Nt32 emulation.
  TimerLib|MdePkg/Library/BaseTimerLibNullTemplate/BaseTimerLibNullTemplate.inf


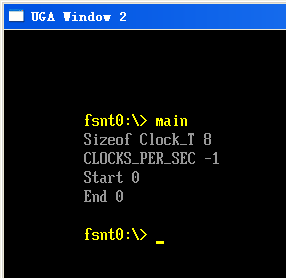
当然,修改之后,能在NT32环境中运行了,但是无法取得clock值。输出始终为 0。

clock1

为了验证,我尝试在实际环境下测试。首先是要将上面的设定恢复原装。恢复完之后无法通过编译,需要修改成下面的样子(下面ORG给出的是原来的路径)。

[LibraryClasses.IA32]
  #ORG TimerLib|PerformancePkg/Library/DxeTscTimerLib/DxeTscTimerLib.inf
  TimerLib|PerformancePkg/Library/TscTimerLib/DxeTscTimerLib.inf
  ## Comment out the above line and un-comment the line below for running under Nt32 emulation.
  #TimerLib|MdePkg/Library/BaseTimerLibNullTemplate/BaseTimerLibNullTemplate.inf


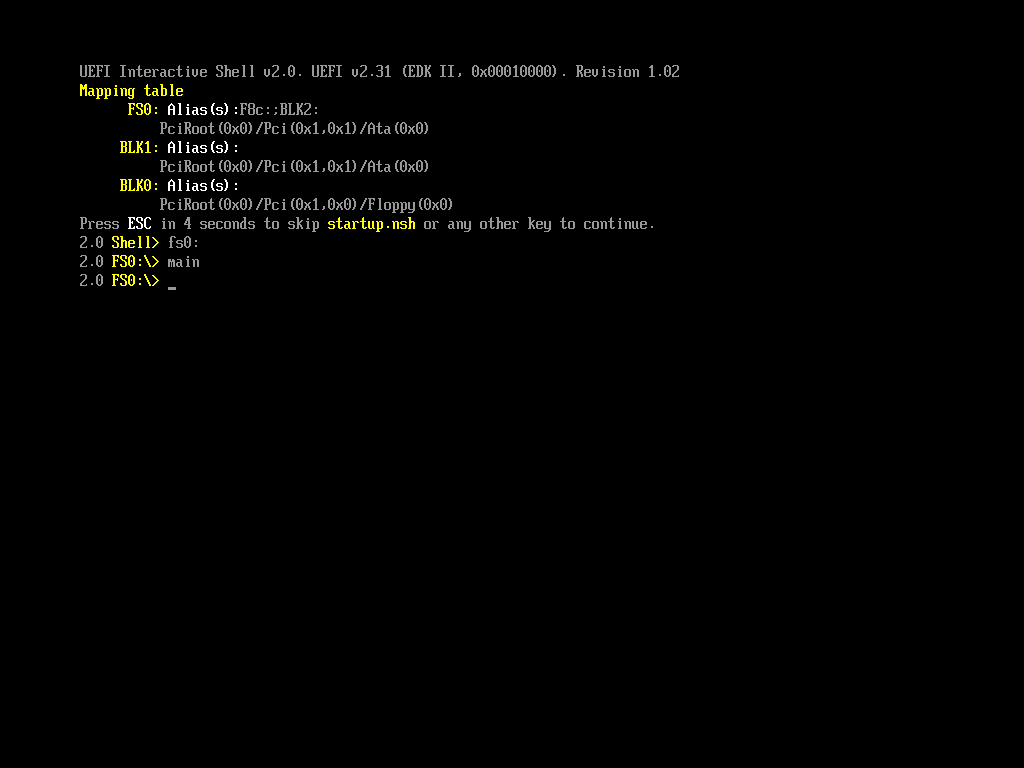
之后,我用WinISO做了一个 ISO镜像,将main.efi放在iso文件中,直接挂接到virtualbox的虚拟机中(4.3.10 r93012),发现运行之后无任何输出.
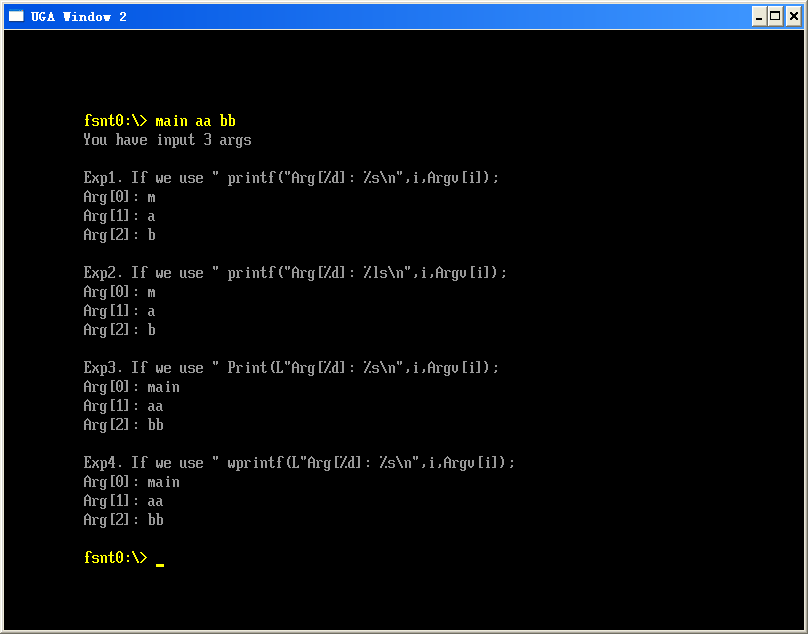
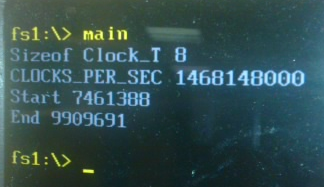
clock2

拷贝到实际机器上运行,看起来结果正常:

clock

这次实验使用的代码如下,依然是从 Demo 的Main.c中修改而来

/** @file
    A simple, basic, application showing how the Hello application could be
    built using the "Standard C Libraries" from StdLib.

    Copyright (c) 2010 - 2011, Intel Corporation. All rights reserved.<BR>
    This program and the accompanying materials
    are licensed and made available under the terms and conditions of the BSD License
    which accompanies this distribution. The full text of the license may be found at
    http://opensource.org/licenses/bsd-license.

    THE PROGRAM IS DISTRIBUTED UNDER THE BSD LICENSE ON AN "AS IS" BASIS,
    WITHOUT WARRANTIES OR REPRESENTATIONS OF ANY KIND, EITHER EXPRESS OR IMPLIED.
**/
//#include  <Uefi.h>
//#include  <Library/UefiLib.h>
//#include  <Library/ShellCEntryLib.h>

#include  <stdio.h>
#include  <time.h>

/***
  Demonstrates basic workings of the main() function by displaying a
  welcoming message.

  Note that the UEFI command line is composed of 16-bit UCS2 wide characters.
  The easiest way to access the command line parameters is to cast Argv as:
      wchar_t **wArgv = (wchar_t **)Argv;

  @param[in]  Argc    Number of argument tokens pointed to by Argv.
  @param[in]  Argv    Array of Argc pointers to command line tokens.

  @retval  0         The application exited normally.
  @retval  Other     An error occurred.
***/
int
EFIAPI
main (
  IN int Argc,
  IN char **Argv
  )
{
  int i;
  printf("Sizeof Clock_T %d\n",sizeof(clock_t));

  printf("CLOCKS_PER_SEC %d\n",CLOCKS_PER_SEC);

  printf("Start %d\n",clock());

  for (i=1;i<0xFFFF; i++)  
   {
   }

  printf("End %d\n",clock());

  return EFI_SUCCESS;
}


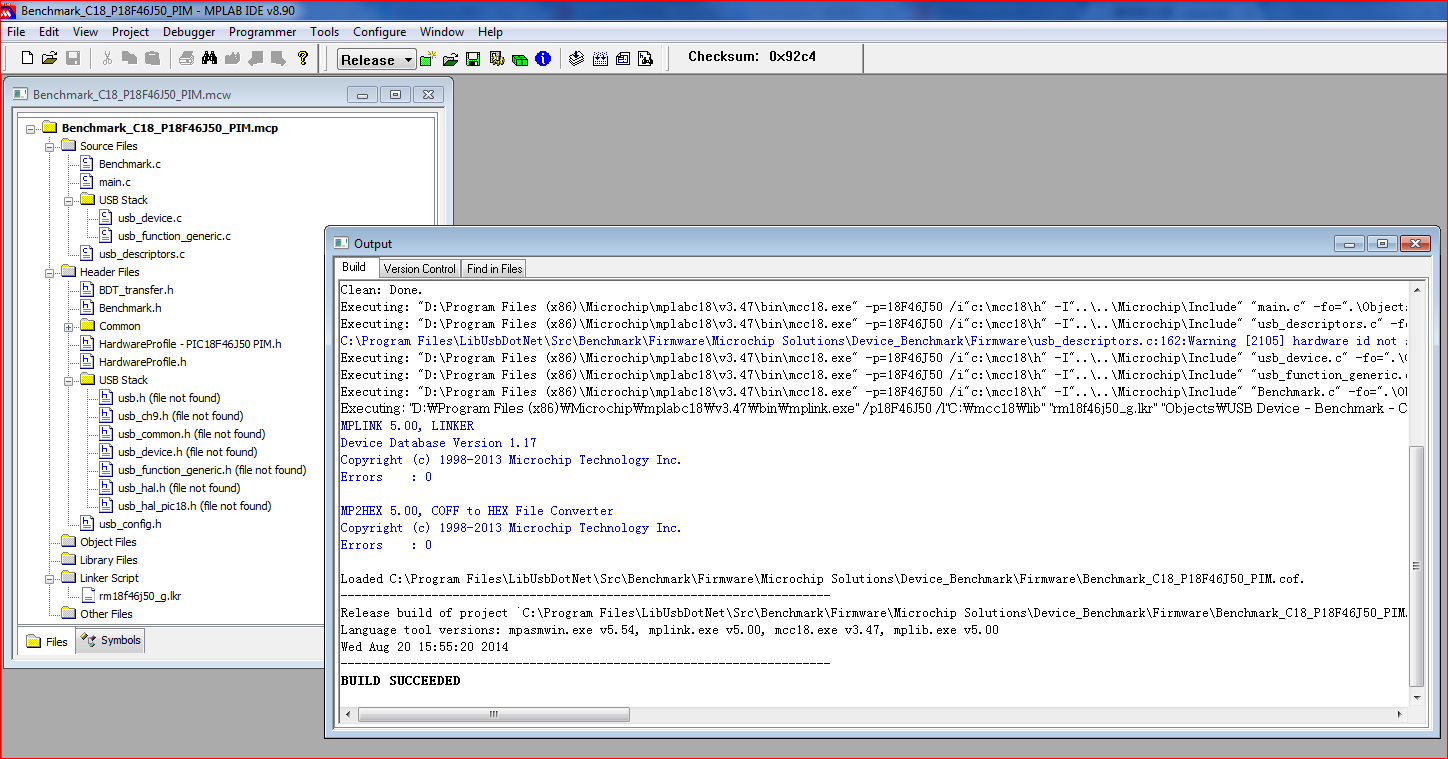
依旧是使用 AppPkg 的环境进行编译。

代码下载

Main

编译的可以在实际机器上运行的EFI文件

Main_Actual

根据上面的 CLOCKS_PER_SEC 我们同样能做出来一个测算当前CPU频率的程序。同时我们也完全可以写出一个 delay 函数(我在C 标准库中查看了一下,惊奇的发现这个函数并非标准函数……)

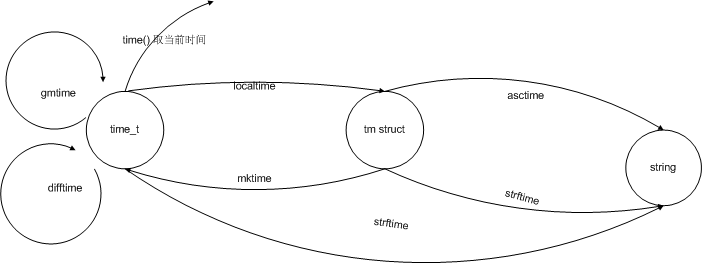
为了总结关于时间的库函数,总结下面这个图表

time lib

参考:
1.http://ganquan.info/standard-c/function/clock

红外无线温度计

前一段,给Arduino做了一个外壳。材料是有机玻璃再加上 3mm 的铜柱螺丝和螺母的组合,做出来效果还不错。最明显的就是放到论坛上会有很多人关注和讨论。相比OpenCV统计骰子点数的装置,这个盒子的人气高很多。【参考1】

淘宝上有更专业的Arduino外壳,只是价格比较贵。有兴趣的朋友可以像我这样,买一块有机玻璃,再买一把各种螺钉螺母的。

shellarduino

果壳网近期有个手机装置设计大赛,翻翻箱子看看手上有什么能够用起来的东西。最后决定做一个“无线温度计”。除了上面的外壳,还有如下材料:

Arduino Uno
TN901 红外温度传感器
蓝牙模块

简单介绍一下 TN901 ,实物如图(实际我使用的比下面的长一截,多出来一段电路板,不知道是不是考虑到太短了用起来容易焊接不亮,或者容易头重脚轻)

tn901

上图从左到右分别是 A:测试 G:地 C:时钟 D:数据 V:电源【参考】。从另外一个方向看过去,顺序刚好颠倒。用的时候先看一下电路板上哪里是 A 哪里是 V 即可确认方向。刚开始的时候我就接反了,不工作,吓得我一身冷汗(这个小东西要 150元,是我一个月购买材料budget。开发品就是贵啊。相比之下,淘宝上还有50元的测温枪,不同的传感器而已)
论坛上有人之前做过【参考1】,有现成的库可以使用【参考2】,方便啊!
连接上蛮简单,VCC供电(建议选 5V),GND接好之后,剩下三根线,根据库初始化时的提示分别将 Data CLK ACK 连接到 Pin 13 12 11。连接好之后,在串口就能看到数据了。

下面再引入蓝牙模块。入手的是专门Arduino 使用的。简单的说Arduino蓝牙模块=单板+底板。而我刚开始入手的是单板。入手单板之后有点傻眼:小是够小,但是没引出来需要的Pin脚。最后还是买了一个专门 Arduino 使用的了事。

有专门的 TN901的库,因此 Arduino 程序编写要简单的多。

#include <Arduino.h> 
#include <Wire.h>
#include "TN901.h"  //引用库文件
TN901 tn;           //实 例 化
void setup()
{
    Serial.begin(9600);
    tn.Init(13,12,11);  //初 始 化 data clk ack
}
void loop()
{
   tn.Read();
   SerialValue();
   delay(2000);
}

void SerialValue()
{
   String s;
   s=">O"+String(tn.OT, DEC)+"E"+String(tn.ET,DEC)+"<"; 
   Serial.println(s);
   //Serial.print(tn.OT, DEC);
   //Serial.print("ET");
   //Serial.print(tn.ET, DEC);
}


出来的两个温度分别是目标温度(tn.OT)和当前的环境温度(tn.ET)。上面的程序将结果放在一个下面这样 >Oxx.xxEyy.yy< 的字符串中发送到串口上。再通过串口蓝牙,我们的电脑就能够收到结果了。

dPsth1-sLLasZ1cLCQ3rMfmbswWAUts6clUKxhVVkLTRAQAAZwIAAFBO

gzpTD5eLLIU02MC-PJLVKXZdGj_FxCdSvfSsH1W16H6QBwAAIAoAAEpQ

供电部分使用的是一个USB充电宝,内部是一节 16580 电池。体积适中,价格也不贵。

FkSGBq2NsJR46BrDWXQG6geid3rNpRCUh42Eeq5dNSqAAgAA4AEAAEpQ

电脑端,使用Delphi 设计了一个简单的界面,用类似任务管理器的界面来展示当前的和部分的历史数据

x4k4h5l-_l7mJqz3KqnSmvqPMmoxITAwhYTGsStQ874BBgAAhAMAAFBO

为了方便起见同时还使用了 CPort VCL 来作为串口通讯。但是个人感觉不是很稳定,因此有机会还是直接使用 API 爱进行通讯比较好。程序下载 IRTemp。Arduino相关库下载:tn9

最后还拍摄了一个应用的演示视频。

http://www.tudou.com/programs/view/dDu_7_c58TA/?resourceId=414535982_06_02_99

参考:
1. http://www.geek-workshop.com/thread-10726-1-1.html用有机玻璃做个arduino外壳

2. http://www.geek-workshop.com/thread-8727-1-1.html DIY红外非接触式温度计

3. http://www.geek-workshop.com/thread-1884-1-1.html如何自己编写Arduino支持的C++类库

4. http://www.zytemp.com/products/tn901.asp Tn9 usermanual

libusb(1)

最近看了一下 libusb 这个开源库(Win32)。然后发现LibUsbDotNet给出了一个USB速度测试Demo,包括软件和Firmware部分。对我来说,最感兴趣的还是 USB Firmware,于是乎研究了一番。他的代码在 \LibUsbDotNet\Src\Benchmark\Firmware 下面。从文档中来看,代码基于PIC的 USB 单片机 Demo 板的,又搜了一下对应开发板的价格…….然后我们谈一下其他的吧…….

PIC系列的单片机是 MicroChip 公司开发的系列产品,覆盖范围非常广。考察下来的结论是:PIC属于那种非常适合公司开发的单片机,是那种有钱所有都有的(开发板,Debug,编辑器,编译器一条龙都能下来),美中不足的就是需要钱,烧写都需要专门的工具(也不得不说他的工具非常强大)。但是对于我这样的,很多时候只是三分钟热血看一眼而已,每月预算有限的爱好者只是看看吧。

然后就开始阅读代码了。但是很奇怪的是,代码似乎不完整。又下载了一个 MPLAB的编译器。经过一个晚上的研究发现:缺少USB Stack。又去找这些东西,最后发现MicroChip会将用到的代码 Publish出来。之后我下载了一个最新的,补充到 LibUsbDotNet 给出的代码中,编译之后发现不通过。查找了一下,应该是我下载的库版本太新,而LibUsbDotNet Firmware用的是老库导致的…….最后用的是 MCHP_App_Lib_v2010_10_19_Installer.zip 。即可正常编译,虽然无法运行,但是理论上不缺代码了。

编译结果:

Capture

编译的Source Code,有板子的朋友可以烧一下看看是否正常

PICUSB