前面一篇介绍了如何获得USB Descriptor,更麻烦的是这个数据的解读。在【参考1】给出了一个直接解析 Descriptor的例子。美中不足的是,这个例子只能在老版本的Arduino上工作(我估计是 0.22),在新版本 1.6.x 的IDE上会出现很多报错。
经过努力修改,终于可以编译通过(需要选择 Arduno Uno),程序如下:
/* MAX3421E USB Host controller configuration descriptor parser */
//#include "Spi.h"
#include "Max3421e.h"
#include "Usb.h"
#include "descriptor_parser.h"

#define LOBYTE(x) ((char*)(&(x)))[0]
#define HIBYTE(x) ((char*)(&(x)))[1]
#define BUFSIZE 256    //buffer size
#define DEVADDR 1

#define getReportDescr( addr, ep, nbytes, parse_func, nak_limit ) ctrlXfer( addr, ep, bmREQ_HIDREPORT, USB_REQUEST_GET_DESCRIPTOR, 0x00, HID_DESCRIPTOR_REPORT, 0x0000, nbytes, parse_func, nak_limit )
#define getReport( addr, ep, nbytes, interface, report_type, report_id, parse_func, nak_limit ) ctrlXfer( addr, ep, bmREQ_HIDIN, HID_REQUEST_GET_REPORT, report_id, report_type, interface, nbytes, parse_func, nak_limit )

/* Foeward declarations */
void setup();
void loop();
byte ctrlXfer( byte addr, byte ep, byte bmReqType, byte bRequest, byte wValLo, byte wValHi, unsigned int wInd, uint16_t nbytes, PARSE parse_func, uint16_t nak_limit );
void HIDreport_parse( uint8_t* buf, uint8_t* head, uint8_t* tail);

typedef struct {
  uint8_t bDescriptorType;
  uint16_t wDescriptorLength;
} HID_CLASS_DESCRIPTOR;


//typedef void (*PARSE)( int8_t*, int8_t*, int8_t );

MAX3421E Max;
USB Usb;

void setup()
{
  Serial.begin( 115200 );
  printProgStr(PSTR("\r\nStart"));
  Max.powerOn();
  delay( 200 );
}

void loop()
{
  uint8_t rcode;
  uint8_t tmpbyte = 0;

  //PARSE pf = &HIDreport_parse;
  /**/
  Max.Task();
  Usb.Task();
  if( Usb.getUsbTaskState() >= USB_STATE_CONFIGURING ) {  //state configuring or higher
  /* printing device descriptor */
    printProgStr(PSTR("\r\nDevice addressed... "));
    printProgStr(PSTR("Requesting device descriptor."));
    tmpbyte = getdevdescr( DEVADDR );                           //number of configurations, 0 if error
    if( tmpbyte == 0 ) {
      printProgStr(PSTR("\r\nDevice descriptor cannot be retrieved. Program Halted\r\n"));
      while( 1 );           //stop
     }//if( tmpbyte
     /* print configuration descriptors for all configurations */
     for( uint8_t i = 0; i < tmpbyte; i++ ) {
       getconfdescr( DEVADDR, i );
     }
  /* Stop */
      while( 1 );                          //stop
  }
}

/* Prints device descriptor. Returns number of configurations or zero if request error occured */
byte getdevdescr( byte addr )
{
  USB_DEVICE_DESCRIPTOR buf;
  byte rcode;
  //Max.toggle( BPNT_0 );
  rcode = Usb.getDevDescr( addr, 0, 0x12, ( char *)&buf );
  if( rcode ) {
    printProgStr( rcode_error_msg );
    print_hex( rcode, 8 );
    return( 0 );
  }
  printProgStr(PSTR("\r\nDevice descriptor: \r\n"));
  //Descriptor length
  printProgStr( descr_len );
  print_hex( buf.bLength, 8 );
  //Descriptor type
//  printProgStr( descr_type );
//  print_hex( buf.bDescriptorType, 8 );
//  printProgStr( descrtype_parse( buf.bDescriptorType ));
  //USB Version
  printProgStr(PSTR("\r\nUSB version:\t\t"));
  Serial.print(( HIBYTE( buf.bcdUSB )), HEX );
  Serial.print(".");
  Serial.print(( LOBYTE( buf.bcdUSB )), HEX );
  //Device class
  printProgStr( class_str );
  print_hex( buf.bDeviceClass, 8 );
  printProgStr( classname_parse( buf.bDeviceClass ));
  //Device Subclass
  printProgStr( subclass_str );
  print_hex( buf.bDeviceSubClass, 8 );
  //Device Protocol
  printProgStr( protocol_str );
  print_hex( buf.bDeviceProtocol, 8 );
  //Max.packet size
  printProgStr( maxpktsize_str );
  print_hex( buf.bMaxPacketSize0, 8 );
  //VID
  printProgStr(PSTR("\r\nVendor  ID:\t\t"));
  print_hex( buf.idVendor, 16 );
  //PID
  printProgStr(PSTR("\r\nProduct ID:\t\t"));
  print_hex( buf.idProduct, 16 );
  //Revision
  printProgStr(PSTR("\r\nRevision ID:\t\t"));
  print_hex( buf.bcdDevice, 16 );
  //Mfg.string
  printProgStr (PSTR("\r\nMfg.string index:\t"));
  print_hex( buf.iManufacturer, 8 );
  getstrdescr( addr, buf.iManufacturer );
  //Prod.string
  printProgStr(PSTR("\r\nProd.string index:\t"));
  print_hex( buf.iProduct, 8 );
  //printProgStr( str_cont );
  getstrdescr( addr, buf.iProduct );
  //Serial number string
  printProgStr(PSTR("\r\nSerial number index:\t"));
  print_hex( buf.iSerialNumber, 8 );
  //printProgStr( str_cont );
  getstrdescr( addr, buf.iSerialNumber );
  //Number of configurations
  printProgStr(PSTR("\r\nNumber of conf.:\t"));
  print_hex( buf.bNumConfigurations, 8 );
  return( buf.bNumConfigurations );
}
/* Get string descriptor. Takes device address and string index */
byte getstrdescr( byte addr, byte idx )
{
  char buf[ BUFSIZE ];
  byte rcode;
  byte length;
  byte i;
  unsigned int langid;
  if( idx == 0 ) {  //don't try to get index zero
    return( 0 );
  }
  rcode = Usb.getStrDescr( addr, 0, 1, 0, 0, buf );  //get language table length
  if( rcode ) {
    printProgStr(PSTR("\r\nError retrieving LangID table length"));
    return( rcode );
  }
  length = buf[ 0 ];      //length is the first byte
  rcode = Usb.getStrDescr( addr, 0, length, 0, 0, buf );  //get language table
  if( rcode ) {
    printProgStr(PSTR("\r\nError retrieving LangID table"));
    return( rcode );
  }
  HIBYTE( langid ) = buf[ 3 ];                            //get first langid
  LOBYTE( langid ) = buf[ 2 ];                            //bytes are swapped to account for endiannes
  //printProgStr(PSTR("\r\nLanguage ID: "));
  //print_hex( langid, 16 );
  rcode = Usb.getStrDescr( addr, 0, 1, idx, langid, buf );
  if( rcode ) {
    printProgStr(PSTR("\r\nError retrieving string length"));
    return( rcode );
  }
  length = ( buf[ 0 ] < 254 ? buf[ 0 ] : 254 );
  printProgStr(PSTR(" Length: "));
  Serial.print( length, DEC );
  rcode = Usb.getStrDescr( addr, 0, length, idx, langid, buf );
  if( rcode ) {
    printProgStr(PSTR("\r\nError retrieveing string"));
    return( rcode );
  }
  printProgStr(PSTR(" Contents: "));
  for( i = 2; i < length; i+=2 ) {
    Serial.print( buf[ i ] );
  }
  return( idx );
}
/* Returns string to class name */
const char* classname_parse( byte class_number )
{
  switch( class_number ) {
    case 0x00:
      return PSTR(" Use class information in the Interface Descriptor");
    case 0x01:
      return PSTR(" Audio");
    case 0x02:
      return PSTR(" Communications and CDC Control");
    case 0x03:
      return PSTR(" HID (Human Interface Device)");
    case 0x05:
      return PSTR(" Physical");
    case 0x06:
      return PSTR(" Image");
    case 0x07:
      return PSTR(" Printer");
    case 0x08:
      return PSTR(" Mass Storage");
    case 0x09:
      return PSTR(" Hub");
    case 0x0a:
      return PSTR(" CDC-Data");
    case 0x0b:
      return PSTR(" Smart Card");
    case 0x0d:
      return PSTR(" Content Security");
    case 0x0e:
      return PSTR(" Video");
    case 0x0f:
      return PSTR(" Personal Healthcare");
    case 0xdc:
      return PSTR("Diagnostic Device");
    case 0xe0:
      return PSTR(" Wireless Controller");
    case 0xef:
      return PSTR(" Miscellaneous");
    case 0xfe:
      return PSTR(" Application Specific");
    case 0xff:
      return PSTR(" Vendor Specific");
    default:
      return unk_msg;
  }//switch( class_number
}
/* Getting configuration descriptor */
byte getconfdescr( byte addr, byte conf )
{
  char buf[ BUFSIZE ];
  char* buf_ptr = buf;
  byte rcode;
  byte descr_length;
  byte descr_type;
  unsigned int total_length;
  printProgStr(PSTR("\r\n\nConfiguration number "));
  Serial.print( conf, HEX );
  rcode = Usb.getConfDescr( addr, 0, 4, conf, buf );  //get total length
  if( rcode ) {
    printProgStr(PSTR("Error retrieving configuration length. Error code "));
    Serial.println( rcode, HEX );
    return( 0 );
  }//if( rcode
  LOBYTE( total_length ) = buf[ 2 ];
  HIBYTE( total_length ) = buf[ 3 ];
  printProgStr(PSTR("\r\nTotal configuration length: "));
  Serial.print( total_length, DEC );
  printProgStr(PSTR(" bytes"));
  if( total_length > BUFSIZE ) {    //check if total length is larger than buffer
    printProgStr(PSTR("Total length truncated to "));
    Serial.print( BUFSIZE, DEC);
    printProgStr(PSTR("bytes"));
    total_length = BUFSIZE;
  }
  rcode = Usb.getConfDescr( addr, 0, total_length, conf, buf ); //get the whole descriptor
  while( buf_ptr < buf + total_length ) {  //parsing descriptors
    descr_length = *( buf_ptr );
    descr_type = *( buf_ptr + 1 );
    switch( descr_type ) {
      case( USB_DESCRIPTOR_CONFIGURATION ):
        printconfdescr( buf_ptr );
        break;
      case( USB_DESCRIPTOR_INTERFACE ):
        printintfdescr( buf_ptr );
        break;
      case( USB_DESCRIPTOR_ENDPOINT ):
        printepdescr( buf_ptr );
        break;
      case( HID_DESCRIPTOR_HID ):
        printhid_descr( buf_ptr );
        break;
      default:
        printunkdescr( buf_ptr );
        break;
        }//switch( descr_type
    Serial.println("");
    buf_ptr = ( buf_ptr + descr_length );    //advance buffer pointer
  }//while( buf_ptr <=...
  return( 0 );
}
/* function to print configuration descriptor */
void printconfdescr( char* descr_ptr )
{
 USB_CONFIGURATION_DESCRIPTOR* conf_ptr = ( USB_CONFIGURATION_DESCRIPTOR* )descr_ptr;
 uint8_t tmpbyte;
  printProgStr(PSTR("\r\n\nConfiguration descriptor:"));
  printProgStr(PSTR("\r\nTotal length:\t\t"));
  print_hex( conf_ptr->wTotalLength, 16 );
  printProgStr(PSTR("\r\nNumber of interfaces:\t"));
  print_hex( conf_ptr->bNumInterfaces, 8 );
  printProgStr(PSTR("\r\nConfiguration value:\t"));
  print_hex( conf_ptr->bConfigurationValue, 8 );
  printProgStr(PSTR("\r\nConfiguration string:\t"));
  tmpbyte = conf_ptr->iConfiguration;
  print_hex( tmpbyte, 8 );
  getstrdescr( DEVADDR, tmpbyte );
  printProgStr(PSTR("\r\nAttributes:\t\t"));
  tmpbyte = conf_ptr->bmAttributes;
  print_hex( tmpbyte, 8 );
  if( tmpbyte & 0x40 ) {  //D6
    printProgStr(PSTR(" Self-powered"));
  }
  if( tmpbyte & 0x20 ) { //D5
    printProgStr(PSTR(" Remote Wakeup"));
  }
  printProgStr(PSTR("\r\nMax.power:\t\t"));
  tmpbyte = conf_ptr->bMaxPower;
  print_hex( tmpbyte, 8 );
  printProgStr(PSTR(" "));
  Serial.print(( tmpbyte * 2 ), DEC);
  printProgStr(PSTR("ma"));
  return;
}
/* function to print interface descriptor */
void printintfdescr( char* descr_ptr )
{
 USB_INTERFACE_DESCRIPTOR* intf_ptr = ( USB_INTERFACE_DESCRIPTOR* )descr_ptr;
 uint8_t tmpbyte;
  printProgStr(PSTR("\r\nInterface descriptor:"));
  printProgStr(PSTR("\r\nInterface number:\t"));
  print_hex( intf_ptr->bInterfaceNumber, 8 );
  printProgStr(PSTR("\r\nAlternate setting:\t"));
  print_hex( intf_ptr->bAlternateSetting, 8 );
  printProgStr(PSTR("\r\nEndpoints:\t\t"));
  print_hex( intf_ptr->bNumEndpoints, 8 );
  printProgStr( class_str );
  tmpbyte = intf_ptr->bInterfaceClass;
  print_hex( tmpbyte, 8 );
  printProgStr(classname_parse( tmpbyte ));
  printProgStr( subclass_str );
  print_hex( intf_ptr->bInterfaceSubClass, 8 );
  printProgStr( protocol_str );
  print_hex( intf_ptr->bInterfaceProtocol, 8 );
  printProgStr(PSTR("\r\nInterface string:\t"));
  tmpbyte = intf_ptr->iInterface;
  print_hex( tmpbyte, 8 );
  getstrdescr( DEVADDR, tmpbyte );
  return;
}
/* function to print endpoint descriptor */
void printepdescr( char* descr_ptr )
{
 USB_ENDPOINT_DESCRIPTOR* ep_ptr = ( USB_ENDPOINT_DESCRIPTOR* )descr_ptr;
 uint8_t tmpbyte;
  printProgStr(PSTR("\r\nEndpoint descriptor:"));
  printProgStr(PSTR("\r\nEndpoint address:\t"));
  tmpbyte = ep_ptr->bEndpointAddress;
  print_hex( tmpbyte & 0x0f, 8 );
  printProgStr(PSTR(" Direction: "));
  ( tmpbyte & 0x80 ) ? printProgStr(PSTR("IN")) : printProgStr(PSTR("OUT"));
  printProgStr(PSTR("\r\nAttributes:\t\t"));
  tmpbyte = ep_ptr->bmAttributes;
  print_hex( tmpbyte, 8 );
  printProgStr(PSTR(" Transfer type: "));
  printProgStr((char*)pgm_read_word(&transfer_types[(tmpbyte & 0x03)]));
  if(( tmpbyte & 0x03 ) == 1 ) {  //Isochronous Transfer
    printProgStr(PSTR(", Sync Type: "));
    printProgStr((char*)pgm_read_word(&sync_types[(tmpbyte & 0x0c)]));
    printProgStr(PSTR(", Usage Type: "));
    printProgStr((char*)pgm_read_word(&usage_types[(tmpbyte & 0x30)]));
  }//if( tmpbyte & 0x01
  printProgStr( maxpktsize_str );
  print_hex( ep_ptr->wMaxPacketSize, 16 );
  printProgStr(PSTR("\r\nPolling interval:\t"));
  tmpbyte = ep_ptr->bInterval;
  print_hex( tmpbyte, 8 );
  printProgStr(PSTR(" "));
  Serial.print( tmpbyte, DEC );
  printProgStr(PSTR(" ms"));
  return;
}
/* function to print HID descriptor */
void printhid_descr( char* descr_ptr )
{
 PARSE pf = &HIDreport_parse;
 USB_HID_DESCRIPTOR* hid_ptr = ( USB_HID_DESCRIPTOR* )descr_ptr;
 uint8_t tmpbyte;
  /**/
  printProgStr(PSTR("\r\nHID descriptor:"));
  printProgStr(PSTR("\r\nDescriptor length:\t"));
  tmpbyte = hid_ptr->bLength;
  print_hex( tmpbyte, 8 );
  printProgStr(PSTR(" "));
  Serial.print( tmpbyte, DEC );
  printProgStr(PSTR(" bytes"));
  printProgStr(PSTR("\r\nHID version:\t\t"));
  Serial.print(( HIBYTE( hid_ptr->bcdHID )), HEX );
  Serial.print(".");
  Serial.print(( LOBYTE( hid_ptr->bcdHID )), HEX );
  tmpbyte = hid_ptr->bCountryCode;
  printProgStr(PSTR("\r\nCountry Code:\t\t"));
  Serial.print( tmpbyte, DEC );
  printProgStr(PSTR(" "));
  ( tmpbyte > 35 ) ? printProgStr(PSTR("Reserved")) : printProgStr((char*)pgm_read_word(&HID_Country_Codes[ tmpbyte ]));
  tmpbyte = hid_ptr->bNumDescriptors;
  printProgStr(PSTR("\r\nClass Descriptors:\t"));
  Serial.print( tmpbyte, DEC );
  //Printing class descriptors
  descr_ptr += 6; //advance buffer pointer
  for( uint8_t i = 0; i < tmpbyte; i++ ) {
    uint8_t tmpdata;
    HID_CLASS_DESCRIPTOR* hidclass_ptr = ( HID_CLASS_DESCRIPTOR* )descr_ptr;
    tmpdata = hidclass_ptr->bDescriptorType;
    printProgStr(PSTR("\r\nClass Descriptor Type:\t"));
    Serial.print( tmpdata, HEX );
    if(( tmpdata < 0x21 ) || ( tmpdata > 0x2f )) {
     printProgStr(PSTR(" Invalid"));
    }
    switch( tmpdata ) {
      case 0x21:
        printProgStr(PSTR(" HID"));
        break;
      case 0x22:
        printProgStr(PSTR(" Report"));
        break;
      case 0x23:
        printProgStr(PSTR(" Physical"));
        break;
      default:
        printProgStr(PSTR(" Reserved"));
        break;
    }//switch( tmpdata
    printProgStr(PSTR("\r\nClass Descriptor Length:"));
    Serial.print( hidclass_ptr->wDescriptorLength );
    printProgStr(PSTR(" bytes"));
    printProgStr(PSTR("\r\n\nHID report descriptor:\r\n"));
    getReportDescr( DEVADDR, 0 , hidclass_ptr->wDescriptorLength, pf, USB_NAK_LIMIT );
    descr_ptr += 3; //advance to the next record
  }//for( uint8_t i=...
  return;
}
/*function to print unknown descriptor */
void printunkdescr( char* descr_ptr )
{
  byte length = *descr_ptr;
  byte i;
  printProgStr(PSTR("\r\nUnknown descriptor:"));
  printProgStr(PSTR("Length:\t\t"));
  print_hex( *descr_ptr, 8 );
  printProgStr(PSTR("\r\nType:\t\t"));
  print_hex( *(descr_ptr + 1 ), 8 );
  printProgStr(PSTR("\r\nContents:\t"));
  descr_ptr += 2;
  for( i = 0; i < length; i++ ) {
    print_hex( *descr_ptr, 8 );
    descr_ptr++;
  }
}
/* Control-IN transfer with callback. Sets address, endpoint, fills control packet with necessary data, dispatches control packet, and initiates bulk IN transfer   */
/* Control, data, and setup stages combined from standard USB library to be able to read large data blocks. Restricted to control-IN transfers with data stage   */
/* data read and MAX3421E RECV FIFO buffer release shall be performed by parse_func callback */
/* return codes:                */
/* 00       =   success         */
/* 01-0f    =   non-zero HRSLT  */
byte ctrlXfer( byte addr, byte ep, byte bmReqType, byte bRequest, byte wValLo, byte wValHi, unsigned int wInd, uint16_t nbytes, PARSE parse_func, uint16_t nak_limit = USB_NAK_LIMIT )
{
 byte rcode;
 SETUP_PKT sp;
 EP_RECORD* ep_rec = Usb.getDevTableEntry( addr, ep );
 byte pktsize;
 byte maxpktsize = ep_rec->MaxPktSize;
 unsigned int xfrlen = 0;
  /**/
  Max.regWr( rPERADDR, addr );                    //set peripheral address
  /* fill in setup packet */
  sp.ReqType_u.bmRequestType = bmReqType;
  sp.bRequest = bRequest;
  sp.wVal_u.wValueLo = wValLo;
  sp.wVal_u.wValueHi = wValHi;
  sp.wIndex = wInd;
  sp.wLength = nbytes;
  Max.bytesWr( rSUDFIFO, 8, ( char *)&sp );    //transfer to setup packet FIFO
  rcode = Usb.dispatchPkt( tokSETUP, ep, nak_limit );            //dispatch packet
  //Serial.println("Setup packet");   //DEBUG
  if( rcode ) {                                   //return HRSLT if not zero
      printProgStr(PSTR("\r\nSetup packet error: "));
      Serial.print( rcode, HEX );
      return( rcode );
  }
  /* Data stage */
  //ep_rec->rcvToggle = bmRCVTOG1;
  Max.regWr( rHCTL, bmRCVTOG1 );  //set toggle
  while( 1 ) {                    //exited by break
    /* request data */
    rcode = Usb.dispatchPkt( tokIN, ep, nak_limit );
    if( rcode ) {
      printProgStr(PSTR("\r\nData Stage Error: "));
      Serial.print( rcode, HEX );
      return( rcode );
    }
    /* check for RCVDAVIRQ and generate error if not present */
    /* the only case when absense of RCVDAVIRQ makes sense is when toggle error occured. Need to add handling for that */
    if(( Max.regRd( rHIRQ ) & bmRCVDAVIRQ ) == 0 ) {
      printProgStr(PSTR("\r\nData Toggle error."));
      return ( 0xf0 );
    }
    pktsize = Max.regRd( rRCVBC );  //get received bytes count
    parse_func( pktsize );          //call parse function. Parse is expected to read the FIFO completely
    Max.regWr( rHIRQ, bmRCVDAVIRQ );                    // Clear the IRQ & free the buffer
    xfrlen += pktsize;                              // add this packet's byte count to total transfer length
    /* The transfer is complete under two conditions:           */
    /* 1. The device sent a short packet (L.T. maxPacketSize)   */
    /* 2. 'nbytes' have been transferred.                       */
    if (( pktsize < maxpktsize ) || (xfrlen >= nbytes )) {      // have we transferred 'nbytes' bytes?
      break;
    }
  }//while( 1 )
  rcode = Usb.dispatchPkt( tokOUTHS, ep, nak_limit );
  if( rcode ) {   //return error
    printProgStr(PSTR("Status packet error: "));
    Serial.print( rcode, HEX );
  }
  return( rcode );
}
/* Parses bitfields in main items */
void print_mainbitfield( uint8_t byte_toparse )
{
  ( byte_toparse & 0x01 ) ? printProgStr(PSTR("Constant,")) : printProgStr(PSTR("Data,"));  //bit 0
  ( byte_toparse & 0x02 ) ? printProgStr(PSTR("Variable,")) : printProgStr(PSTR("Array,"));  //bit 1
  ( byte_toparse & 0x04 ) ? printProgStr(PSTR("Relative,")) : printProgStr(PSTR("Absolute,"));  //...
  ( byte_toparse & 0x08 ) ? printProgStr(PSTR("Wrap,")) : printProgStr(PSTR("No Wrap,"));
  ( byte_toparse & 0x10 ) ? printProgStr(PSTR("Non Linear,")) : printProgStr(PSTR("Linear,"));
  ( byte_toparse & 0x20 ) ? printProgStr(PSTR("No preferred,")) : printProgStr(PSTR("Preferred State,"));
  ( byte_toparse & 0x40 ) ? printProgStr(PSTR("Null State,")) : printProgStr(PSTR("No Null Position,"));  //bit 6
  ( byte_toparse & 0x40 ) ? printProgStr(PSTR("Volatile( ignore for Input),")) : printProgStr(PSTR("Non-volatile(Ignore for Input),"));  //bit 7
}
/* HID Report Desriptor Parser Callback             */
/* called repeatedly from Control transfer function */
void HIDreport_parse( uint8_t pkt_size )
{
#define B_SIZE 0x03        //bSize bitmask
#define B_TYPE 0x0c        //bType bitmask
#define B_TAG  0xf0        //bTag bitmask
 /* parser states */
 enum STATE { ITEM_START, DATA_PARSE };
 static STATE state = ITEM_START;
 static uint8_t databytes_left = 0;
 static uint8_t prefix;              //item prefix - type and tag
 uint8_t byte_toparse;
 uint8_t bType;
 uint8_t tmpbyte;
 /**/
  while( 1 ) {
     if( pkt_size ) {
       byte_toparse = Max.regRd( rRCVFIFO );  //read a byte from FIFO
       pkt_size--;
     }
     else {
       return;                                //all bytes read
     }
     switch( state ) {
      case ITEM_START:  //start of the record
        prefix = byte_toparse >>2;        //store prefix for databyte parsing
        tmpbyte = byte_toparse & B_SIZE;
        /* get item length */
        ( tmpbyte == 0x03 ) ? databytes_left = 4 : databytes_left = tmpbyte;
         if( databytes_left ) {
           state = DATA_PARSE;    //read bytes after prefix
         }
         printProgStr(PSTR("\r\nLength: "));
         Serial.print( databytes_left, DEC );
         /* get item type */
         bType = ( byte_toparse & B_TYPE ) >>2;
         printProgStr(PSTR("  Type: "));
         printProgStr((char*)pgm_read_word(&btypes[ bType ]));
         /* get item tag */
         printProgStr(PSTR("\t\tTag: "));
         tmpbyte = ( byte_toparse & B_TAG ) >>4 ;
         switch( bType ) {
           case 0:  //Main
             if( tmpbyte < 0x08 ) {
               printProgStr(PSTR("Invalid Tag"));
             }
             else if( tmpbyte > 0x0c ) {
               printProgStr( reserved_msg );
             }
             else {
               printProgStr((char*)pgm_read_word(&maintags[ tmpbyte - 8 /* & 0x03 */]));
               //Serial.print("Byte: ");
               //Serial.println( tmpbyte, HEX );
             }
             break;//case 0 Main
           case 1:  //Global
             ( tmpbyte > 0x0b ) ? printProgStr( reserved_msg ) : printProgStr((char*)pgm_read_word(&globaltags[ tmpbyte ]));
             break;//case 1 Global
           case 2:  //Local
             ( tmpbyte > 0x0a ) ? printProgStr( reserved_msg ) : printProgStr((char*)pgm_read_word(&localtags[ tmpbyte ]));
             break;//case 2 Local
           default:
             break;
         }//switch( bType...
         break;//case ITEM_START
       case DATA_PARSE:
         switch( prefix ) {
           case 0x20:  //Main Input
           case 0x24:  //Main Output
           case 0x2c:  //Main Feature
             /* todo: add parsing 8th bit */
             print_mainbitfield( byte_toparse );
             break;
           case 0x28:    //Main Collection
             if(( byte_toparse > 0x06 ) && ( byte_toparse < 0x80 )) {
               printProgStr( reserved_msg );
             }
             else if(( byte_toparse > 0x7f ) && ( byte_toparse <= 0xff )) {
               printProgStr(PSTR("Vendor-defined"));
             }
             else {
               printProgStr((char*)pgm_read_word(&collections[ byte_toparse ]));
             }
             break;//case 0x28 Main Collection
           //case 0x30: //Main End Collection
           case 0x01:    //Global Usage Page
             switch( byte_toparse ) {  //see HID Usage Tables doc v.1.12 page 14
               case 0x00:
               case 0x01:
               case 0x02:
               case 0x03:
               case 0x04:
               case 0x05:
               case 0x06:
               case 0x07:
               case 0x08:
               case 0x09:
               case 0x0a:
               case 0x0b:
               case 0x0c:
               case 0x0d:
               case 0x0e:
               case 0x0f:
               case 0x10:
                 printProgStr((char*)pgm_read_word(&usage_pages[ byte_toparse ]));
                 break;
               case 0x14:
                 printProgStr(PSTR("Alphanumeric Display"));
                 break;
               case 0x40:
                 printProgStr(PSTR("Medical Instruments"));
                 break;
               case 0x80:
               case 0x81:
               case 0x82:
               case 0x83:
                 printProgStr(PSTR("Monitor page"));
                 break;
               case 0x84:
               case 0x85:
               case 0x86:
               case 0x87:
                 printProgStr(PSTR("Power page"));
                 break;
               case 0x8c:
                 printProgStr(PSTR("Bar Code Scanner page"));
                 break;
               case 0x8d:
                 printProgStr(PSTR("Scale page"));
                 break;
               case 0x8e:
                 printProgStr(PSTR("Magnetic Stripe Reading (MSR) Devices"));
                 break;
               case 0x8f:
                 printProgStr(PSTR("Reserved Point of Sale pages"));
                 break;
               case 0x90:
                 printProgStr(PSTR("Camera Control Page"));
                 break;
               case 0x91:
                 printProgStr(PSTR("Arcade Page"));
                 break;
             default:
//               printProgStr(PSTR("Data: "));
//               print_hex( byte_toparse, 8 );
               //databytes_left--;
               break;
             }//switch case 0x01:    //Global Usage Page
         }//switch( prefix ...
         printProgStr(PSTR("  Data: "));
         print_hex( byte_toparse, 8 );
         databytes_left--;
         if( !databytes_left ) {
           state = ITEM_START;
         }
         break;
     }//switch( state...
   }//while( 1 ...
}
/* prints hex numbers with leading zeroes */
// copyright, Peter H Anderson, Baltimore, MD, Nov, '07
// source: http://www.phanderson.com/arduino/arduino_display.html
void print_hex(int v, int num_places)
{
  int mask=0, n, num_nibbles, digit;

  for (n=1; n<=num_places; n++) {
    mask = (mask << 1) | 0x0001;
  }
  v = v & mask; // truncate v to specified number of places

  num_nibbles = num_places / 4;
  if ((num_places % 4) != 0) {
    ++num_nibbles;
  }
  do {
    digit = ((v >> (num_nibbles-1) * 4)) & 0x0f;
    Serial.print(digit, HEX);
  }
  while(--num_nibbles);
}

/* given a PROGMEM string, use Serial.print() to send it out       */
/* Some non-intuitive casting necessary:                           */
/* printProgStr(PSTR("Func.Mode:\t0x"));                           */
/* printProgStr((char*)pgm_read_word(&mtpopNames[(op & 0xFF)]));   */
void printProgStr(const char* str)
{
  if(!str) {
    return;
  }
  char c;
  while((c = pgm_read_byte(str++))) {
    Serial.write(c);
  }
  return;
}
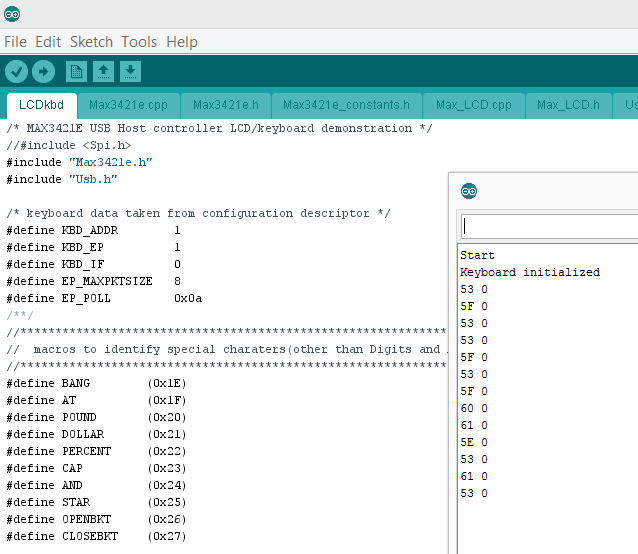
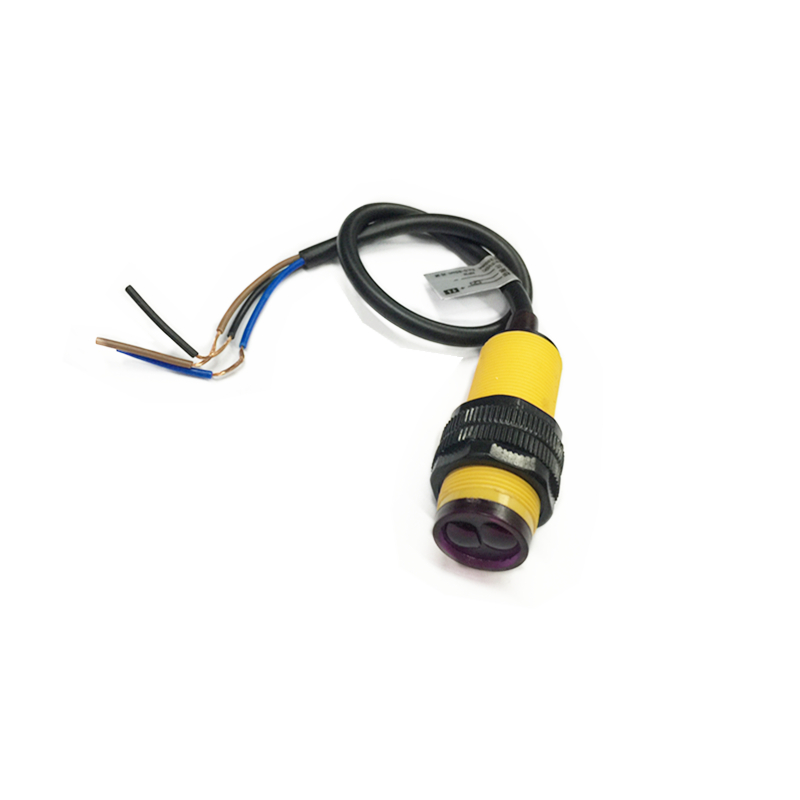
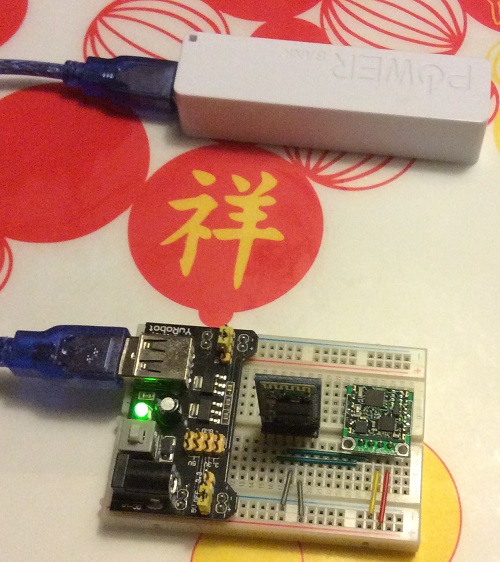
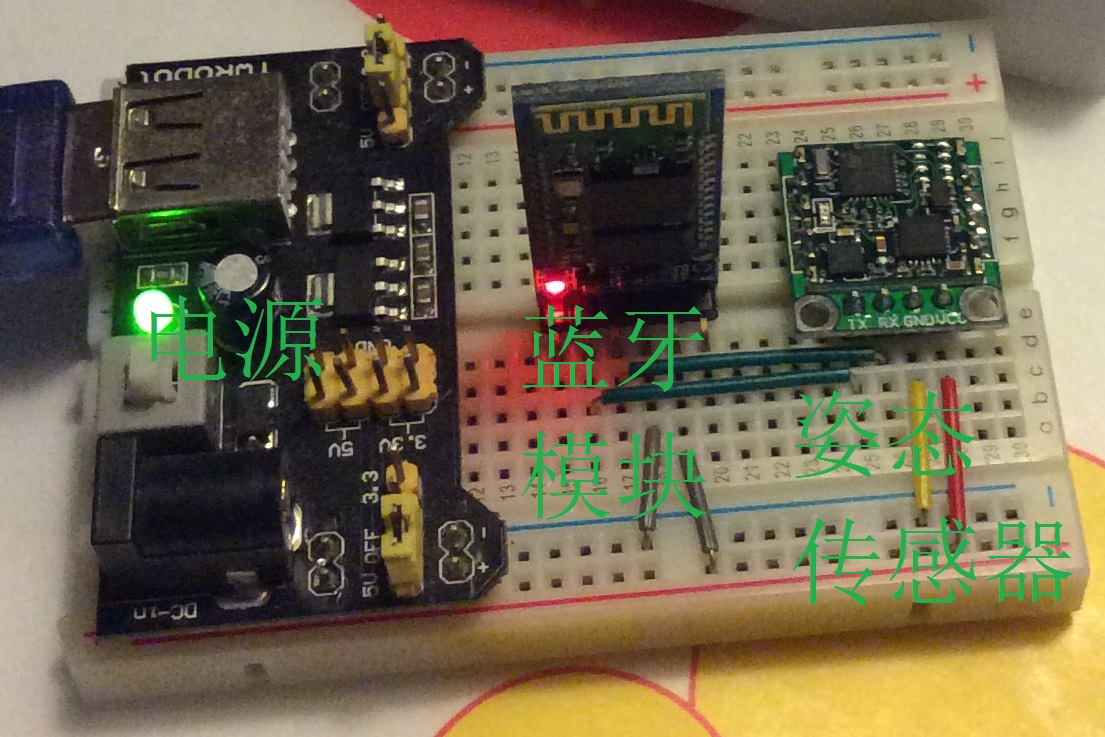
工作的照片:
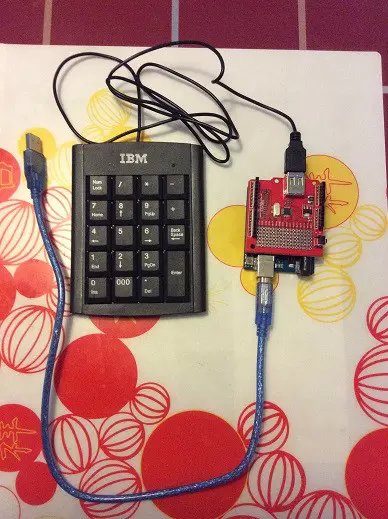
我用USB Shield挂接了一个USB小键盘,获得的结果如下:
Start
Device addressed… Requesting device descriptor.
Device descriptor:
Descriptor Length: 12
USB version: 1.10
Class: 00 Use class information in the Interface Descriptor
Subclass: 00
Protocol: 00
Max.packet size: 08
Vendor ID: 13BA
Product ID: 0001
Revision ID: 0100
Mfg.string index: 00
Prod.string index: 00
Serial number index: 00
Number of conf.: 01
Configuration number 0
Total configuration length: 34 bytes
Configuration descriptor:
Total length: 0022
Number of interfaces: 01
Configuration value: 01
Configuration string: 00
Attributes: A0 Remote Wakeup
Max.power: 32 100ma
Interface descriptor:
Interface number: 00
Alternate setting: 00
Endpoints: 01
Class: 03 HID (Human Interface Device)
Subclass: 01
Protocol: 01
Interface string: 00
HID descriptor:
Descriptor length: 09 9 bytes
HID version: 1.10
Country Code: 0 Not Supported
Class Descriptors: 1
Class Descriptor Type: 22 Report
Class Descriptor Length:54 bytes
HID report descriptor:
Length: 1 Type: Global Tag: Usage Page Generic Desktop Controls Data: 01
Length: 1 Type: Local Tag: Usage Data: 06
Length: 1 Type: Main Tag: Collection Application (mouse, keyboard) Data: 01
Length: 1 Type: Global Tag: Usage Page LEDs Data: 08
Length: 1 Type: Local Tag: Usage Minimum Data: 01
Length: 1 Type: Local Tag: Usage Maximum Data: 03
Length: 1 Type: Global Tag: Logical Minimum Data: 00
Length: 1 Type: Global Tag: Logical Maximum Data: 01
Length: 1 Type: Global Tag: Report Size Data: 01
Length: 1 Type: Global Tag: Report Count Data: 03
Length: 1 Type: Main Tag: Output Data,Variable,Absolute,No Wrap,Linear,Preferred State,No Null Position,Non-volatile(Ignore for Input), Data: 02
Length: 1 Type: Global Tag: Report Count Data: 05
Length: 1 Type: Main Tag: Output Constant,Array,Absolute,No Wrap,Linear,Preferred State,No Null Position,Non-volatile(Ignore for Input), Data: 01
Length: 1 Type: Global Tag: Usage Page Keyboard/Keypad Data: 07
Length: 1 Type: Local Tag: Usage Minimum Data: E0
Length: 1 Type: Local Tag: Usage Maximum Data: E7
Length: 1 Type: Global Tag: Report Count Data: 08
Length: 1 Type: Main Tag: Input Data,Variable,Absolute,No Wrap,Linear,Preferred State,No Null Position,Non-volatile(Ignore for Input), Data: 02
Length: 1 Type: Global Tag: Report Size Data: 08
Length: 1 Type: Global Tag: Report Count Data: 01
Length: 1 Type: Main Tag: Input Constant,Array,Absolute,No Wrap,Linear,Preferred State,No Null Position,Non-volatile(Ignore for Input), Data: 01
Length: 1 Type: Local Tag: Usage Minimum Data: 00
Length: 1 Type: Local Tag: Usage Maximum Data: 91
Length: 2 Type: Global Tag: Logical Maximum Data: FF Data: 00
Length: 1 Type: Global Tag: Report Count Data: 06
Length: 1 Type: Main Tag: Input Data,Array,Absolute,No Wrap,Linear,Preferred State,No Null Position,Non-volatile(Ignore for Input), Data: 00
Length: 0 Type: Main Tag: End Collection
Endpoint descriptor:
Endpoint address: 01 Direction: IN
Attributes: 03 Transfer type: Interrupt
Max.packet size: 0008
Polling interval: 0A 10 ms
修改后的可以正常编译的代码下载
descriptor_parser
参考:
1. https://github.com/felis/USB_Host_Shield/tree/master/examples/descriptor_parser USB_Host_Shield/examples/descriptor_parser/