Step to UEFI (220)微软提供的 UEFI Shell 截图工具

微软的 MU 项目提供了一个 Shell 下的截图工具:PrintScreenLogger,具体的介绍可以在下面看到:

https://microsoft.github.io/mu/dyn/mu_plus/MsGraphicsPkg/PrintScreenLogger/Readme/#printscreenlogger-operation

我尝试直接在 AppPkg 下编译了一下,可以通过编译。然后在实体机上进行了测试工作正常:

PrintScreenLogger.efi 运行结果

使用方法:

  1. 在你需要存放截图的盘上放置名为 PrintScreenEnable.txt 的文件(空文件即可),运行之后这个工具会将截图结果放置在存着这个文件的盘上;
  2. 使用 Load PrintScreenLogger.efi 加载(因为这个是一个 Driver);
  3. 截图快捷键是 ctrl + screen print ;

源代码来自 https://github.com/microsoft/mu_plus/tree/release/202005/MsGraphicsPkg/PrintScreenLogger

/** @file
PrintScreenLogger.c

PrintScreen logger to capture UEFI menus into a BMP written to a USB key

Copyright (C) Microsoft Corporation. All rights reserved.
SPDX-License-Identifier: BSD-2-Clause-Patent

**/

#include "PrintScreenLogger.h"

typedef struct {
    EFI_KEY_DATA KeyData;
    EFI_HANDLE   NotifyHandle;
} PRINT_SCREEN_KEYS;
//
// PrtScreen comes in as an EFI_SYS_REQUEST shift state.
//
// Register two notifications, one for a RightCtrl-PrtScn and one for a LeftCtrl-PrtScn
//      
STATIC PRINT_SCREEN_KEYS  gPrtScnKeys[] = {
    {
        {
            {0,0},
            {EFI_SHIFT_STATE_VALID | EFI_LEFT_CONTROL_PRESSED  | EFI_SYS_REQ_PRESSED, 0}
        },
        NULL
    },
    {
        {
            {0,0},
            {EFI_SHIFT_STATE_VALID | EFI_RIGHT_CONTROL_PRESSED | EFI_SYS_REQ_PRESSED, 0}
        },
        NULL
    }
};

#define NUMBER_KEY_NOTIFIES (sizeof(gPrtScnKeys)/sizeof(PRINT_SCREEN_KEYS)) 

// Global variables.
//
STATIC EFI_SIMPLE_TEXT_INPUT_EX_PROTOCOL *gTxtInEx    = NULL;
STATIC EFI_EVENT                          gTimerEvent = NULL;

/**

  Scan USB Drives looking for a file named PrintScreenEnable.txt.  The presence
  of this file indicates it is OK to write print screen files to this drive.

  @param    Fs_Handle       Handle to the opened volume.

  @retval   EFI_SUCCESS     The FS volume was opened successfully.
  @retval   Others          The operation failed.

**/
EFI_STATUS
FindUsbDriveForPrintScreen (
  OUT EFI_FILE_PROTOCOL  **VolumeHandle
  )
{
    EFI_FILE_PROTOCOL               *FileHandle;
    EFI_FILE_PROTOCOL               *VolHandle;
    EFI_HANDLE                      *HandleBuffer;
    UINTN                            Index;
    UINTN                            NumHandles;
    EFI_STATUS                       Status;
    EFI_STATUS                       Status2;
    EFI_DEVICE_PATH_PROTOCOL        *BlkIoDevicePath;
    EFI_DEVICE_PATH_PROTOCOL        *UsbDevicePath;
    EFI_SIMPLE_FILE_SYSTEM_PROTOCOL *SfProtocol;
    EFI_HANDLE                       Handle;

    NumHandles = 0;
    HandleBuffer = NULL;
    SfProtocol = NULL;

    //
    // Locate all handles that are using the SFS protocol.
    //
    Status = gBS->LocateHandleBuffer(ByProtocol,
                                     &gEfiSimpleFileSystemProtocolGuid,
                                     NULL,
                                     &NumHandles,
                                     &HandleBuffer);

    if (EFI_ERROR(Status) != FALSE) {
        DEBUG((DEBUG_ERROR, "%a: failed to locate any handles using the Simple FS protocol (%r)\n", __FUNCTION__, Status));
        goto CleanUp;
    }

    //
    // Search the handles to find one that has has a USB node in the device path.
    //
    for (Index = 0; (Index < NumHandles); Index += 1) {
        //
        // Insure this device is on a USB controller
        //
        UsbDevicePath = DevicePathFromHandle(HandleBuffer[Index]);
        if (UsbDevicePath == NULL) {
            continue;
        }
        Status = gBS->LocateDevicePath (&gEfiUsbIoProtocolGuid,
                                        &UsbDevicePath,
                                        &Handle);
        if (EFI_ERROR(Status)) {
            // Device is not USB;
            continue;
        }

        //
        // Check if this is a block IO device path. 
        //
        BlkIoDevicePath = DevicePathFromHandle(HandleBuffer[Index]);
        if (BlkIoDevicePath == NULL) {
            continue;
        }
        Status = gBS->LocateDevicePath(&gEfiBlockIoProtocolGuid, 
                                       &BlkIoDevicePath, 
                                       &Handle);
        if (EFI_ERROR(Status)) {
            // Device is not BlockIo;
            continue;
        }

        Status = gBS->HandleProtocol(HandleBuffer[Index],
                                     &gEfiSimpleFileSystemProtocolGuid,
                                     (VOID**)&SfProtocol);

        if (EFI_ERROR(Status)) {
            DEBUG((DEBUG_ERROR, "%a: Failed to locate Simple FS protocol. %r\n", __FUNCTION__, Status));
            continue;
        }

        //
        // Open the volume/partition.
        //
        Status = SfProtocol->OpenVolume(SfProtocol, &VolHandle);
        if (EFI_ERROR(Status) != FALSE) {
            DEBUG((DEBUG_ERROR,"%a: Unable to open SimpleFileSystem. Code = %r\n", __FUNCTION__, Status));
            continue;
        }

        //
        // Insure the PrinteScreenEnable.txt file is present
        //
        Status = VolHandle->Open (VolHandle, &FileHandle, PRINT_SCREEN_ENABLE_FILENAME, EFI_FILE_MODE_READ, 0);
        if (EFI_ERROR(Status)) {
            DEBUG((DEBUG_INFO,"%a: Print Screen not supported to this device. Code = %r\n", __FUNCTION__, Status));
            Status2 = VolHandle->Close (VolHandle);
            if (EFI_ERROR(Status2)) {
                DEBUG((DEBUG_ERROR,"%a: Error closing Vol Handle. Code = %r\n", __FUNCTION__, Status2));
            }
            continue;
        }

        FileHandle->Close (FileHandle);
        *VolumeHandle = VolHandle;
        Status = EFI_SUCCESS;
        break;
    }

CleanUp:
    if (HandleBuffer != NULL) {
        FreePool(HandleBuffer);
    }

    return Status;
}

/**
  Convert a Gop 32 bits per pixel video frame buffer to a 
  24 bits per pixel *.BMP graphics image

  @param  BmpFileName   Name of file to create
  @param  Gop           GRAPHICS_OUTPUT_PROTOCOL
  @param  BltBuffer     Buffer containing GOP version of BmpImage.

  @retval EFI_SUCCESS           GopBlt and GopBltSize are returned.
  @retval EFI_UNSUPPORTED       BmpImage is not a valid *.BMP image
  @retval EFI_BUFFER_TOO_SMALL  The passed in GopBlt buffer is not big enough.
                                GopBltSize will contain the required size.
  @retval EFI_OUT_OF_RESOURCES  No enough buffer to allocate.

**/
EFI_STATUS
WriteBmpToFile (
  IN EFI_FILE_PROTOCOL             *FileHandle
) {

    EFI_STATUS                     Status;
    BMP_IMAGE_HEADER              *BmpHeader;
    UINTN                          DataSizePerLine;
    UINTN                          BmpBufferSize;
    UINT8                         *Image;
    EFI_GRAPHICS_OUTPUT_BLT_PIXEL *Blt;
    EFI_GRAPHICS_OUTPUT_BLT_PIXEL *BltBuffer;
    UINT32                         Height;
    UINT32                         Width;
    UINT64                         WriteSize;

    EFI_GRAPHICS_OUTPUT_PROTOCOL   *Gop;

#define BMP_BITS_PER_PIXEL  24

    BmpHeader = NULL;
    BltBuffer = NULL;

    Status = gBS->LocateProtocol (&gEfiGraphicsOutputProtocolGuid,
                                  NULL,
                                  (VOID **)&Gop
                                 );
    if (EFI_ERROR(Status)) {
        DEBUG((DEBUG_ERROR, "Unable to locate Gop protocol\n"));
        return Status;
    }

    if ((Gop->Mode->Info->PixelFormat != PixelRedGreenBlueReserved8BitPerColor) &&
        (Gop->Mode->Info->PixelFormat != PixelBlueGreenRedReserved8BitPerColor)) {
        DEBUG((DEBUG_ERROR, "%a: Unsupported video mode\n", __FUNCTION__));
        return EFI_UNSUPPORTED;
    }

    BltBuffer = (EFI_GRAPHICS_OUTPUT_BLT_PIXEL *)  AllocatePool (Gop->Mode->FrameBufferSize); 
    if (NULL == BltBuffer) {
        return EFI_OUT_OF_RESOURCES;
    }

    Height = Gop->Mode->Info->VerticalResolution;
    Width = Gop->Mode->Info->HorizontalResolution;

    Status = Gop->Blt (Gop,
                       BltBuffer,
                       EfiBltVideoToBltBuffer,
                       0,
                       0,
                       0,
                       0,
                       Width,
                       Height,
                       0
                      );
    if (EFI_ERROR(Status)) {
        DEBUG((DEBUG_ERROR, "Unable to BLt video to buffer, code=%r\n",Status));
        goto ErrorExit;
    }

    DataSizePerLine = ((Gop->Mode->Info->HorizontalResolution * BMP_BITS_PER_PIXEL + 31) >> 3) & (~0x3);
    BmpBufferSize = MultU64x32 (DataSizePerLine, Gop->Mode->Info->VerticalResolution) + sizeof(BMP_IMAGE_HEADER) + ((sizeof(BMP_IMAGE_HEADER) + 3) & ~0x03);

    if (BmpBufferSize > (UINT32) ~0) {
        Status = EFI_INVALID_PARAMETER;
        goto ErrorExit;
    }

    BmpHeader = AllocateZeroPool (BmpBufferSize); // Insure unfilled area is zeroed
    if (NULL == BmpHeader) {
        Status = EFI_OUT_OF_RESOURCES;
        goto ErrorExit;
    }

    Status = EFI_SUCCESS;

    BmpHeader->CharB = 'B';           // Header flag
    BmpHeader->CharM = 'M';
    BmpHeader->Size = (UINT32) BmpBufferSize;
    BmpHeader->Reserved[0] = 0;
    BmpHeader->Reserved[1] = 0;
    BmpHeader->ImageOffset = (sizeof(BMP_IMAGE_HEADER) + 3) & ~0x03;  // Start first row on 4 byte boundary
    BmpHeader->HeaderSize = sizeof (BMP_IMAGE_HEADER) - OFFSET_OF(BMP_IMAGE_HEADER, HeaderSize);
    BmpHeader->PixelWidth = Width;
    BmpHeader->PixelHeight = Height;
    BmpHeader->Planes = 1;
    BmpHeader->BitPerPixel = 24;
    BmpHeader->CompressionType = 0;   // Not Compressed
    BmpHeader->ImageSize = 0;
    BmpHeader->XPixelsPerMeter = 11000;  // Approximately 300 dpi
    BmpHeader->YPixelsPerMeter = 11000;
    BmpHeader->NumberOfColors = 0;
    BmpHeader->ImportantColors = 0;

    Image = ((UINT8 *) BmpHeader) + BmpHeader->ImageOffset;

    for (Height = 0; Height < BmpHeader->PixelHeight; Height++) {
        Blt = &BltBuffer[(BmpHeader->PixelHeight - Height - 1) * BmpHeader->PixelWidth];
        for (Width = 0; Width < BmpHeader->PixelWidth; Width++, Blt++) {
            if (Gop->Mode->Info->PixelFormat == PixelRedGreenBlueReserved8BitPerColor) {
                *Image++ = Blt->Red;
                *Image++ = Blt->Green;
                *Image++ = Blt->Blue;
            } else {    // PixelBlueGreenRedReserved8BitPerColor
                *Image++ = Blt->Blue;
                *Image++ = Blt->Green;
                *Image++ = Blt->Red;
            }   
        }
        Image = (UINT8 *)(  ((UINT64)Image + 3) & ~0x03);  // Start next row on 4 byte boundary.
    }

    WriteSize = BmpBufferSize;
    Status = FileHandle->Write (FileHandle, &WriteSize, BmpHeader);
    if (EFI_ERROR(Status)) {
        DEBUG((DEBUG_ERROR, "Error writing Bmp file. Code=%r\n", Status));
    }
    if (WriteSize != BmpBufferSize) {
        DEBUG((DEBUG_ERROR, "Wrong number of bytes written.  S/B=%ld, Actual=%ld\n", BmpBufferSize, WriteSize));
        Status = EFI_BAD_BUFFER_SIZE;
    }

ErrorExit:
    if (BltBuffer != NULL) {
        FreePool (BltBuffer);
    }

    if (BmpHeader != NULL) {
        FreePool (BmpHeader );
    }

    return Status;
}

/**
  Handler for hot key notification

  @param KeyData         A pointer to a buffer that is filled in with the keystroke
                         information for the key that was pressed.

  @retval  EFI_SUCCESS   Always - Return code is not used by SimpleText providers.

**/
EFI_STATUS
EFIAPI
PrintScreenCallback (
  IN EFI_KEY_DATA     *KeyData
)
{   
    EFI_FILE_PROTOCOL *FileHandle;
    UINTN              Index;
    CHAR16             PrtScrnFileName[] = L"PrtScreen####.bmp";
    EFI_STATUS         Status;
    EFI_STATUS         Status2;
    EFI_FILE_PROTOCOL *VolumeHandle;

    // We only register two keys - LeftCtrl-PrtScn and RightCtrl-PrtScn.  
    // Assume print screen function if this function is called.
    DEBUG((DEBUG_INFO,"%a: Starting PrintScreen capture. Sc=%x, Uc=%x, Sh=%x, Ts=%x\n",
        __FUNCTION__,
        KeyData->Key.ScanCode,
        KeyData->Key.UnicodeChar,
        KeyData->KeyState.KeyShiftState,
        KeyData->KeyState.KeyToggleState));

    Status = gBS->CheckEvent (gTimerEvent);

    if (Status == EFI_NOT_READY) {
        DEBUG((DEBUG_INFO,"Print Screen request ignored\n"));
        return EFI_SUCCESS;
    }

    //
    // 1. Find a suitable USB drive - one that has PrintScreenEnable.txt on it.
    //
    Status = FindUsbDriveForPrintScreen(&VolumeHandle);

    if (!EFI_ERROR(Status)) {
        //
        // 2. Find the first value of PrtScreen#### that is available 
        //
        Index = 0;

        do {
            Index++;
            if (Index > MAX_PRINT_SCREEN_FILES) {
                goto Exit;
            }

            UnicodeSPrint (PrtScrnFileName, sizeof (PrtScrnFileName), L"PrtScreen%04d.bmp", Index);
            Status = VolumeHandle->Open (VolumeHandle, &FileHandle, PrtScrnFileName, EFI_FILE_MODE_READ, 0);
            if (!EFI_ERROR(Status)) {
                if (Index % PRINT_SCREEN_DEBUG_WARNING == 0) {
                    DEBUG((DEBUG_INFO,"%a: File %s exists.  Trying again\n", __FUNCTION__, PrtScrnFileName));                    
                }
                Status2 = FileHandle->Close (FileHandle);
                if (EFI_ERROR(Status2)) {
                    DEBUG((DEBUG_ERROR,"%a: Error closing File Handle. Code = %r\n", __FUNCTION__, Status2));
                }
                continue;
            }
            if (Status == EFI_NOT_FOUND) {
                break;
            }
        } while (TRUE); 

        //
        // 3. Create the new file that will contain the bitmap
        //
        Status = VolumeHandle->Open (VolumeHandle, &FileHandle, PrtScrnFileName, EFI_FILE_MODE_READ | EFI_FILE_MODE_WRITE | EFI_FILE_MODE_CREATE, EFI_FILE_ARCHIVE);
        if (EFI_ERROR(Status)) {
            DEBUG((DEBUG_ERROR,"%a: Unable to create file %s. Code = %r\n", __FUNCTION__, PrtScrnFileName, Status));
            goto Exit;
        }

        //
        // 4. Write the contents of the display to the new file
        //
        Status = WriteBmpToFile (FileHandle);
        if (!EFI_ERROR(Status)) {
            DEBUG((DEBUG_INFO,"%a: Screen captured to file %s.\n", __FUNCTION__, PrtScrnFileName));
        }
        //
        // 4. Close the bitmap file
        //
        Status2 = FileHandle->Close (FileHandle);
        if (EFI_ERROR(Status2)) {
            DEBUG((DEBUG_ERROR,"%a: Error closing bit map file %s. Code = %r\n", __FUNCTION__, PrtScrnFileName, Status2));
        }
Exit:
        //
        // 5. Close the USB volume
        //
        Status2 = VolumeHandle->Close (VolumeHandle);
        if (EFI_ERROR(Status2)) {
            DEBUG((DEBUG_ERROR,"%a: Error closing Vol Handle. Code = %r\n", __FUNCTION__, Status2));
        }
    }

    // Ignore future PrtScn requests for some period.  This is due to the make
    // and break of PrtScn being identical, and it takes a few seconds to complete
    // a single screen capture.
    Status = gBS->SetTimer (gTimerEvent, TimerRelative, PRINT_SCREEN_DELAY);
   
    return EFI_SUCCESS;
}

/**
  Unregister TxtIn callbacks and end the timer

**/
VOID
UnRegisterNotifications ( 
    VOID
    ) {
    INTN       i;
    EFI_STATUS Status;

    for (i = 0; i < NUMBER_KEY_NOTIFIES; i++) {
        if (gPrtScnKeys[i].NotifyHandle != NULL) {
            Status = gTxtInEx->UnregisterKeyNotify (gTxtInEx,  gPrtScnKeys[i].NotifyHandle);
            if (EFI_ERROR(Status)) {
                DEBUG((DEBUG_ERROR, "%a: Unable to uninstall TxtIn Notify. Code = %r\n", __FUNCTION__, Status));
            }        
        }    
    }

    if (gTimerEvent != NULL) {
        gBS->SetTimer (gTimerEvent, TimerCancel, 0);
        gBS->CloseEvent (gTimerEvent);

    }
}

/**

  Callback to cleanup the driver on unload.

  @param    Event           Not Used.
  @param    Context         Not Used.
  
  @retval   None
  
**/
EFI_STATUS
EFIAPI
PrintScreenLoggerUnload (
  IN  EFI_HANDLE   ImageHandle
  )
{

    DEBUG((DEBUG_INFO, "%a: unloading...\n", __FUNCTION__));

    UnRegisterNotifications ();

    return EFI_SUCCESS;
}

/**
  Main entry point for this driver.

  @param    ImageHandle     Image handle of this driver.
  @param    SystemTable     Pointer to the system table.

  @retval   EFI_STATUS      Always returns EFI_SUCCESS.
  
**/
EFI_STATUS
EFIAPI
PrintScreenLoggerEntry (
  IN EFI_HANDLE           ImageHandle,
  IN EFI_SYSTEM_TABLE     *SystemTable
  )
{
    EFI_STATUS      Status = EFI_NOT_FOUND;
    INTN            i;

    DEBUG((DEBUG_LOAD, "%a: enter...\n", __FUNCTION__));

    //
    // 1. Get access to ConSplitter's TextInputEx protocol
    //
    if (gST->ConsoleInHandle != NULL) {
        Status = gBS->OpenProtocol (
                        gST->ConsoleInHandle,
                        &gEfiSimpleTextInputExProtocolGuid,
                        (VOID **) &gTxtInEx,
                        ImageHandle,
                        NULL,
                        EFI_OPEN_PROTOCOL_BY_HANDLE_PROTOCOL);
    } 

    if (EFI_ERROR(Status)) {
        DEBUG((DEBUG_ERROR, "%a: Unable to access TextInputEx protocol. Code = %r\n", __FUNCTION__, Status));
    }  else {

        //
        // 2.  Register for PrtScn callbacks
        //
        for (i = 0; i < NUMBER_KEY_NOTIFIES; i++) {
             Status = gTxtInEx->RegisterKeyNotify (
                          gTxtInEx,
                          &gPrtScnKeys[i].KeyData,
                          PrintScreenCallback,
                          &gPrtScnKeys[i].NotifyHandle);
            if (EFI_ERROR (Status)) {
                 DEBUG ((DEBUG_ERROR, "%a: Error registering key %d. Code = %r\n", __FUNCTION__, i, Status));
                 break;
            }
        }

        if (!EFI_ERROR(Status)) {
            //
            // 3. Create the PrtScn hold off timer
            //
            Status = gBS->CreateEvent(
                                EVT_TIMER,
                                0,
                                NULL,
                                NULL,
                                &gTimerEvent);
            if (!EFI_ERROR(Status)) {
                //
                // 4. Place event into the signaled state indicating PrtScn is active.
                //
                Status = gBS->SignalEvent (gTimerEvent);                
            }
        }
 
        if (!EFI_ERROR(Status)) {
            DEBUG((DEBUG_INFO, "%a: exit. Ready for Ctl-PrtScn operation\n", __FUNCTION__));                
        } else {
            UnRegisterNotifications ();
            DEBUG((DEBUG_ERROR, "%a: exit with errors. Ctl-PrtScn not operational. Code=%r\n", __FUNCTION__, Status));                
        }
    }

    return EFI_SUCCESS;
}

完整代码下载:

编译后的 X64 EFI 下载:

Step to UEFI (221)FASM 编译生成 EFI

之前介绍过使用 Nasm 生成 EFI 程序,这次介绍如何使用 FASM 来生成。

首先,准备 FASM 编译器,可以在 http://flatassembler.net/download.php  下载 Windows版本,例如:flat assembler 1.73.25 for Windows。这个工具不需要安装,解压之后就可以使用。解压后放在C:\BuildBs\fasmw17325目录下。

接下来编译测试 https://github.com/manusov/UEFIusbScan 这个项目的代码,它是 FASM 编写的 Shell 下显示本机 USB Host 和连接情况的工具。

编译命令如下:

C:\BuildBs\fasmw17325\UEFIusbScan-master\source>C:\BuildBs\fasmw17325\FASM.EXE ScanXhci.asm
flat assembler  version 1.73.25  (1048576 kilobytes memory)
4 passes, 4096 bytes.

编译后就能生成 ScanXhci.efi ,在实体机上运行结果如下:

完整代码和 X64 EFI 下载:

在作者的GitHub 页面上还有很多 FASM 编写的UEFI Application :  https://github.com/manusov  有兴趣的朋友可以去看看。

ESP32开发板 WIFI+蓝牙 物联网 智能家居 ESP-WROOM-32 ESP-32S

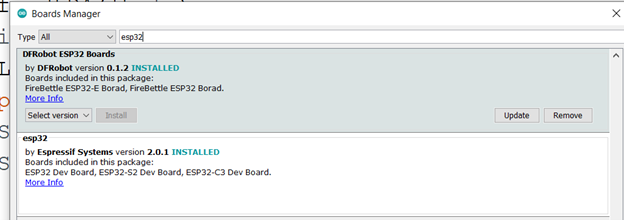
前一段使用DFRobot的 FireBeelte ,后来有了问题,于是入手 Taobao 便宜的 ESP32 来使用。

https://item.taobao.com/item.htm?spm=a1z09.2.0.0.58602e8dzr7xuq&id=547069527125&_u=fkf8s93c8b
https://github.com/Nicholas3388/LuaNode/blob/master/images/ESP32_dimension.png

https://microcontrollerslab.com/esp32-pinout-use-gpio-pins/

在Board Manager 中选择NodeMCU-32S 编译上传。

EDK2 202008 来了

今天偶然注意到edk2 的最新版本:edk2-stable202008

https://github.com/tianocore/edk2/releases/tag/edk2-stable202008 可以下载到。

从资料上看,目前 Windows 下的编译工具已经切换到了 VS2019。

EDK2 202008 Windows VS2019 测试结果

这个版本是 2020 九月 四日 Release 的,改动如下:

下载代码进行简单的测试(我仍然使用 VS2015):

第一步,在 VS2015 X86 Native 窗口下,使用 edksetup forcerebuild 命令编译 build 中使用到的工具。但是编译过程中会报错,错误指向  Brotli ,这是一个压缩算法, Github 给出的代码只是给出了指向它的链接,所以下载到的代码中并不包括,所以需要我们手工补充之。

EDK2 代码没有直接包括 Brotli

下载到指定的版本(这里是 66C328),放置在edk202008\BaseTools\Source\C\BrotliCompress 目录下,再次编译即可通过:

EDK2 编译工具编译正常

第二步,编译模拟器的代码。在 edk2/MdeModulePkg/Library/BrotliCustomDecompressLib/ 同样需要放置Brotli的代码。编译命令:

build -p EmulatorPkg\EmulatorPkg.dsc -t VS2015x86 -a X64

EDK2 Emulator 编译正常

编译结果是edk202008\Build\EmulatorX64\DEBUG_VS2015x86\X64\ WinHost.exe

Emulator 运行正常

结论:使用 VS2015 仍然可以正常编译 EDK2 202008。

完整的代码我在Baidu网盘中放置了一份,有需要的朋友可以下载:

链接: https://pan.baidu.com/s/14luXRtDvtfx0zR9-8_WmNQ 提取码: 6i33

推荐《从零开始的UEFI裸机编程》

最近偶然看到这本书,大概浏览了一下,非常适合初学者阅读。

从零开始的UEFI裸机编程
フルスクラッチで作る!UEFIベアメタルプログラミング

大神 祐真 著, 神楽坂琴梨 译

Gitbub 页面的简单介绍

本书的目录:

  1. 从零开始的UEFI裸机编程
  2. 译者的话
  3. 1. 第一部分
    1. 1.1. 引言
    2. 1.2. Hello UEFI!
      1. 1.2.1. 遵循UEFI标准编写程序
      2. 1.2.2. 交叉编译为UEFI可执行格式
      3. 1.2.3. 引导并运行UEFI应用程序
    3. 1.3. 获取按键输入
      1. 1.3.1. 简单文本输入协议
      2. 1.3.2. 编写一个回显程序
      3. 1.3.3. 编写一个简单的Shell
    4. 1.4. 在屏幕上绘制图形
      1. 1.4.1. 图形输出协议
      2. 1.4.2. 在屏幕上画一个矩形
      3. 1.4.3. 制作一个简单的GUI
    5. 1.5. 获取鼠标输入
      1. 1.5.1. 简单指针协议
      2. 1.5.2. 查看鼠标状态
      3. 1.5.3. 实现鼠标指针
    6. 1.6. 文件读写
      1. 1.6.1. 文件相关的协议
      2. 1.6.2. 列出目录下文件
      3. 1.6.3. GUI下列出文件
      4. 1.6.4. 读取文本文件
      5. 1.6.5. GUI下浏览文本文件
      6. 1.6.6. 编辑文本文件
      7. 1.6.7. GUI下编辑文本文件
    7. 1.7. 扩展poiOS的功能
      1. 1.7.1. 显示图片
      2. 1.7.2. 实现退出功能
      3. 1.7.3. 更大的鼠标指针
      4. 1.7.4. 功能展示
    8. 1.8. 后记
    9. 1.9. 参考资料
  4. 2. 第二部分
    1. 2.1. 引言
    2. 2.2. 控制台输出
      1. 2.2.1. 设置文字颜色和背景色
      2. 2.2.2. 检测字符串是否能被显示
      3. 2.2.3. 获取支持的文本显示模式
      4. 2.2.4. 设置文本显示模式
    3. 2.3. 键盘输入
      1. 2.3.1. 绑定按键事件
    4. 2.4. 加载和执行UEFI应用程序
      1. 2.4.1. 查看当前设备路径
      2. 2.4.2. 创建设备路径
      3. 2.4.3. 从设备路径加载镜像
      4. 2.4.4. 设备路径的“设备”
      5. 2.4.5. 创建完整的设备路径
      6. 2.4.6. 从完整的设备路径加载镜像
      7. 2.4.7. 运行加载的镜像
      8. 2.4.8. 启动Linux: 编译并启动内核
      9. 2.4.9. 启动Linux: 内核启动参数
    5. 2.5. 计时器事件
      1. 2.5.1. 暂停程序执行
      2. 2.5.2. 利用事件处理函数异步操作
    6. 2.6. 其他功能
      1. 2.6.1. 内存分配器
      2. 2.6.2. 软关机
    7. 2.7. 后记
    8. 2.8. 参考资料
  5. 关于本书

中译本在 https://kagurazakakotori.github.io/ubmp-cn/index.html 可以看到,有兴趣的朋友可以查看。

Step to UEFI (219)Windows 下的 IoApic

前面介绍了 Shell 下的 IoApic 的读写,这次研究一下 Windows 下面的。在 Windows 下面,我们可以直接使用 RW_Everything 来进行读取,设定如下:

RW_Everything 读取 IoApic

读取结果如下:

RW_Everything 读取 IoApic 结果

我们特别关注 0x12 偏移处的值为 0x980 (这台机器和之前的 WinDBG 调试的不是同一个机器,IoApic 不同)。我猜测这里是PS/2 keyboard 的 IRQ0。参照资料修改 Bit16 (Interrupt Mask),设置为1会 Disable 这个中断。于是 x012 会被写为 0x0001 0980,这时候我发现键盘无法工作了。

IoApic Interrupt Mask

测试的这个机器是笔记本,键盘是挂在EC 下面的,EC汇报给系统的是PS/2键盘。

Device Manager PS/2 Keyboard

于是,通过这样的方式我阻止了 IRQ1 的产生,因此按键会无效。接下来,再将这个恢复为之前的 0x980,但是笔记本键盘是不工作的。我猜测应该有可能是按键堵住了 Buffer,所以再使用 RW 读取 0x60 IO port(就是打开 0x60 IO Port 页面看一下),键盘即恢复了工作。有兴趣的朋友可以自行尝试,记得需要连接一个 USB 键盘。

结论:我们现在谈论的IRQ 只的是针对 IOAPIC的Number, 比如,IRQ1 位于 I/O Redirection Table Register 1 的位置,同时这个 Register 会给出对应的 Vector。当中断发生时,CPU 会根据 Vector 找到 IDT 中给出来的ISR (Interrupt Service Routine)。

额外的实验,我们可以编写一个 Python Script 来配合 Dbc实现 IoApic 的读取,代码如下:

def Test():
    def get_APIC_DAT(index):
        _base.mem(0xfec00000 , 1, index)
        return _base.mem(0xfec00010, 4)
    import common.baseaccess as _baseaccess
    _base = _baseaccess.getglobalbase()    
    print("Script from www.lab-z.com")
    for i in range(0,0x77):
        print("%02x:%08X %08X" %(i,get_APIC_DAT(0x10+i*2),get_APIC_DAT(0x10+i*2+1)))        

上述代码命名为 myscript.py, 运行结果如下:

PythonSv 读取 IoApic

20220114 RW_Everything 访问 0x60 port 的方法如下:

RW_Everything 访问 IO 60Port

Step to UEFI (218)UEFI Shell下读取 IoApic

最近在编写一个Shell 下读取 IoApic 的工具,首先实验直接调用 IoApicLib来实现,为此,在 AppPkg.dsc 中加入下面三个 Lib:

 IoApicLib|PcAtChipsetPkg/Library/BaseIoApicLib/BaseIoApicLib.inf
 LocalApicLib|UefiCpuPkg/Library/BaseXApicLib/BaseXApicLib.inf
 TimerLib|PcAtChipsetPkg/Library/AcpiTimerLib/DxeAcpiTimerLib.inf

之后在自己的App 中引用IoApicLib。但是这样编译出来的EFI 在运行期会死机,甚至没有运行到 Application第一行就会死机。经过研究发现在 DxeAcpiTimerLib.inf 中有如下设定:

CONSTRUCTOR                    = DxeAcpiTimerLibConstructor

因此,DxeAcpiTimerLibConstructor会先于我们的Application入口执行,其中的代码会导致运行时死机(但是具体原因我没有分析)。

所以,需要手工编写一个读取的工具。

首先,研究一下读取的方法,根据【参考1】给出的指引,在内存中有暴露出2个内存地址作为 Index 和Data,在目前我们的电脑上都是 0xFEC0 0000h

和0xFEC 0010h. 具体的读取操作是在 Index 给出的内存地址写入要访问的寄存器索引,之后 Data 给出的内存位置就是这个寄存器的值。

IoApic Index

具体的寄存器分布如下:

IoApic Version Register

上面的 01h(IOAPICVER) 中会给出来 Redirection Table 的实际数量,Spec 中给出只有24个,但是现在通常会多于这个数量。

最终的代码如下(其中的 IoApicLib.h 等代码也都是直接从 ED2 代码中提取组合而成):

#include <Uefi.h>
#include <Library/UefiLib.h>
#include <Library/DebugLib.h>
#include <Library/ShellCEntryLib.h>
#include <Library/IoLib.h>
#include <Library/ShellLib.h>
#include "IoApicLib.h"

INTN
EFIAPI
ShellAppMain (
  IN UINTN Argc,
  IN CHAR16 **Argv
  )
{
    IO_APIC_VERSION_REGISTER         Version;
    IO_APIC_REDIRECTION_TABLE_ENTRY  Entry;
    UINTN       Irq;

    ShellSetPageBreakMode(TRUE);
    
    Version.Uint32 = IoApicRead (IO_APIC_VERSION_REGISTER_INDEX);
    Print(L"Version  : %X \n",Version.Bits.Version);
    Print(L"Max Entry: %X \n",Version.Bits.MaximumRedirectionEntry);
    
    for (Irq=0;Irq<Version.Bits.MaximumRedirectionEntry; Irq++) {
        Entry.Uint32.Low = IoApicRead (IO_APIC_REDIRECTION_TABLE_ENTRY_INDEX + Irq * 2);
        Entry.Uint32.High = IoApicRead(IO_APIC_REDIRECTION_TABLE_ENTRY_INDEX + Irq * 2+1);
        Print(L"Int%02X: %08X %08X \n",Irq,Entry.Uint32.Low,Entry.Uint32.High);
    }

    return EFI_SUCCESS;
}

运行结果:

IceLake-U 运行结果

如果觉得上面的读取方式过于复杂,还可以直接使用 MMIO 的方式来访问,通过调用 IoLib 的方式实现 MmIo 的访问代码非常简单:

    for (Irq=0;Irq<Version.Bits.MaximumRedirectionEntry; Irq++) {
            MmioWrite8 (0xFEC00000, IO_APIC_REDIRECTION_TABLE_ENTRY_INDEX+(UINT8)Irq*2);
            Entry.Uint32.Low=MmioRead32 (0xFEC00000+0x10);
            MmioWrite8 (0xFEC00000, IO_APIC_REDIRECTION_TABLE_ENTRY_INDEX+(UINT8)Irq*2+1);
            Entry.Uint32.High=MmioRead32 (0xFEC00000+0x10);   
            Print(L"%08X %08X \n",Entry.Uint32.Low,Entry.Uint32.High);            
}

在实体机上这两种方法没有差别,结果是相同的。完整代码和 X64 EFI 可以在这里下载:

ESP32 测试EC11旋转编码器

最近研究了一下旋转编码器的使用。入手的是 ALPS EC11系列的:

ALPS EC11 旋转编码器

为了让它工作,自己做了电路板电阻配合【参考1】。电路图和 PCB 设计如下:

EC11 旋转编码器电路图
EC11 旋转编码器 PCB

工程可以在这里下载:

软件方面使用了ai-esp32-rotary-encoder 库,下面是一个同时使用2个旋转编码器的例子(特特别注意:不是任何的GPIO 都能选择成为和旋转编码器连接的引脚,某些连接之后会导致无法启动,有可能是因为部分ESP32在启动时会选做接口VSPI,如果你了解原因不妨在评论中指出。谢谢! ):

#include "AiEsp32RotaryEncoder.h"
#include "Arduino.h"

/*
connecting Rotary encoder
CLK (A pin) - to any microcontroler intput pin with interrupt -> in this example pin 32
DT (B pin) - to any microcontroler intput pin with interrupt -> in this example pin 21
SW (button pin) - to any microcontroler intput pin -> in this example pin 25
VCC - to microcontroler VCC (then set ROTARY_ENCODER_VCC_PIN -1) or in this example pin 25
GND - to microcontroler GND
*/

#define ROTARY_ENCODER1_A_PIN 4
#define ROTARY_ENCODER1_B_PIN 16
#define ROTARY_ENCODER1_BUTTON_PIN 2

AiEsp32RotaryEncoder rotaryEncoder1 = AiEsp32RotaryEncoder(ROTARY_ENCODER1_A_PIN, ROTARY_ENCODER1_B_PIN, ROTARY_ENCODER1_BUTTON_PIN, -1);

void rotary1_onButtonClick() {
  Serial.println("Button1 Pressed!");
}

void rotary1_loop() {
	//first lets handle rotary encoder button click
	if (rotaryEncoder1.currentButtonState() == BUT_RELEASED) {
		//we can process it here or call separate function like:
	 	rotary1_onButtonClick();
	}

	//lets see if anything changed
	int16_t encoderDelta = rotaryEncoder1.encoderChanged();
	
	//for some cases we only want to know if value is increased or decreased (typically for menu items)
	if (encoderDelta>0) Serial.print("+");
	if (encoderDelta<0) Serial.print("-");

	//for other cases we want to know what is current value. Additionally often we only want if something changed
	//example: when using rotary encoder to set termostat temperature, or sound volume etc
	
	//if value is changed compared to our last read
	if (encoderDelta!=0) {
		//now we need current value
		int16_t encoderValue = rotaryEncoder1.readEncoder();
		//process new value. Here is simple output.
		Serial.print("Rot 1 value: ");
		Serial.println(encoderValue);
	} 
	
}

#define ROTARY_ENCODER2_A_PIN 26
#define ROTARY_ENCODER2_B_PIN 27
#define ROTARY_ENCODER2_BUTTON_PIN 14

AiEsp32RotaryEncoder rotaryEncoder2 = AiEsp32RotaryEncoder(ROTARY_ENCODER2_A_PIN, ROTARY_ENCODER2_B_PIN, ROTARY_ENCODER2_BUTTON_PIN, -1);

void rotary2_onButtonClick() {
  Serial.println("Button2 Pressed!");
}

void rotary2_loop() {
  //first lets handle rotary encoder button click
  if (rotaryEncoder2.currentButtonState() == BUT_RELEASED) {
    //we can process it here or call separate function like:
    rotary2_onButtonClick();
  }

  //lets see if anything changed
  int16_t encoderDelta = rotaryEncoder2.encoderChanged();
  
  //for some cases we only want to know if value is increased or decreased (typically for menu items)
  if (encoderDelta>0) Serial.print("+");
  if (encoderDelta<0) Serial.print("-");

  //for other cases we want to know what is current value. Additionally often we only want if something changed
  //example: when using rotary encoder to set termostat temperature, or sound volume etc
  
  //if value is changed compared to our last read
  if (encoderDelta!=0) {
    //now we need current value
    int16_t encoderValue = rotaryEncoder2.readEncoder();
    //process new value. Here is simple output.
    Serial.print("Rot 2 value: ");
    Serial.println(encoderValue);
  } 
  
}

void setup() {

	Serial.begin(115200);
  Serial.println("Starttesting");

	//we must initialize rorary encoder 
	rotaryEncoder1.begin();
	rotaryEncoder1.setup([]{rotaryEncoder1.readEncoder_ISR();});
	//optionally we can set boundaries and if values should cycle or not
	rotaryEncoder1.setBoundaries(0, 10, true); //minValue, maxValue, cycle values (when max go to min and vice versa)

  //we must initialize rorary encoder 
  rotaryEncoder2.begin();
  rotaryEncoder2.setup([]{rotaryEncoder2.readEncoder_ISR();});
  //optionally we can set boundaries and if values should cycle or not
  rotaryEncoder2.setBoundaries(0, 10, true); //minValue, maxValue, cycle values (when max go to min and vice versa)

}

void loop() {
	//in loop call your custom function which will process rotary encoder values
	rotary1_loop();
  rotary2_loop();
                             
   delay(50);   
}

上述测试代码:

库可以在这里下载:

测试的照片:

双旋转编码器测试

参考:

1.

https://www.cnblogs.com/AChenWeiqiangA/p/12785276.html

AdaFriut 库驱动 ILI9431

之前在 Teensy上使用过 ILI9341 的屏幕【参考1】,这次在 FireBeelte(ESP32)上使用这个屏幕,相比之下 ESP32 可以很轻松的使用 40Mhz的SPI 频率。

连接如下:

ILI9341屏幕GNDVCCCLKMOSRESDCBLKMIS
FireBeelteGNDVCC (推荐) 3.3V也可以SCK/IO18MOSI/IO23D2/IO25D9/IO2NAMISO/IO19
ILI9341 对 FireBeelte(ESP32)的连接

在程序开头有2种定义方式:

1.类似  Adafruit_ILI9341 tft = Adafruit_ILI9341(TFT_CS, TFT_DC);  这种是指定使用硬件 SPI,速度快(我看资料理论可以达到 80Mhz, 实际测试 40Mhz 完全没问题)

2.类似 Adafruit_ILI9341 tft = Adafruit_ILI9341(TFT_CS, TFT_DC, TFT_MOSI, TFT_CLK, TFT_RST, TFT_MISO); 这种定义是 SW SPI 最高在 1.2Mhz 左右

测试代码是 Adafruit_GFX_Library的例子 mock_ili9341.ino, 有修过如下:

/***************************************************
  This is our GFX example for the Adafruit ILI9341 Breakout and Shield
  ----> http://www.adafruit.com/products/1651

  Check out the links above for our tutorials and wiring diagrams
  These displays use SPI to communicate, 4 or 5 pins are required to
  interface (RST is optional)
  Adafruit invests time and resources providing this open source code,
  please support Adafruit and open-source hardware by purchasing
  products from Adafruit!

  Written by Limor Fried/Ladyada for Adafruit Industries.
  MIT license, all text above must be included in any redistribution
 ****************************************************/


#include "SPI.h"
#include "Adafruit_GFX.h"
#include "Adafruit_ILI9341.h"

// For the Adafruit shield, these are the default.
//#define TFT_DC 9
//#define TFT_CS 10

// For the Adafruit shield, these are the default.
//#define TFT_DC D9
#define TFT_DC 21
#define TFT_CS D8
#define TFT_MOSI MOSI
#define TFT_CLK SCK
//#define TFT_RST D2
#define TFT_RST 22
#define TFT_MISO MISO

// Use hardware SPI (on Uno, #13, #12, #11) and the above for CS/DC
Adafruit_ILI9341 tft = Adafruit_ILI9341(TFT_CS, TFT_DC, TFT_RST);
// If using the breakout, change pins as desired
//Adafruit_ILI9341 tft = Adafruit_ILI9341(TFT_CS, TFT_DC, TFT_MOSI, TFT_CLK, TFT_RST, TFT_MISO);

void setup() {
  Serial.begin(9600);
  Serial.println("ILI9341 Test!"); 
 
  tft.begin(2000000UL);

  // read diagnostics (optional but can help debug problems)
  uint8_t x = tft.readcommand8(ILI9341_RDMODE);
  Serial.print("Display Power Mode: 0x"); Serial.println(x, HEX);
  x = tft.readcommand8(ILI9341_RDMADCTL);
  Serial.print("MADCTL Mode: 0x"); Serial.println(x, HEX);
  x = tft.readcommand8(ILI9341_RDPIXFMT);
  Serial.print("Pixel Format: 0x"); Serial.println(x, HEX);
  x = tft.readcommand8(ILI9341_RDIMGFMT);
  Serial.print("Image Format: 0x"); Serial.println(x, HEX);
  x = tft.readcommand8(ILI9341_RDSELFDIAG);
  Serial.print("Self Diagnostic: 0x"); Serial.println(x, HEX); 
  
  Serial.println(F("Benchmark                Time (microseconds)"));
  delay(10);
  Serial.print(F("Screen fill              "));
  Serial.println(testFillScreen());
  delay(500);

  Serial.print(F("Text                     "));
  Serial.println(testText());
  delay(3000);

  Serial.print(F("Lines                    "));
  Serial.println(testLines(ILI9341_CYAN));
  delay(500);

  Serial.print(F("Horiz/Vert Lines         "));
  Serial.println(testFastLines(ILI9341_RED, ILI9341_BLUE));
  delay(500);

  Serial.print(F("Rectangles (outline)     "));
  Serial.println(testRects(ILI9341_GREEN));
  delay(500);

  Serial.print(F("Rectangles (filled)      "));
  Serial.println(testFilledRects(ILI9341_YELLOW, ILI9341_MAGENTA));
  delay(500);

  Serial.print(F("Circles (filled)         "));
  Serial.println(testFilledCircles(10, ILI9341_MAGENTA));

  Serial.print(F("Circles (outline)        "));
  Serial.println(testCircles(10, ILI9341_WHITE));
  delay(500);

  Serial.print(F("Triangles (outline)      "));
  Serial.println(testTriangles());
  delay(500);

  Serial.print(F("Triangles (filled)       "));
  Serial.println(testFilledTriangles());
  delay(500);

  Serial.print(F("Rounded rects (outline)  "));
  Serial.println(testRoundRects());
  delay(500);

  Serial.print(F("Rounded rects (filled)   "));
  Serial.println(testFilledRoundRects());
  delay(500);

  Serial.println(F("Done!"));

}


void loop(void) {
  for(uint8_t rotation=0; rotation<4; rotation++) {
    tft.setRotation(rotation);
    testText();
    delay(1000);
  }
}

unsigned long testFillScreen() {
  unsigned long start = micros();
  tft.fillScreen(ILI9341_BLACK);
  yield();
  tft.fillScreen(ILI9341_RED);
  yield();
  tft.fillScreen(ILI9341_GREEN);
  yield();
  tft.fillScreen(ILI9341_BLUE);
  yield();
  tft.fillScreen(ILI9341_BLACK);
  yield();
  return micros() - start;
}

unsigned long testText() {
  tft.fillScreen(ILI9341_BLACK);
  unsigned long start = micros();
  tft.setCursor(0, 0);
  tft.setTextColor(ILI9341_WHITE);  tft.setTextSize(1);
  tft.println("Hello World!");
  tft.setTextColor(ILI9341_YELLOW); tft.setTextSize(2);
  tft.println(1234.56);
  tft.setTextColor(ILI9341_RED);    tft.setTextSize(3);
  tft.println(0xDEADBEEF, HEX);
  tft.println();
  tft.setTextColor(ILI9341_GREEN);
  tft.setTextSize(5);
  tft.println("Groop");
  tft.setTextSize(2);
  tft.println("I implore thee,");
  tft.setTextSize(1);
  tft.println("my foonting turlingdromes.");
  tft.println("And hooptiously drangle me");
  tft.println("with crinkly bindlewurdles,");
  tft.println("Or I will rend thee");
  tft.println("in the gobberwarts");
  tft.println("with my blurglecruncheon,");
  tft.println("see if I don't!");
  return micros() - start;
}

unsigned long testLines(uint16_t color) {
  unsigned long start, t;
  int           x1, y1, x2, y2,
                w = tft.width(),
                h = tft.height();

  tft.fillScreen(ILI9341_BLACK);
  yield();
  
  x1 = y1 = 0;
  y2    = h - 1;
  start = micros();
  for(x2=0; x2<w; x2+=6) tft.drawLine(x1, y1, x2, y2, color);
  x2    = w - 1;
  for(y2=0; y2<h; y2+=6) tft.drawLine(x1, y1, x2, y2, color);
  t     = micros() - start; // fillScreen doesn't count against timing

  yield();
  tft.fillScreen(ILI9341_BLACK);
  yield();

  x1    = w - 1;
  y1    = 0;
  y2    = h - 1;
  start = micros();
  for(x2=0; x2<w; x2+=6) tft.drawLine(x1, y1, x2, y2, color);
  x2    = 0;
  for(y2=0; y2<h; y2+=6) tft.drawLine(x1, y1, x2, y2, color);
  t    += micros() - start;

  yield();
  tft.fillScreen(ILI9341_BLACK);
  yield();

  x1    = 0;
  y1    = h - 1;
  y2    = 0;
  start = micros();
  for(x2=0; x2<w; x2+=6) tft.drawLine(x1, y1, x2, y2, color);
  x2    = w - 1;
  for(y2=0; y2<h; y2+=6) tft.drawLine(x1, y1, x2, y2, color);
  t    += micros() - start;

  yield();
  tft.fillScreen(ILI9341_BLACK);
  yield();

  x1    = w - 1;
  y1    = h - 1;
  y2    = 0;
  start = micros();
  for(x2=0; x2<w; x2+=6) tft.drawLine(x1, y1, x2, y2, color);
  x2    = 0;
  for(y2=0; y2<h; y2+=6) tft.drawLine(x1, y1, x2, y2, color);

  yield();
  return micros() - start;
}

unsigned long testFastLines(uint16_t color1, uint16_t color2) {
  unsigned long start;
  int           x, y, w = tft.width(), h = tft.height();

  tft.fillScreen(ILI9341_BLACK);
  start = micros();
  for(y=0; y<h; y+=5) tft.drawFastHLine(0, y, w, color1);
  for(x=0; x<w; x+=5) tft.drawFastVLine(x, 0, h, color2);

  return micros() - start;
}

unsigned long testRects(uint16_t color) {
  unsigned long start;
  int           n, i, i2,
                cx = tft.width()  / 2,
                cy = tft.height() / 2;

  tft.fillScreen(ILI9341_BLACK);
  n     = min(tft.width(), tft.height());
  start = micros();
  for(i=2; i<n; i+=6) {
    i2 = i / 2;
    tft.drawRect(cx-i2, cy-i2, i, i, color);
  }

  return micros() - start;
}

unsigned long testFilledRects(uint16_t color1, uint16_t color2) {
  unsigned long start, t = 0;
  int           n, i, i2,
                cx = tft.width()  / 2 - 1,
                cy = tft.height() / 2 - 1;

  tft.fillScreen(ILI9341_BLACK);
  n = min(tft.width(), tft.height());
  for(i=n; i>0; i-=6) {
    i2    = i / 2;
    start = micros();
    tft.fillRect(cx-i2, cy-i2, i, i, color1);
    t    += micros() - start;
    // Outlines are not included in timing results
    tft.drawRect(cx-i2, cy-i2, i, i, color2);
    yield();
  }

  return t;
}

unsigned long testFilledCircles(uint8_t radius, uint16_t color) {
  unsigned long start;
  int x, y, w = tft.width(), h = tft.height(), r2 = radius * 2;

  tft.fillScreen(ILI9341_BLACK);
  start = micros();
  for(x=radius; x<w; x+=r2) {
    for(y=radius; y<h; y+=r2) {
      tft.fillCircle(x, y, radius, color);
    }
  }

  return micros() - start;
}

unsigned long testCircles(uint8_t radius, uint16_t color) {
  unsigned long start;
  int           x, y, r2 = radius * 2,
                w = tft.width()  + radius,
                h = tft.height() + radius;

  // Screen is not cleared for this one -- this is
  // intentional and does not affect the reported time.
  start = micros();
  for(x=0; x<w; x+=r2) {
    for(y=0; y<h; y+=r2) {
      tft.drawCircle(x, y, radius, color);
    }
  }

  return micros() - start;
}

unsigned long testTriangles() {
  unsigned long start;
  int           n, i, cx = tft.width()  / 2 - 1,
                      cy = tft.height() / 2 - 1;

  tft.fillScreen(ILI9341_BLACK);
  n     = min(cx, cy);
  start = micros();
  for(i=0; i<n; i+=5) {
    tft.drawTriangle(
      cx    , cy - i, // peak
      cx - i, cy + i, // bottom left
      cx + i, cy + i, // bottom right
      tft.color565(i, i, i));
  }

  return micros() - start;
}

unsigned long testFilledTriangles() {
  unsigned long start, t = 0;
  int           i, cx = tft.width()  / 2 - 1,
                   cy = tft.height() / 2 - 1;

  tft.fillScreen(ILI9341_BLACK);
  start = micros();
  for(i=min(cx,cy); i>10; i-=5) {
    start = micros();
    tft.fillTriangle(cx, cy - i, cx - i, cy + i, cx + i, cy + i,
      tft.color565(0, i*10, i*10));
    t += micros() - start;
    tft.drawTriangle(cx, cy - i, cx - i, cy + i, cx + i, cy + i,
      tft.color565(i*10, i*10, 0));
    yield();
  }

  return t;
}

unsigned long testRoundRects() {
  unsigned long start;
  int           w, i, i2,
                cx = tft.width()  / 2 - 1,
                cy = tft.height() / 2 - 1;

  tft.fillScreen(ILI9341_BLACK);
  w     = min(tft.width(), tft.height());
  start = micros();
  for(i=0; i<w; i+=6) {
    i2 = i / 2;
    tft.drawRoundRect(cx-i2, cy-i2, i, i, i/8, tft.color565(i, 0, 0));
  }

  return micros() - start;
}

unsigned long testFilledRoundRects() {
  unsigned long start;
  int           i, i2,
                cx = tft.width()  / 2 - 1,
                cy = tft.height() / 2 - 1;

  tft.fillScreen(ILI9341_BLACK);
  start = micros();
  for(i=min(tft.width(), tft.height()); i>20; i-=6) {
    i2 = i / 2;
    tft.fillRoundRect(cx-i2, cy-i2, i, i, i/8, tft.color565(0, i, 0));
    yield();
  }

  return micros() - start;
}

这里是上述三个库:

参考:

1. http://www.lab-z.com/teensyucglib/

2022年7月17日 我又一次尝试使用这个屏幕,但是惊奇的发现无法点亮,最终研究得出了如下结论:

屏幕引脚分别是GND/VCC/CLK/MOSI/RES/DC/BLK/MISO

首先是 VCC, 经过实验最好使用5V供电,否则会概率性无法显示(屏幕是白色无内容);其中CLK 和 MOIS 需要连接到你板子上的 SPI 上;RES 是 RESET 引脚,并不是CS (卖家说的 CS 可能指的是整体省电),因此你可以将RES直接接到3.3V上(注意不要接5V),这是是最大的坑;BLK和MISO 可以悬空不接。

// Ili9341 LCD panel
#define TFT_DC          21
#define TFT_CS          -1
Adafruit_ILI9341 tft = Adafruit_ILI9341(TFT_CS, TFT_DC);

我在 FireBeetle板子上运行示例代码\libraries\Adafruit_ILI9341\examples\graphicstest.ino 头部做如下声明即可:

// Ili9341 LCD panel
#define TFT_DC          21
#define TFT_CS          -1

Adafruit_ILI9341 tft = Adafruit_ILI9341(TFT_CS, TFT_DC);

连接方式:

ILI9341屏幕GNDVCCCLKMOSRESDCBLKMIS
FireBeelteGNDVCC 5VSCK/IO18MOSI/IO233.3V21N/AN/A
ILI9341 对 FireBeelte(ESP32)的连接

此外Adafruit_BusIO 在编译时有一点小问题,我修改了一下,有需要的可以试试:

同样的连接,在 ESP32 WROOM 上也可以正常工作:

Step to UEFI (217)UEFI Shell 下读获取分区信息

最近看到 Github 上的Intel Hao Wu 提供了一个读取“EFI Partition Infomation Protocol”的工具,在 https://github.com/hwu25/edk2/tree/partition_info_test/MdeModulePkg/Application/DumpPartInfo 可以看到(https://github.com/hwu25/edk2 branch:partition_info_test)。于是进行了一番研究。

首先对于 Partition Information Protocol 可以在 UEFI Spec 2.7 中的 13.18 章节看到,通过它可以获得当前系统中的分区信息:

Partition Information Protocol
EFI_PARTITION_INFO_PROTOCOL

DumpPartInfo代码不复杂,放到 \MdeModulePkg\Application中,然后修改MdeModulePkg.dsc 即可正常编译。但是在实体机上运行的时候没有任何输出。转过头查看 DumpPartInfo.c代码发现其中使用 DEBUG() 宏作为输出。对于DEBUG这个宏,在之前的文章【参考1】中有过研究。这个宏在 \MdePkg\Include\Library\DebugLib.h 中有定义,所有的调用都是相同的头文件,但是在链接的时候会使用不同的文件作为实现。

为了确定具体实现的文件,查看Build 过程中生成的Makefile 在\Build\MdeModule\DEBUG_VS2015x86\X64\MdeModulePkg\Application\DumpPartInfo\DumpPartInfo\Makefile 可以看到,链接过程中使用了 UefiDebugLibStdErr ,因此我们需要查看 \MdePkg\Library\UefiDebugLibStdErr\DebugLib.c 才能看到具体的实现:

1.DebugPrintEnabled()函数,代码如下:

/**  
  Returns TRUE if DEBUG() macros are enabled.

  This function returns TRUE if the DEBUG_PROPERTY_DEBUG_PRINT_ENABLED bit of 
  PcdDebugProperyMask is set.  Otherwise FALSE is returned.

  @retval  TRUE    The DEBUG_PROPERTY_DEBUG_PRINT_ENABLED bit of PcdDebugProperyMask is set.
  @retval  FALSE   The DEBUG_PROPERTY_DEBUG_PRINT_ENABLED bit of PcdDebugProperyMask is clear.

**/
BOOLEAN
EFIAPI
DebugPrintEnabled (
  VOID
  )
{
  return (BOOLEAN) ((PcdGet8(PcdDebugPropertyMask) &amp; DEBUG_PROPERTY_DEBUG_PRINT_ENABLED) != 0);
}

这里提示我们需要在 MdeModulePkg.dsc 打开下面的开关:

第一部分:

[Defines]
  PLATFORM_NAME                  = MdeModule
  PLATFORM_GUID                  = 587CE499-6CBE-43cd-94E2-186218569478
  PLATFORM_VERSION               = 0.98
  DSC_SPECIFICATION              = 0x00010005
  OUTPUT_DIRECTORY               = Build/MdeModule
  SUPPORTED_ARCHITECTURES        = IA32|IPF|X64|EBC|ARM|AARCH64
  BUILD_TARGETS                  = DEBUG|RELEASE|NOOPT
  SKUID_IDENTIFIER               = DEFAULT
#LABZ_Debug_Start
#
#  Debug output control
#
  DEFINE DEBUG_ENABLE_OUTPUT      = TRUE       # Set to TRUE to enable debug output
  DEFINE DEBUG_PRINT_ERROR_LEVEL  = 0x80000040  # Flags to control amount of debug output
  DEFINE DEBUG_PROPERTY_MASK      = 2
#LABZ_Debug_End

[LibraryClasses]

第二部分:


2.实现上面的代码后,在 NT32Pkg 虚拟机中我们可以看到 DEBUG()能够实现在屏幕上的输出了,但实体机上仍然无输出。继续研究,输出的具体代码在UefiDebugLibStdErr\DebugLib.c 中下面这个函数:

VOID
EFIAPI
DebugPrint (
  IN  UINTN        ErrorLevel,
  IN  CONST CHAR8  *Format,
  ...
  )
{
  CHAR16   Buffer[MAX_DEBUG_MESSAGE_LENGTH];
  VA_LIST  Marker;

  //
  // If Format is NULL, then ASSERT().
  //
  ASSERT (Format != NULL);
  //
  // Check driver debug mask value and global mask
  //
  if ((ErrorLevel & GetDebugPrintErrorLevel ()) == 0) {
    return;
  }
  //
  // Convert the DEBUG() message to a Unicode String
  //
  VA_START (Marker, Format);
  UnicodeVSPrintAsciiFormat (Buffer, MAX_DEBUG_MESSAGE_LENGTH, Format, Marker);
  VA_END (Marker);
  //
  // Send the print string to the Standard Error device
  //
  if ((gST != NULL) && (gST->StdErr != NULL)) {
    gST->StdErr->OutputString (gST->StdErr, Buffer);
  }
}

追踪显示 gST-> StdErr 并不是 NULL,但有可能是定义为串口。对于我们来说最简单的办法是将 StdErr 赋值为 StdOut 。修改DumpPartInfo.c代码如下:

EFI_STATUS
EFIAPI
UefiMain (
  IN EFI_HANDLE        ImageHandle,
  IN EFI_SYSTEM_TABLE  *SystemTable
  )
{
  EFI_STATUS                          Status;
  EFI_HANDLE                          *Handles;
  UINTN                               HandleCount;
  UINTN                               HandleIndex;
  EFI_DEVICE_PATH_PROTOCOL            *DevicePath;
  CHAR16                              *DPText;
  EFI_PARTITION_INFO_PROTOCOL         *PartInfo;

  gST->StdErr=gST->ConOut;
  
  Status = gBS->LocateHandleBuffer (
                ByProtocol,
                &gEfiPartitionInfoProtocolGuid,
                NULL,
                &HandleCount,
                &Handles
                );

之后,实体机中工作正常了:

完整代码和 X64 EFI 文件下载:

参考:

1. http://www.lab-z.com/stu170dbg/ Application 中使用 DEBUG 宏