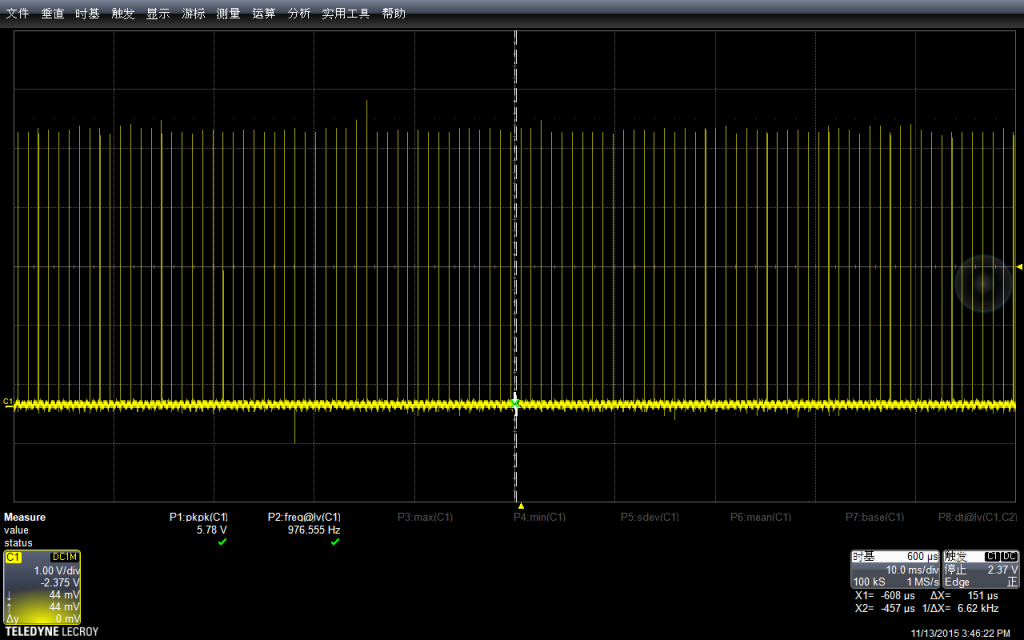
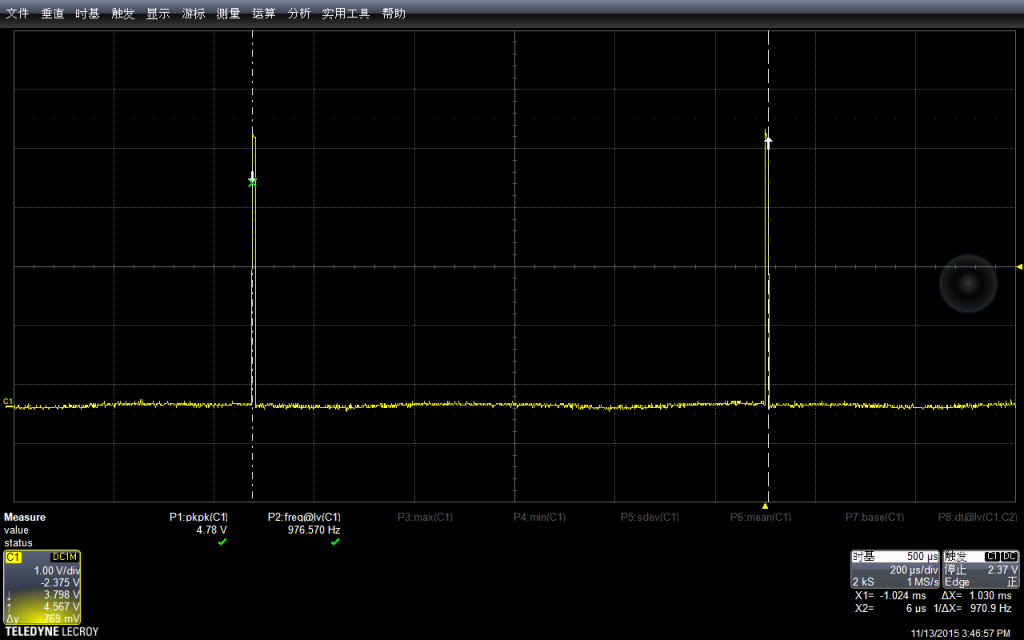
之前一直在使用攀藤 G1 ,前面提到 G1 都坏掉了郁闷无比。然后入手了一个 G3 。之所以还选择攀藤的产品最主要是考虑尽可能的复用之前的代码……
下面图是 G1 和 G3 外观,可以看出 G3 要小一点:
数据上和G1稍微有些差别,主要是送出来的数据短了一些。
下面是串口实际获得的数据
具体解读(来自说明书)
最后修改一下之前给 G1 写的 APP 即可
完整的代码
G3Ver1source
编译后的程序
Project2
之前一直在使用攀藤 G1 ,前面提到 G1 都坏掉了郁闷无比。然后入手了一个 G3 。之所以还选择攀藤的产品最主要是考虑尽可能的复用之前的代码……
下面图是 G1 和 G3 外观,可以看出 G3 要小一点:
数据上和G1稍微有些差别,主要是送出来的数据短了一些。
下面是串口实际获得的数据
具体解读(来自说明书)
最后修改一下之前给 G1 写的 APP 即可
完整的代码
G3Ver1source
编译后的程序
Project2
前面实现了HP 鼠标数据的读取,下面继续研究 DELL 的鼠标。还是首先运行取得描述符的程序,结果如下:
Start
Device addressed… Requesting device descriptor.
Device descriptor:
Descriptor Length: 12
USB version: 1.10
Class: 00 Use class information in the Interface Descriptor
Subclass: 00
Protocol: 00
Max.packet size: 08
Vendor ID: 2188
Product ID: 0AE1
Revision ID: 0100
Mfg.string index: 00
Prod.string index: 01 Length: 38 Contents: USB OPTICAL MOUSE
Serial number index: 00
Number of conf.: 01
Configuration number 0
Total configuration length: 34 bytes
Configuration descriptor:
Total length: 0022
Number of interfaces: 01
Configuration value: 01
Configuration string: 00
Attributes: A0 Remote Wakeup
Max.power: 32 100ma
Interface descriptor:
Interface number: 00
Alternate setting: 00
Endpoints: 01
Class: 03 HID (Human Interface Device)
Subclass: 01
Protocol: 02
Interface string: 00
HID descriptor:
Descriptor length: 09 9 bytes
HID version: 1.11
Country Code: 0 Not Supported
Class Descriptors: 1
Class Descriptor Type: 22 Report
Class Descriptor Length:66 bytes
HID report descriptor:
Length: 1 Type: Global Tag: Usage Page Generic Desktop Controls Data: 01
Length: 1 Type: Local Tag: Usage Data: 02
Length: 1 Type: Main Tag: Collection Application (mouse, keyboard) Data: 01
Length: 1 Type: Global Tag: Report ID Data: 01
Length: 1 Type: Local Tag: Usage Data: 01
Length: 1 Type: Main Tag: Collection Physical (group of axes) Data: 00
Length: 1 Type: Global Tag: Usage Page Button Data: 09
Length: 1 Type: Local Tag: Usage Minimum Data: 01
Length: 1 Type: Local Tag: Usage Maximum Data: 03
Length: 1 Type: Global Tag: Logical Minimum Data: 00
Length: 1 Type: Global Tag: Logical Maximum Data: 01
Length: 1 Type: Global Tag: Report Count Data: 03
Length: 1 Type: Global Tag: Report Size Data: 01
Length: 1 Type: Main Tag: Input Data,Variable,Absolute,No Wrap,Linear,Preferred State,No Null Position,Non-volatile(Ignore for Input), Data: 02
Length: 1 Type: Global Tag: Report Count Data: 01
Length: 1 Type: Global Tag: Report Size Data: 05
Length: 1 Type: Main Tag: Input Constant,Array,Absolute,No Wrap,Linear,Preferred State,No Null Position,Non-volatile(Ignore for Input), Data: 01
Length: 1 Type: Global Tag: Usage Page Generic Desktop Controls Data: 01
Length: 1 Type: Local Tag: Usage Data: 30
Length: 1 Type: Local Tag: Usage Data: 31
Length: 2 Type: Global Tag: Logical Minimum Data: 00 Data: F8
Length: 2 Type: Global Tag: Logical Maximum Data: FF Data: 07
Length: 1 Type: Global Tag: Report Size Data: 0C
Length: 1 Type: Global Tag: Report Count Data: 02
Length: 1 Type: Main Tag: Input Data,Variable,Relative,No Wrap,Linear,Preferred State,No Null Position,Non-volatile(Ignore for Input), Data: 06
Length: 1 Type: Local Tag: Usage Data: 38
Length: 1 Type: Global Tag: Logical Minimum Data: 81
Length: 1 Type: Global Tag: Logical Maximum Data: 7F
Length: 1 Type: Global Tag: Report Size Data: 08
Length: 1 Type: Global Tag: Report Count Data: 01
Length: 1 Type: Main Tag: Input Data,Variable,Relative,No Wrap,Linear,Preferred State,No Null Position,Non-volatile(Ignore for Input), Data: 06
Length: 0 Type: Main Tag: End Collection
Endpoint descriptor:
Endpoint address: 01 Direction: IN
Attributes: 03 Transfer type: Interrupt
Max.packet size: 0006
Polling interval: 0A 10 ms
同样,尝试之前的 Get_Report 方式的程序,得到的却是不停的输出的错误信息:
Setup packet error: 7
Mouse Poll Error: 7
没有办法直接了解这个错误编号的含义,最后只能用逻辑分析仪分析产生问题的原因:
可以看到当发送Get_Report之后,Device 会返回STALL 。
对比之前能够正常工作的 HP 鼠标,收到 Get_Report 后,会返回 ACK 还会继续通讯。
查看资料上说,返回STALL有可能是因为设备不支持该指令…… Windows的设备经常会出现这样的情况:可以正常工作,但是未必完整的 follow 工业标准。
上面的方法行不通,只能用中断方式来获取数据。我去掉了切换 Boot Protocol 的代码
/* Mouse communication via interrupt endpoint */
/* Assumes EP1 as interrupt IN ep */
#include "max3421e.h"
#include "usb.h"
#define DEVADDR 1
#define CONFVALUE 1
#define EP_MAXPKTSIZE 5
EP_RECORD ep_record[ 2 ]; //endpoint record structure for the mouse
void setup();
void loop();
MAX3421E Max;
USB Usb;
void setup()
{
Serial.begin( 115200 );
Serial.println("Start");
Max.powerOn();
delay( 200 );
}
void loop()
{
byte rcode;
Max.Task();
Usb.Task();
if( Usb.getUsbTaskState() == USB_STATE_CONFIGURING ) {
mouse1_init();
}//if( Usb.getUsbTaskState() == USB_STATE_CONFIGURING...
if( Usb.getUsbTaskState() == USB_STATE_RUNNING ) { //poll the keyboard
rcode = mouse1_poll();
if( rcode ) {
Serial.print("Mouse Poll Error: ");
Serial.println( rcode, HEX );
}//if( rcode...
}//if( Usb.getUsbTaskState() == USB_STATE_RUNNING...
}
/* Initialize mouse */
void mouse1_init( void )
{
byte rcode = 0; //return code
byte tmpdata;
byte* byte_ptr = &tmpdata;
/**/
ep_record[ 0 ] = *( Usb.getDevTableEntry( 0,0 )); //copy endpoint 0 parameters
ep_record[ 1 ].MaxPktSize = EP_MAXPKTSIZE;
ep_record[ 1 ].sndToggle = bmSNDTOG0;
ep_record[ 1 ].rcvToggle = bmRCVTOG0;
Usb.setDevTableEntry( 1, ep_record ); //plug kbd.endpoint parameters to devtable
/* Configure device */
rcode = Usb.setConf( DEVADDR, 0, CONFVALUE );
if( rcode ) {
Serial.print("Error configuring mouse. Return code : ");
Serial.println( rcode, HEX );
while(1); //stop
}//if( rcode...
rcode = Usb.setIdle( DEVADDR, 0, 0, 0, tmpdata );
if( rcode ) {
Serial.print("Set Idle error. Return code : ");
Serial.println( rcode, HEX );
while(1); //stop
}
rcode = Usb.getIdle( DEVADDR, 0, 0, 0, (char *)byte_ptr );
if( rcode ) {
Serial.print("Get Idle error. Return code : ");
Serial.println( rcode, HEX );
while(1); //stop
}
Serial.print("Idle Rate: ");
Serial.print(( tmpdata * 4 ), DEC ); //rate is returned in multiples of 4ms
Serial.println(" ms");
tmpdata = 0;
rcode = Usb.setIdle( DEVADDR, 0, 0, 0, tmpdata );
if( rcode ) {
Serial.print("Set Idle error. Return code : ");
Serial.println( rcode, HEX );
while(1); //stop
}
Usb.setUsbTaskState( USB_STATE_RUNNING );
return;
}
/* Poll mouse via interrupt endpoint and print result */
/* assumes EP1 as interrupt endpoint */
byte mouse1_poll( void )
{
byte rcode,i;
char buf[ 6 ] = { 0 }; //mouse report buffer
unsigned long int libuf[ sizeof(buf) ];
unsigned long int x;
unsigned long int y;
/* poll mouse */
rcode = Usb.inTransfer( DEVADDR, 1, sizeof(buf), buf, 1 ); //
if( rcode ) { //error
if( rcode == 0x04 ) { //NAK
rcode = 0;
}
return( rcode );
}
/* print buffer */
if( buf[ 1 ] & 0x01 ) {
Serial.println("Button1 pressed ");
}
if( buf[ 1 ] & 0x02 ) {
Serial.println("Button2 pressed ");
}
if( buf[ 1 ] & 0x04 ) {
Serial.println("Button3 pressed ");
}
for (int i=0;i<sizeof(buf);i++) {
libuf[i]=(buf[i]) & 0xff;
}
/*
Serial.print(libuf[0],HEX); Serial.print(" ");
Serial.print(libuf[1],HEX); Serial.print(" ");
Serial.print(libuf[2],HEX); Serial.print(" ");
Serial.print(libuf[3],HEX); Serial.print(" ");
Serial.print(libuf[4],HEX); Serial.print(" ");
Serial.print(libuf[5],HEX); Serial.print(" ");
Serial.println("");
*/
Serial.print("X-axis: ");
x=((libuf[3] & 0xF)<<8)+(libuf[2] & 0xFF );
if (x & 0x800) {
Serial.print("-");
x = ((~x) & 0x7FF) +1;
}
Serial.print(x, HEX); Serial.print(" ");
Serial.print("Y-axis: ");
y=(((libuf[3]>>4) & 0xF) +((libuf[4] & 0xFF )<<4));
if (y & 0x800) {
Serial.print("-");
y = ((~y) & 0x7FF) +1;
}
Serial.print(y, HEX); Serial.print(" ");
Serial.print("Wheel: ");
Serial.println(buf [5] & 0xFF, HEX);
return( rcode );
}
和前面那个程序相比,这个特别之处在于返回值多了 Report_ID ,对于我们处理数据来说,只是有效数据从 Buf[1] 开始,其他地方并无特别。
运行结果
完整代码下载
基本上,鼠标的玩法就是这些。可以用鼠标做很多好玩的东西。
根据网上搜到的结果,在【参考1】下载了 controlP5 的库,然后使用下面的程序
import controlP5.*;
ControlP5 cp5;
String[] textfieldNames = {"tf1", "tf2", "tf3", "tf4", "tf5"};
void setup() {
size(700,400);
PFont font = createFont("arial",20);
cp5 = new ControlP5(this);
int y = 20;
int spacing = 60;
for(String name: textfieldNames){
cp5.addTextfield(name)
.setPosition(20,y)
.setSize(100,40)
.setFont(font)
.setFocus(true)
.setColor(color(255,0,0))
;
y += spacing;
}
textFont(font);
}
void draw() {
background(0);
}
void controlEvent(ControlEvent theEvent) {
if(theEvent.isAssignableFrom(Textfield.class)) {
println("controlEvent: accessing a string from controller '"
+theEvent.getName()+"': "
+theEvent.getStringValue()
);
}
}
运行结果
1. http://www.sojamo.de/libraries/controlP5/
前面介绍了 MD5 的实现,这里介绍一下 SHA-1 算法的实现。具体代码来自【参考1】。
和之前 MD5 程序有一些差别在于这个程序不是一次性将所有文件都放入内存中,而是放入一部分,计算一部分,再用中间结果继续计算下一部分。这样,再大的文件也可以正常处理。
#include <Uefi.h>
#include <Library/UefiLib.h>
#include <Library/ShellCEntryLib.h>
#include <stdio.h>
#include <stdlib.h>
#include <wchar.h>
#include <Protocol/EfiShell.h>
#include <Library/ShellLib.h>
#include <Library/MemoryAllocationLib.h>
#include "sha1.h"
#define BUFFERSIZE 2048
extern EFI_BOOT_SERVICES *gBS;
extern EFI_SYSTEM_TABLE *gST;
extern EFI_RUNTIME_SERVICES *gRT;
extern EFI_SHELL_PROTOCOL *gEfiShellProtocol;
int
EFIAPI
main (
IN int Argc,
IN CHAR16 **Argv
)
{
EFI_FILE_HANDLE FileHandle;
RETURN_STATUS Status;
EFI_FILE_INFO *FileInfo = NULL;
EFI_HANDLE *HandleBuffer=NULL;
UINTN ReadSize=BUFFERSIZE;
SHA1Context sha;
//Check if there is a parameter
if (Argc == 1) {
Print(L"Usage: crctest [filename]\n");
return 0;
}
//Open the file given by the parameter
Status = ShellOpenFileByName(Argv[1], (SHELL_FILE_HANDLE *)&FileHandle,
EFI_FILE_MODE_READ , 0);
if(Status != RETURN_SUCCESS) {
Print(L"OpenFile failed!\n");
return EFI_SUCCESS;
}
//Get file size
FileInfo = ShellGetFileInfo( (SHELL_FILE_HANDLE)FileHandle);
/*
* Reset the SHA-1 context and process input
*/
SHA1Reset(&sha);
//Allocate a memory buffer
HandleBuffer = AllocateZeroPool(BUFFERSIZE);
if (HandleBuffer == NULL) {
return (SHELL_OUT_OF_RESOURCES); }
while (BUFFERSIZE == ReadSize)
{
ReadSize=BUFFERSIZE;
//Load the whole file to the buffer
Status = ShellReadFile(FileHandle,&ReadSize,HandleBuffer);
SHA1Input(&sha,(unsigned char *) HandleBuffer, ReadSize);
}
//Output
Print(L"File Name: %s\n",Argv[1]);
Print(L"File Size: %d\n",(UINTN)FileInfo-> FileSize);
if (!SHA1Result(&sha))
{
Print(L"sha: could not compute message digest\n");
}
else
{
Print(L"%08X %08X %08X %08X %08X\n",
sha.Message_Digest[0],
sha.Message_Digest[1],
sha.Message_Digest[2],
sha.Message_Digest[3],
sha.Message_Digest[4]);
}
FreePool(HandleBuffer);
return EFI_SUCCESS;
}
运行结果:
完整的代码下载:
参考:
1.https://www.packetizer.com/
了解了一下 UUID 和 GUID , 资料上来看,这两个是同一个东西。GUID 是 MS 定义的 UUID 的一种实现方法. 两者在写法上稍微有些差别【参考1】【参考2】:
GUID:xxxxxxxx-xxxx-xxxx-xxxx-xxxxxxxxxxxx (8-4-4-4-12)
UUID:xxxxxxxx-xxxx-xxxx-xxxxxxxxxxxxxxxx (8-4-4-16)
在 UEFI 中,我们经常看到类似下面的定义
“cf8e16a5-c1e8-4e25-b712-4f54a96702c8”
#define EFI_SIMPLE_FILE_SYSTEM_PROTOCOL_GUID \
{ \
0x964e5b22, 0x6459, 0x11d2, {0x8e, 0x39, 0x0, 0xa0, 0xc9, 0x69, 0x72, 0x3b } \
}
UUID PadFileGuid;
对于 GUID ,可以在 \MdePkg\Include\Base.h 看到下面的定义
///
/// 128 bit buffer containing a unique identifier value.
/// Unless otherwise specified, aligned on a 64 bit boundary.
///
typedef struct {
UINT32 Data1;
UINT16 Data2;
UINT16 Data3;
UINT8 Data4[8];
} GUID;
同时,在 \MdePkg\Include\Uefi\UefiBaseType.h 有下面的定义
/// /// 128-bit buffer containing a unique identifier value. /// typedef GUID EFI_GUID;
在 \BaseTools\Source\C\Common\CommonLib.c 有一个打印输出的例子可以直接拿出来用
EFI_STATUS
PrintGuid (
IN EFI_GUID *Guid
)
/*++
Routine Description:
This function prints a GUID to STDOUT.
Arguments:
Guid Pointer to a GUID to print.
Returns:
EFI_SUCCESS The GUID was printed.
EFI_INVALID_PARAMETER The input was NULL.
--*/
{
if (Guid == NULL) {
Error (NULL, 0, 2000, "Invalid parameter", "PrintGuidToBuffer() called with a NULL value");
return EFI_INVALID_PARAMETER;
}
printf (
"%08x-%04x-%04x-%02x%02x-%02x%02x%02x%02x%02x%02x\n",
(unsigned) Guid->Data1,
Guid->Data2,
Guid->Data3,
Guid->Data4[0],
Guid->Data4[1],
Guid->Data4[2],
Guid->Data4[3],
Guid->Data4[4],
Guid->Data4[5],
Guid->Data4[6],
Guid->Data4[7]
);
return EFI_SUCCESS;
}
最后,写一个输出的例子
#include <Uefi.h>
#include <Library/UefiLib.h>
#include <Library/ShellCEntryLib.h>
#include <stdio.h>
#include <stdlib.h>
#include <wchar.h>
#include <Protocol/EfiShell.h>
#include <Library/ShellLib.h>
extern EFI_BOOT_SERVICES *gBS;
extern EFI_SYSTEM_TABLE *gST;
extern EFI_RUNTIME_SERVICES *gRT;
#define GUID1 \
{ \
0x964e5b22, 0x6459, 0x11d2, {0x8e, 0x39, 0x0, 0xa0, 0xc9, 0x69, 0x72, 0x3b } \
}
#define GUID2 \
{ \
0x33221100, 0x5544, 0x7766, {0x88, 0x99, 0xAA, 0xBB, 0xCC, 0xDD, 0xEE, 0xFF } \
}
EFI_STATUS
PrintGuid (
IN EFI_GUID *Guid
)
/*++
Routine Description:
This function prints a GUID to STDOUT.
Arguments:
Guid Pointer to a GUID to print.
Returns:
EFI_SUCCESS The GUID was printed.
EFI_INVALID_PARAMETER The input was NULL.
--*/
{
if (Guid == NULL) {
printf("Parameter error!\n");
return EFI_INVALID_PARAMETER;
}
printf (
"%08x-%04x-%04x-%02x%02x-%02x%02x%02x%02x%02x%02x\n",
(unsigned) Guid->Data1,
Guid->Data2,
Guid->Data3,
Guid->Data4[0],
Guid->Data4[1],
Guid->Data4[2],
Guid->Data4[3],
Guid->Data4[4],
Guid->Data4[5],
Guid->Data4[6],
Guid->Data4[7]
);
return EFI_SUCCESS;
}
int
EFIAPI
main (
IN int Argc,
IN CHAR16 **Argv
)
{
EFI_GUID T1=GUID1;
EFI_GUID T2=GUID2;
PrintGuid(&T1);
PrintGuid(&T2);
return EFI_SUCCESS;
}
运行结果
完整代码下载
参考:
1.http://baike.baidu.com/view/1052579.htm UUID
2.http://blog.csdn.net/forlong401/article/details/7580147 UUID 和 GUID 的区别
3.https://en.wikipedia.org/wiki/Globally_unique_identifier Globally unique identifier
4.https://en.wikipedia.org/wiki/Universally_unique_identifier Universally unique identifier
上次买了攀藤 G1 PM2.5 传感器了,这次有需要又拿了出来使用【参考1】。很不幸,经常不工作,探究原因似乎与接线有关系,于是我又重新做了一个线(上次和卖家多要了一根线),用上之后现象稍微有些改善,但是移动之类的还会导致失灵,具体现象就是风扇不转,碰碰插头之类的就好了。一怒之下,拆开研究:
首先,外面是一层壳子,这个可以直接撬开(蓝色的是外面的塑料膜,我基本上没有用,所以这层薄膜还在的)
然后,需要拧掉周围四个固定外壳的螺丝,此外还要拧下固定风扇的三个螺丝才能继续拆解。螺丝居然生锈了,我很惊奇。基本上没怎么用,也都是一直放在家里不知道为什么会这样,观察另外一只(好吧,其实我是买个2个的),同样也有生锈的情况
最后,用螺丝刀之类的撬开即可
主板上有一颗CY8C 的单片机。更惊奇的是:主板上固定的螺丝竟然也有锈蚀!
背面是关键,可以看出有一个激光头样子的东西,这应该是这个传感器的关键部件,配合风扇和壳子内部形成的风道,可以计量单位时间颗粒物的数量。
研究发现插头不紧的原因是:他选用的那种连接件不是自锁样式的。比如:在拆开上面状态下,无法插入接线然后保持卡住的状态。连接件只是让金属接触上,然后卡住是外壳的功劳。这样,如果外壳出现松动或者接头磨损之类的,就根本无法卡住,就会出现我遇到的问题。
前几个月,我在实验点亮各种 MIPI 屏幕,然后发现接口卡具没多久就坏掉了,我去和硬件工程师说,你们做的时候不能选点好的连接器么,他回答是:这个东西装上基本上不会再拆了,像你这样拆来拆去的属于特殊情况,从成本角度考虑我们不会有选择结实一点的需求,估计这个传感器也是本着这样的思路设计的。
最后的结论:东西不错,但是连接设计太差,如果你要像我这样做 DIY 有经常插拔的需求,不建议选择这款。如果你是做毕业设计之类的展示性工作,最好再多买一个备份。
后面的话我想找个 HW 帮着焊接出来一根永久固定的线吧。
参考:
1.http://www.lab-z.com/g1pm25/ 攀藤 G1 PM2.5传感器
前面介绍了USB键盘的使用,这里介绍一下USB鼠标的调用。根据【参考1】的文章进行实验,这次我们的目标是:获得鼠标移动按键信息,串口输出之。
首先运行一下之前的取得描述符的工具抓取一下描述符:
Descriptor of HP Mouse
Start
Device addressed… Requesting device descriptor.
Device descriptor:
Descriptor Length: 12
USB version: 2.0
Class: 00 Use class information in the Interface Descriptor
Subclass: 00
Protocol: 00
Max.packet size: 08
Vendor ID: 046D
Product ID: C077
Revision ID: 6700
Mfg.string index: 01 Length: 18 Contents: Logitech
Prod.string index: 02 Length: 36 Contents: USB Optical Mouse
Serial number index: 00
Number of conf.: 01
Configuration number 0
Total configuration length: 34 bytes
Configuration descriptor:
Total length: 0022
Number of interfaces: 01
Configuration value: 01
Configuration string: 00
Attributes: A0 Remote Wakeup
Max.power: 31 98ma
Interface descriptor:
Interface number: 00
Alternate setting: 00
Endpoints: 01
Class: 03 HID (Human Interface Device)
Subclass: 01
Protocol: 02
Interface string: 00
HID descriptor:
Descriptor length: 09 9 bytes
HID version: 1.11
Country Code: 0 Not Supported
Class Descriptors: 1
Class Descriptor Type: 22 Report
Class Descriptor Length:67 bytes
HID report descriptor:
Length: 1 Type: Global Tag: Usage Page Generic Desktop Controls Data: 01
Length: 1 Type: Local Tag: Usage Data: 02
Length: 1 Type: Main Tag: Collection Application (mouse, keyboard) Data: 01
Length: 1 Type: Local Tag: Usage Data: 01
Length: 1 Type: Main Tag: Collection Physical (group of axes) Data: 00
Length: 1 Type: Global Tag: Usage Page Button Data: 09
Length: 1 Type: Local Tag: Usage Minimum Data: 01
Length: 1 Type: Local Tag: Usage Maximum Data: 08
Length: 1 Type: Global Tag: Logical Minimum Data: 00
Length: 1 Type: Global Tag: Logical Maximum Data: 01
Length: 1 Type: Global Tag: Report Size Data: 01
Length: 1 Type: Global Tag: Report Count Data: 08
Length: 1 Type: Main Tag: Input Data,Variable,Absolute………
Length: 1 Type: Global Tag: Usage Page Generic Desktop Controls Data: 01
Length: 2 Type: Global Tag: Logical Minimum Data: 01 Data: F8
Length: 2 Type: Global Tag: Logical Maximum Data: FF Data: 07
Length: 1 Type: Global Tag: Report Size Data: 0C
Length: 1 Type: Global Tag: Report Count Data: 02
Length: 1 Type: Local Tag: Usage Data: 30
Length: 1 Type: Local Tag: Usage Data: 31
Length: 1 Type: Main Tag: Input Data,Variable,Relative………
Length: 1 Type: Global Tag: Logical Minimum Data: 81
Length: 1 Type: Global Tag: Logical Maximum Data: 7F
Length: 1 Type: Global Tag: Report Size Data: 08
Length: 1 Type: Global Tag: Report Count Data: 01
Length: 1 Type: Local Tag: Usage Data: 38
Length: 1 Type: Main Tag: Input Data,Variable,Relative………
Length: 1 Type: Global Tag: Usage Page Consumer Data: 0C
Length: 2 Type: Local Tag: Usage Data: 38 Data: 02
Length: 1 Type: Global Tag: Report Count Data: 01
Length: 1 Type: Main Tag: Input Data,Variable,Relative………
Length: 0 Type: Main Tag: End Collection
Endpoint descriptor:
Endpoint address: 01 Direction: IN
Attributes: 03 Transfer type: Interrupt
Max.packet size: 0006
Polling interval: 0A 10 ms
根据上面的结果,计算长度应该是1×8+Cx2+8×1=40 bits= 5 bytes ,修改【参考1】的代码如下:
#include "Max3421e.h"
#include "Usb.h"
#define DEVADDR 1
#define CONFVALUE 1
void setup();
void loop();
MAX3421E Max;
USB Usb;
void setup()
{
Serial.begin( 115200 );
Serial.println("Start");
Max.powerOn();
delay( 200 );
}
void loop()
{
byte rcode;
Max.Task();
Usb.Task();
if( Usb.getUsbTaskState() == USB_STATE_CONFIGURING ) {
mouse0_init();
}//if( Usb.getUsbTaskState() == USB_STATE_CONFIGURING...
if( Usb.getUsbTaskState() == USB_STATE_RUNNING ) { //poll the keyboard
rcode = mouse0_poll();
if( rcode ) {
Serial.print("Mouse Poll Error: ");
Serial.println( rcode, HEX );
}//if( rcode...
}//if( Usb.getUsbTaskState() == USB_STATE_RUNNING...
}
/* Initialize mouse */
void mouse0_init( void )
{
byte rcode = 0; //return code
/**/
Usb.setDevTableEntry( 1, Usb.getDevTableEntry( 0,0 ) ); //copy device 0 endpoint information to device 1
/* Configure device */
rcode = Usb.setConf( DEVADDR, 0, CONFVALUE );
if( rcode ) {
Serial.print("Error configuring mouse. Return code : ");
Serial.println( rcode, HEX );
while(1); //stop
}//if( rcode...
Usb.setUsbTaskState( USB_STATE_RUNNING );
return;
}
/* Poll mouse using Get Report and print result */
byte mouse0_poll( void )
{
byte rcode,i;
char buf[ 4 ] = { 0 }; //mouse buffer
static char old_buf[ 4 ] = { 0 }; //last poll
/* poll mouse */
rcode = Usb.getReport( DEVADDR, 0, 4, 0, 1, 0, buf );
if( rcode ) { //error
return( rcode );
}
for( i = 0; i < 4; i++) { //check for new information
if( buf[ i ] != old_buf[ i ] ) { //new info in buffer
break;
}
}
if( i == 4 ) {
return( 0 ); //all bytes are the same
}
/* print buffer */
if( buf[ 0 ] & 0x01 ) {
Serial.print("Button1 pressed ");
}
if( buf[ 0 ] & 0x02 ) {
Serial.print("Button2 pressed ");
}
if( buf[ 0 ] & 0x04 ) {
Serial.print("Button3 pressed ");
}
Serial.println("");
Serial.print("X-axis: ");
Serial.println( buf[ 1 ], DEC);
Serial.print("Y-axis: ");
Serial.println( buf[ 2 ], DEC);
Serial.print("Wheel: ");
Serial.println( buf[ 3 ], DEC);
for( i = 0; i < 4; i++ ) {
old_buf[ i ] = buf[ i ]; //copy buffer
}
Serial.println("");
return( rcode );
}
运行结果
完整代码下载
看起来按键和X Y都已经正确,但是 wheel 并不正常。再仔细研究代码,取出来的信息长度和描述符中的不一致。就是说,程序虽然能够运行也能够取到变化的值,但是解读有误。
再进一步研读 Descriptor
Length: 1 Type: Global Tag: Usage Page Generic Desktop Controls Data: 01
Length: 2 Type: Global Tag: Logical Minimum Data: 01 Data: F8 //最小 F801 = 1111 1000 0000 0001 = -2047
Length: 2 Type: Global Tag: Logical Maximum Data: FF Data: 07//最大 07FF = 0000 0111 1111 1111 = 2047
Length: 1 Type: Global Tag: Report Size Data: 0C //这里指出了上面数值的大小是 12位
Length: 1 Type: Global Tag: Report Count Data: 02
Length: 1 Type: Local Tag: Usage Data: 30 // X
Length: 1 Type: Local Tag: Usage Data: 31 // Y
应该是意味着2个12bits长度的数值,对应X Y 分配如下,其中 X[B] 和Y[B]应该是最高的符号位
根据这个改写程序,按照上面的表格取值再拼接起来,特别需要注意的是,我发现Arduino在不同尺寸的数据转换上似乎有一些bug,我只能把值放在 unsigned long int中然后才能进行拼接和输出的动作。
Serial.print("X-axis: ");
x=((libuf[2] & 0xF)<<8)+(libuf[1] & 0xFF );
if (x & 0x800) {
Serial.print("-");
x = ((~x) & 0x7FF) +1;
}
Serial.println(x, HEX);
Serial.print("Y-axis: ");
y=(((libuf[2]>>4) & 0xF) +((libuf[3] & 0xFF )<<4));
if (y & 0x800) {
Serial.print("-");
y = ((~y) & 0x7FF) +1;
}
Serial.println(y, HEX);
最终,程序可以正常执行。
工作正常的程序如下:
#include "Max3421e.h"
#include "Usb.h"
#define DEVADDR 1
#define CONFVALUE 1
void setup();
void loop();
MAX3421E Max;
USB Usb;
void setup()
{
Serial.begin( 115200 );
Serial.println("Start");
Max.powerOn();
delay( 200 );
}
void loop()
{
byte rcode;
Max.Task();
Usb.Task();
if( Usb.getUsbTaskState() == USB_STATE_CONFIGURING ) {
mouse0_init();
}//if( Usb.getUsbTaskState() == USB_STATE_CONFIGURING...
if( Usb.getUsbTaskState() == USB_STATE_RUNNING ) { //poll the keyboard
rcode = mouse0_poll();
if( rcode ) {
Serial.print("Mouse Poll Error: ");
Serial.println( rcode, HEX );
}//if( rcode...
}//if( Usb.getUsbTaskState() == USB_STATE_RUNNING...
}
/* Initialize mouse */
void mouse0_init( void )
{
byte rcode = 0; //return code
/**/
Usb.setDevTableEntry( 1, Usb.getDevTableEntry( 0,0 ) ); //copy device 0 endpoint information to device 1
/* Configure device */
rcode = Usb.setConf( DEVADDR, 0, CONFVALUE );
if( rcode ) {
Serial.print("Error configuring mouse. Return code : ");
Serial.println( rcode, HEX );
while(1); //stop
}//if( rcode...
Usb.setUsbTaskState( USB_STATE_RUNNING );
return;
}
/* Poll mouse using Get Report and print result */
byte mouse0_poll( void )
{
byte rcode,i;
char buf[ 5 ] = { 0 }; //mouse buffer
static char old_buf[ sizeof(buf) ] = { 0 }; //last poll
unsigned long int libuf[ sizeof(buf) ];
unsigned long int x;
unsigned long int y;
/* poll mouse */
rcode = Usb.getReport( DEVADDR, 0, sizeof(buf), 0, 1, 0, buf );
if( rcode ) { //error
return( rcode );
}
for( i = 0; i < sizeof(buf); i++) { //check for new information
if( buf[ i ] != old_buf[ i ] ) { //new info in buffer
break;
}
}
if( i == sizeof(buf)) {
return( 0 ); //all bytes are the same
}
/* print buffer */
if( buf[ 0 ] & 0x01 ) {
Serial.print("Button1 pressed ");
}
if( buf[ 0 ] & 0x02 ) {
Serial.print("Button2 pressed ");
}
if( buf[ 0 ] & 0x04 ) {
Serial.print("Button3 pressed ");
}
for( i = 0; i < sizeof(buf); i++ ) {
old_buf[ i ] = buf[ i ]; //copy buffer
libuf[ i] = buf[i];
}
//Serial.print(libuf[0],HEX); Serial.print(" ");
//Serial.print(libuf[1],HEX); Serial.print(" ");
//Serial.print(libuf[2],HEX); Serial.print(" ");
//Serial.print(libuf[3],HEX); Serial.print(" ");
//Serial.println("");
Serial.print("X-axis: ");
x=((libuf[2] & 0xF)<<8)+(libuf[1] & 0xFF );
if (x & 0x800) {
Serial.print("-");
x = ((~x) & 0x7FF) +1;
}
Serial.println(x, HEX);
Serial.print("Y-axis: ");
y=(((libuf[2]>>4) & 0xF) +((libuf[3] & 0xFF )<<4));
if (y & 0x800) {
Serial.print("-");
y = ((~y) & 0x7FF) +1;
}
Serial.println(y, HEX);
Serial.print("Wheel: ");
Serial.println(buf [4] & 0xFF, HEX);
return( rcode );
}
完整代码下载:
补遗:在运行中,我还发现了一个奇怪的问题:当使用 Get_Report取得数据时,鼠标向一个方向移动,会出现最大值。意思是:比如,向右一直移动鼠标,输出达到 7FF 之后,继续右移,输出值会维持在 7FF 而不会变化。没有找到直接描述这个问题的资料,不过有一些类似的介绍【参考2】,上面提到USB鼠标在送出数据的时候,会有两种方式,一种是Relative ,一种是Absolute。差别在于,比如前者输出 (1,1),意思是告诉系统鼠标移动了(1,1);而后者如果输出 (1,1)则是告诉系统,鼠标移动到(1,1)。看起来,我这个鼠标描述符中提到的是Relative,但是实际输出是 Absolute。
Length: 1 Type: Global Tag: Report Size Data: 0C
Length: 1 Type: Global Tag: Report Count Data: 02
Length: 1 Type: Local Tag: Usage Data: 30
Length: 1 Type: Local Tag: Usage Data: 31
Length: 1 Type: Main Tag: Input Data,Variable,Relative………
于此可以形成对照的是 Wheel,每次滚动之后,很快会再次输出一个 0 的位置,下次再给出新的滚动值。
至于Windows 下,根据资料,系统会自动根据鼠标信息计算出一个大概范围方便使用(比如,屏幕是 1024×768,鼠标是Relative -100到+100的话,如果不做优化,从左上到右下需要做几次才行)。而我用的这个鼠标,声明自己是Relative,但是实际上发出Absolute,只是因为自己的范围很大(-7FF到+7FF),所以也不会有什么感觉。
上述只是猜测,是目前已知的最合理的解释而已。使用逻辑分析仪分析USB鼠标信息得到的结果相同。
逻辑分析仪抓取的结果,Windows使用 Interrupt 方式来和鼠标通讯
下面展示一下USB逻辑分析仪抓到的启动时的一些信息,首先是 Overview

不清楚为什么VendorID 居然是罗技的,一种可能是因为这个是假的HP鼠标,乱写一个ID;另外的可能是HP 找罗技代工的。
可以看到,MaxPower确实是一个很古怪的数值:98ma
参考:
1.https://www.circuitsathome.com/communicating-arduino-with-hid-devices-part-1
2.http://www.microchip.com/forums/m482197.aspx MOUSE HID / Resolution problem
最近玩玩 Processing , 尝试导入一个 DXF 的模型,OBJ 格式的. 使用 Processing 加载之。具体做法是这样的:
1. 下载 OBJLoader 库 【参考1】
2. 把这个库放在 Processing -> File -> Preferences -> Sketchbook location 指定的位置中,例如:
特别注意,默认目录中可能有空格或者中文,那么请你指定一个不含有中文或者空格的目录,像我一样,放在 D:\ 下面最好。就是下面这个样子
这个库可以直接去【参考1】给出的网站上下载,也可以用 Tools -> Add Tool 调出 Tool Manager,他会自动下载列表,你选择 ObjLoader 进行安装(可能是 GFW 的缘故,这个功能不稳定)
3.安装好之后,可以编译 ObjLoader 中 Examples 下面的例子,确保安装正确 (如果出现错误,并且错误不是 ObjLoader 导致的,那么请换另外的例子,有些例子用到了第三方的库)
4.最后编写自己的程序。从 Sketch -> Add Files 中导入 OBJ 模型,再输入下面的代码
import saito.objloader.*;
OBJModel model;
void setup() {
size(600,600,P3D);
model= new OBJModel(this);
model.load("teapot.obj");
model.setDrawMode(POLYGON);
noStroke();
}
void draw() {
background(0);
lights();
pushMatrix();
translate(width/2,height,-width);
rotateY(map(mouseX,0,width,-PI,PI));
rotateX(PI/4);
scale(6.0);
model.draw();
popMatrix();
}
最终运行结果如下
完整的代码下载
参考:
1.https://processing.org/reference/libraries/ 上提到的 OBJLoader by Tatsuya Saito and Matt Ditton .OBJ 3D model file loader
前面介绍了如何 Load 一幅 BMP 图片然后显示出来,然后就有一个问题:如何把这个图片也放在 EFI 文件中? 毕竟放在一起会显得更加专业。在【参考1】上,也有朋友问了同样的问题,博主的建议是“写个脚本直接把图片变成像素数组,直接弄,这样很简单”。下面就来实验一下。
首先,需要找一个将图片转为 C Header的工具。我找到的是 Bin2C 这个工具【参考2】. 用下面的命令即可完成转换,生成 show.h
bin2c -o show.h Untitled.bmp
转换之后 show.h 大概就是下面这个样子
然后,修改之前显示 BMP 的那个程序,用 include 来引用用到的 BMP 数据, 去掉 Load 文件的过程,直接使用内存地址。
#include <Uefi.h>
#include <Library/UefiLib.h>
#include <Library/ShellCEntryLib.h>
#include <stdio.h>
#include <stdlib.h>
#include <wchar.h>
#include <time.h>
#include <Protocol/EfiShell.h>
#include <Library/ShellLib.h>
#include <Protocol/SimpleFileSystem.h>
#include <Protocol/BlockIo.h>
#include <Library/DevicePathLib.h>
#include <Library/HandleParsingLib.h>
#include <Library/SortLib.h>
#include <Library/MemoryAllocationLib.h>
#include <Library/BaseMemoryLib.h>
#include <Protocol/LoadedImage.h>
#define MAX_FILE_SIZE (1024*1024*1024)
extern EFI_BOOT_SERVICES *gBS;
extern EFI_SYSTEM_TABLE *gST;
extern EFI_RUNTIME_SERVICES *gRT;
extern EFI_SHELL_ENVIRONMENT2 *mEfiShellEnvironment2;
extern EFI_HANDLE gImageHandle;
static EFI_GUID GraphicsOutputProtocolGuid = EFI_GRAPHICS_OUTPUT_PROTOCOL_GUID;
static EFI_GRAPHICS_OUTPUT_PROTOCOL *GraphicsOutput = NULL;
#pragma pack(1)
//Copied from C\MdePkg\Include\Protocol\UgaDraw.h
typedef struct {
UINT8 Blue;
UINT8 Green;
UINT8 Red;
UINT8 Reserved;
} EFI_UGA_PIXEL;
/* This should be compatible with EFI_UGA_PIXEL */
typedef struct {
UINT8 b, g, r, a;
} EG_PIXEL;
typedef struct {
CHAR8 CharB;
CHAR8 CharM;
UINT32 Size;
UINT16 Reserved[2];
UINT32 ImageOffset;
UINT32 HeaderSize;
UINT32 PixelWidth;
UINT32 PixelHeight;
UINT16 Planes; // Must be 1
UINT16 BitPerPixel; // 1, 4, 8, or 24
UINT32 CompressionType;
UINT32 ImageSize; // Compressed image size in bytes
UINT32 XPixelsPerMeter;
UINT32 YPixelsPerMeter;
UINT32 NumberOfColors;
UINT32 ImportantColors;
} BMP_IMAGE_HEADER;
typedef struct {
UINTN Width;
UINTN Height;
BOOLEAN HasAlpha;
EG_PIXEL *PixelData;
} EG_IMAGE;
#pragma pack()
//const unsigned char Untitled_bmp[289654]
#include "show.h"
VOID egFreeImage(IN EG_IMAGE *Image)
{
if (Image != NULL) {
if (Image->PixelData != NULL)
FreePool(Image->PixelData);
FreePool(Image);
}
}
//
// Basic image handling
//
EG_IMAGE * egCreateImage(IN UINTN Width, IN UINTN Height, IN BOOLEAN HasAlpha)
{
EG_IMAGE *NewImage;
NewImage = (EG_IMAGE *) AllocatePool(sizeof(EG_IMAGE));
if (NewImage == NULL)
return NULL;
NewImage->PixelData = (EG_PIXEL *) AllocatePool(
Width * Height * sizeof(EG_PIXEL));
if (NewImage->PixelData == NULL) {
FreePool(NewImage);
return NULL;
}
NewImage->Width = Width;
NewImage->Height = Height;
NewImage->HasAlpha = HasAlpha;
return NewImage;
}
//
// Load BMP image
//
EG_IMAGE * egDecodeBMP
(
IN UINT8 *FileData,
IN UINTN FileDataLength,
IN BOOLEAN WantAlpha)
{
EG_IMAGE *NewImage;
BMP_IMAGE_HEADER *BmpHeader;
EFI_UGA_PIXEL *BmpColorMap;
UINTN x, y;
UINT8 *ImagePtr;
UINT8 *ImagePtrBase;
UINTN ImageLineOffset;
UINT8 ImageValue=0, AlphaValue;
EG_PIXEL *PixelPtr;
UINTN Index, BitIndex;
// read and check header
if (FileDataLength < sizeof(BMP_IMAGE_HEADER) || FileData == NULL)
return NULL;
BmpHeader = (BMP_IMAGE_HEADER *) FileData;
if (BmpHeader->CharB != 'B' || BmpHeader->CharM != 'M')
return NULL;
if (BmpHeader->CompressionType != 0)
return NULL;
if (BmpHeader->BitPerPixel != 1 && BmpHeader->BitPerPixel != 4 &&
BmpHeader->BitPerPixel != 8 && BmpHeader->BitPerPixel != 24)
return NULL;
// calculate parameters
ImageLineOffset = BmpHeader->PixelWidth;
if (BmpHeader->BitPerPixel == 24)
ImageLineOffset *= 3;
else if (BmpHeader->BitPerPixel == 1)
ImageLineOffset = (ImageLineOffset + 7) >> 3;
else if (BmpHeader->BitPerPixel == 4)
ImageLineOffset = (ImageLineOffset + 1) >> 1;
if ((ImageLineOffset % 4) != 0)
ImageLineOffset = ImageLineOffset + (4 - (ImageLineOffset % 4));
// check bounds
if (BmpHeader->ImageOffset +
ImageLineOffset * BmpHeader->PixelHeight > FileDataLength)
return NULL;
// allocate image structure and buffer
NewImage = egCreateImage(BmpHeader->PixelWidth,
BmpHeader->PixelHeight, WantAlpha);
if (NewImage == NULL)
return NULL;
AlphaValue = WantAlpha ? 255 : 0;
// convert image
BmpColorMap = (EFI_UGA_PIXEL *)(FileData + sizeof(BMP_IMAGE_HEADER));
ImagePtrBase = FileData + BmpHeader->ImageOffset;
for (y = 0; y < BmpHeader->PixelHeight; y++) {
ImagePtr = ImagePtrBase;
ImagePtrBase += ImageLineOffset;
PixelPtr = NewImage->PixelData +
(BmpHeader->PixelHeight - 1 - y) * BmpHeader->PixelWidth;
switch (BmpHeader->BitPerPixel) {
case 1:
for (x = 0; x < BmpHeader->PixelWidth; x++) {
BitIndex = x & 0x07;
if (BitIndex == 0)
ImageValue = *ImagePtr++;
Index = (ImageValue >> (7 - BitIndex)) & 0x01;
PixelPtr->b = BmpColorMap[Index].Blue;
PixelPtr->g = BmpColorMap[Index].Green;
PixelPtr->r = BmpColorMap[Index].Red;
PixelPtr->a = AlphaValue;
PixelPtr++;
}
break;
case 4:
for (x = 0; x <= BmpHeader->PixelWidth - 2; x += 2) {
ImageValue = *ImagePtr++;
Index = ImageValue >> 4;
PixelPtr->b = BmpColorMap[Index].Blue;
PixelPtr->g = BmpColorMap[Index].Green;
PixelPtr->r = BmpColorMap[Index].Red;
PixelPtr->a = AlphaValue;
PixelPtr++;
Index = ImageValue & 0x0f;
PixelPtr->b = BmpColorMap[Index].Blue;
PixelPtr->g = BmpColorMap[Index].Green;
PixelPtr->r = BmpColorMap[Index].Red;
PixelPtr->a = AlphaValue;
PixelPtr++;
}
if (x < BmpHeader->PixelWidth) {
ImageValue = *ImagePtr++;
Index = ImageValue >> 4;
PixelPtr->b = BmpColorMap[Index].Blue;
PixelPtr->g = BmpColorMap[Index].Green;
PixelPtr->r = BmpColorMap[Index].Red;
PixelPtr->a = AlphaValue;
PixelPtr++;
}
break;
case 8:
for (x = 0; x < BmpHeader->PixelWidth; x++) {
Index = *ImagePtr++;
PixelPtr->b = BmpColorMap[Index].Blue;
PixelPtr->g = BmpColorMap[Index].Green;
PixelPtr->r = BmpColorMap[Index].Red;
PixelPtr->a = AlphaValue;
PixelPtr++;
}
break;
case 24:
for (x = 0; x < BmpHeader->PixelWidth; x++) {
PixelPtr->b = *ImagePtr++;
PixelPtr->g = *ImagePtr++;
PixelPtr->r = *ImagePtr++;
PixelPtr->a = AlphaValue;
PixelPtr++;
}
break;
}
}
return NewImage;
}
int
EFIAPI
main (
IN int Argc,
IN char **Argv
)
{
EFI_STATUS Status;
EG_IMAGE *Image;
Status = gBS->LocateProtocol(&GraphicsOutputProtocolGuid,
NULL, (VOID **) &GraphicsOutput);
if (EFI_ERROR(Status)) {
GraphicsOutput = NULL;
Print(L"Loading Graphics_Output_Protocol error!\n");
return EFI_SUCCESS;
}
Image=egDecodeBMP((UINT8 *)&Untitled_bmp, Untitled_bmp_size, FALSE);
Print(L"Image height [%d]:width[%d]",
Image->Height,
Image->Width);
GraphicsOutput->Blt(
GraphicsOutput,
(EFI_GRAPHICS_OUTPUT_BLT_PIXEL *) Image->PixelData,
EfiBltBufferToVideo,
0,
0 ,
0x100,
0x20,
Image->Width,
Image->Height, 0);
return EFI_SUCCESS;
}
运行结果:
Bin2C 下载(内含原始图片)
源代码下载
参考:
1.http://www.cppblog.com/djxzh/archive/2015/02/08/209766.html 补充《UEFI原理与编程》中关于Edk2的调试
2. http://sourceforge.net/projects/bin2c/
鼠标是目前玩电脑的必不可少的配备了。我最早接触的是机械鼠标,中间有一个滚球,带动内部的机械,配合光学器件将旋转信号转化为电子信号,通过串口或者PS2接口传输到电脑上。

【参考1】
这样的鼠标缺点是定位不是很准确,并且容易脏,下面的球滚动一段就会蹭上泥垢,看起来比较恶心。
再后来出现了光电鼠标,那时候的光电鼠标必须在专用的鼠标垫上才能用,那种鼠标垫上面有网格状的东西,只有在它上面,鼠标发出光线才能正确的反馈,换句话说没有特定的鼠标垫根本无法使用。当然,那时候用电脑还是一项非常严重的事情,上机需要按照“团结紧张严肃活泼”的方针,先洗手再换鞋套之类的。
再再后来就出现了目前我们最常见到的光电鼠标,各种材质都可以使用,非常方便。原理上也发生了巨大的变化,简单的说就是现在的鼠标下面有一个类似照相机一样的东西不断给接触面拍照,移动会导致每次画面的变化,然后DSP根据画面不同计算出移动的距离再反馈给PC当前的移动距离信息。
当然,未来还可能出现更新原理的鼠标,比如:象象利用加速度传感器做的 “体感空中鼠”,等等。
我始终有一个想法:是否可以用鼠标来做一个电子尺,因为鼠标移动特定距离之后的输出也是固定的,意思是:鼠标移动10cm,输出的点位应该是固定的,比如:2000之类(DPI是定值)。反过来,如果我们知道鼠标移动了多少点,也就能确定鼠标移动了多少距离。最近接触了Arduino USB Shield ,于是打造一个鼠标尺。
材料准备
Arduino Uno
Arduino USB Shield
USB鼠标
USB充电宝
1602 LCD
导线 4根
实现原理
使用 USB Shield 来做USB HOST,在初始化的时候将鼠标切换到Boot Protocol,切换的好处是避免针对每种鼠标特别分析Descriptor,可以直接使用输出的数据(虽然是都要遵循HID协议,还真有不支持Boot Protocol的,这种情况需要单独处理了)。每次鼠标有动作,都会用Interrupt 方式通知到HOST来处理。我们根据输出的位移(相对位移),可以得知移动了多少。
#include “max3421e.h”
#include “usb.h”
#include “LiquidCrystal_I2C.h”
#include
#define DEVADDR 1
#define CONFVALUE 1
#define EP_MAXPKTSIZE 5
EP_RECORD ep_record[ 2 ]; //endpoint record structure for the mouse
void setup();
void loop();
MAX3421E Max;
USB Usb;
LiquidCrystal_I2C lcd(0x27,16,2);
double distance =0;
void setup()
{
lcd.init(); //初始化LCD
lcd.backlight(); //打开背光
Serial.begin( 115200 );
Serial.println(“Start”);
Max.powerOn();
lcd.setCursor(0,0);
lcd.print(” Distance “);
delay( 200 );
}
void loop()
{
byte rcode;
Max.Task();
Usb.Task();
if( Usb.getUsbTaskState() == USB_STATE_CONFIGURING ) {
mouse1_init();
}//if( Usb.getUsbTaskState() == USB_STATE_CONFIGURING…
if( Usb.getUsbTaskState() == USB_STATE_RUNNING ) { //状态机运行
rcode = mouse1_poll();
if( rcode ) {
Serial.print(“Mouse Poll Error: “);
Serial.println( rcode, HEX );
}//if( rcode…
}//if( Usb.getUsbTaskState() == USB_STATE_RUNNING…
}
/* 鼠标初始化 */
void mouse1_init( void )
{
byte rcode = 0; //return code
byte tmpdata;
byte* byte_ptr = &tmpdata;
/**/
ep_record[ 0 ] = *( Usb.getDevTableEntry( 0,0 )); //copy endpoint 0 parameters
ep_record[ 1 ].MaxPktSize = EP_MAXPKTSIZE;
ep_record[ 1 ].sndToggle = bmSNDTOG0;
ep_record[ 1 ].rcvToggle = bmRCVTOG0;
Usb.setDevTableEntry( 1, ep_record );
/* Configure device */
rcode = Usb.setConf( DEVADDR, 0, CONFVALUE );
if( rcode ) {
Serial.print(“Error configuring mouse. Return code : “);
Serial.println( rcode, HEX );
while(1); //stop
}//if( rcode…
rcode = Usb.getIdle( DEVADDR, 0, 0, 0, (char *)byte_ptr );
if( rcode ) {
Serial.print(“Get Idle error. Return code : “);
Serial.println( rcode, HEX );
while(1); //stop
}
Serial.print(“Idle Rate: “);
Serial.print(( tmpdata * 4 ), DEC ); //rate is returned in multiples of 4ms
Serial.println(” ms”);
tmpdata = 0;
rcode = Usb.setIdle( DEVADDR, 0, 0, 0, tmpdata ); //切换为Boot Protocol
if( rcode ) {
Serial.print(“Set Idle error. Return code : “);
Serial.println( rcode, HEX );
while(1); //stop
}
Usb.setUsbTaskState( USB_STATE_RUNNING );
return;
}
/* Poll mouse via interrupt endpoint and print result */
/* assumes EP1 as interrupt endpoint */
byte mouse1_poll( void )
{
byte rcode,i;
byte x;
byte y;
char res[12];
char buf[ 4 ] = { 0 };
/* poll mouse */
rcode = Usb.inTransfer( DEVADDR, 1, 4, buf, 1 ); //
if( rcode ) { //error
if( rcode == 0x04 ) { //NAK
rcode = 0;
}
return( rcode );
}
/* print buffer */
if( buf[ 0 ] & 0x01 ) {
distance=0;
}
//目前已经切换到 Boot Protocol, 输出的 Byte 2 3 分别是 X 和 Y
x=abs(buf[1]);
y=abs(buf[2]);
Serial.print(“X-axis: “);
Serial.print( buf[1], DEC); Serial.print(” “); Serial.println( x, DEC);
Serial.print(“Y-axis: “);
Serial.print( buf[2], DEC); Serial.print(” “); Serial.println(y , DEC);
distance=distance+sqrt(x*x+y*y); //计算移动距离
String dataString = “”;
//Double转String
dataString = dtostrf(distance, 5, 4, res);
Serial.println(dataString);
lcd.setCursor(0,1);
lcd.print(” “);
lcd.print(dataString);
lcd.print(” “);
return( rcode );
}
制作过程也就是连接过程,Shield直接插,1602 LCD四根线,GND VCC SDA SCL 接对了就好。
工作时就是这个样子
实际上显示的是移动了多少点,具体还要进行换算为实际的距离,每个鼠标的DPI不同,相同的点位表示的实际距离也不相同。上述程序我没有做这个转换,如果有需要在编程的时候拉一个已知长度的线段折算一下即可知。
工作视频
http://www.tudou.com/programs/view/hcsKy9hKCVg/?resourceId=414535982_06_02_99
完整的代码下载
mruler
完成之后,到了老婆提问时间,我们有如下对话
她:这个是干什么的啊?
我:这个是尺
她:尺子是干什么的?
我:尺子就是测量距离的啊
她:那为什么要测量距离?
我:比如一根直线你想知道它多长,需要测量啊
她:那家里有直尺为什么不用。
(这个问题很Sharp…….我想了一会才回答)
我:万一你要测量一个非直线的物体你需要用这个啊。比如,测量一个圆。
她:我为什么要测量一个圆的周长啊
我:你能不能问点有建设性的问题?
她:唔。那我可以用直尺测量圆的直径然后根据圆周率测量周长啊。
(又是一个Sharp的问题!)
我:直径不好确定,另外,没有直接测量方便啊!
她:那你要沿着圆走一圈哎~ 这样不准
(更加Sharp的问题!!我想了一下)
我:从理论上来说,人类无法直接测量出一个圆的周长,因为Pi是无限不循环小数,周长一定也是一个无限不循环小数。人类历史上在逼近圆周率的时候就是采用……..
她:为什么要测量周长呢?
(沉思片刻)
我:比如,你要测量一个椭圆的周长
她:椭圆周长有公式,数学书上有,虽然我现在不记得但是确定有。
(长考虑中…….)
我:再举个例子,比如,你要测量一个抛物线(嗯,这个她听过,肯定也知道公式)。不~ 你要测量一个悬链线(我打赌她肯定都没有听说过)。
她:为什么我要…….
我:不说了,我去唱歌了 《1999谢谢你的爱》
参考:
1. 图片来自 http://it.21cn.com/hardware/mouse/a/2009/0428/20/6209325.shtml 蓝影PK激光!最强游戏鼠标“溜冰“测试
2. http://acc.pconline.com.cn/mouse/study_mouse/0902/1550361_1.html 让你一夜成高手!鼠标知识最全面充电宝典
3. http://www.lab-z.com/usbkb/ Arduino 控制USB设备(5)解析USB键盘的例子