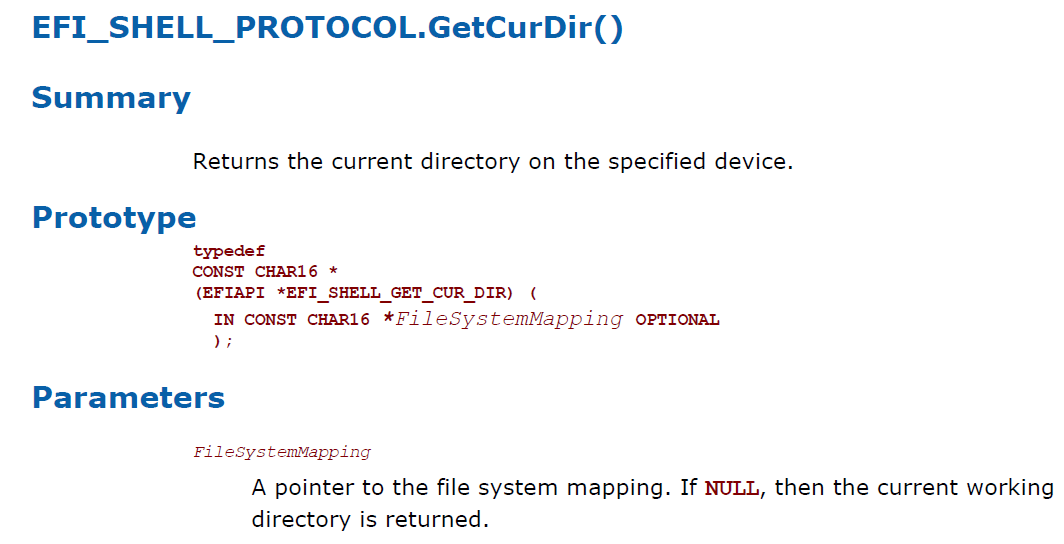
翻看 Shell Specification【参考 1】,发现上面介绍了一个Shell下取得当前目录的函数
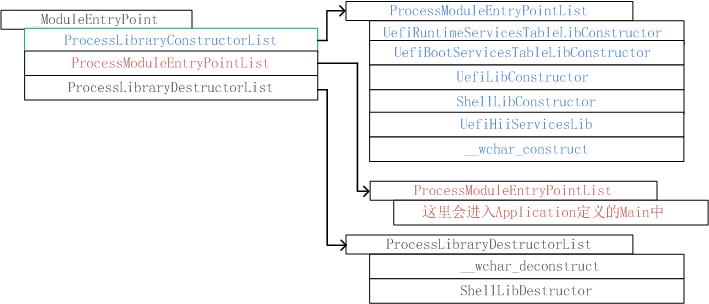
看起来这个函数很简单,于是动手写程序。注意到 \ShellPkg\Library\UefiShellLib\UefiShellLib.c 中有声明,于是直接 extern EFI_SHELL_PROTOCOL *gEfiShellProtocol; 过来用。之所以能这样做,是因为这个位置是 Shell 程序在编译过程中特别加入的头,具体请参考之前的文章。
编译完成之后,进入虚拟环境实验,非常奇怪,每次运行都会出现错误提示,然后NT32就会崩溃掉。
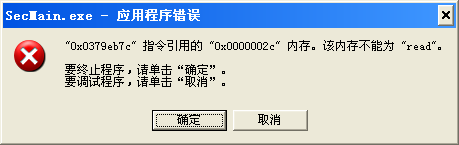
真相到底是什么呢?一检查,gEfiShellProtocol == 0 。还要追根溯源,到定义他的地方去查看。
代码在 \ShellPkg\Library\UefiShellLib\UefiShellLib.c
为了Debug,在关键的地方添加上的一点代码,输出信息
  Status = gBS->OpenProtocol(
    ImageHandle,
    &gEfiShellParametersProtocolGuid,
    (VOID **)&gEfiShellParametersProtocol,
    ImageHandle,
    NULL,
    EFI_OPEN_PROTOCOL_GET_PROTOCOL
   );
  if (EFI_ERROR(Status)) {
    gEfiShellParametersProtocol = NULL;
  }
SystemTable->ConOut->OutputString(SystemTable->ConOut,L"TestA\n\r"); //LabZDebug
  if (gEfiShellParametersProtocol == NULL || gEfiShellProtocol == NULL) {
SystemTable->ConOut->OutputString(SystemTable->ConOut,L"TestB\n\r"); //LabZDebug
    //
    // Moved to seperate function due to complexity
    //
    Status = ShellFindSE2(ImageHandle);

    if (EFI_ERROR(Status)) {
      DEBUG((DEBUG_ERROR, "Status: 0x%08x\r\n", Status));
      mEfiShellEnvironment2 = NULL;
    }
    Status = gBS->OpenProtocol(ImageHandle,
                               &gEfiShellInterfaceGuid,
                               (VOID **)&mEfiShellInterface,
                               ImageHandle,
                               NULL,
                               EFI_OPEN_PROTOCOL_GET_PROTOCOL
                              );
    if (EFI_ERROR(Status)) {
      mEfiShellInterface = NULL;
    }
  }
if (0==gEfiShellProtocol) {
SystemTable->ConOut->OutputString(SystemTable->ConOut,L"TestE\n\r"); //LabZDebug
  }

SystemTable->ConOut->OutputString(SystemTable->ConOut,L"TestC\n\r"); //LabZDebug
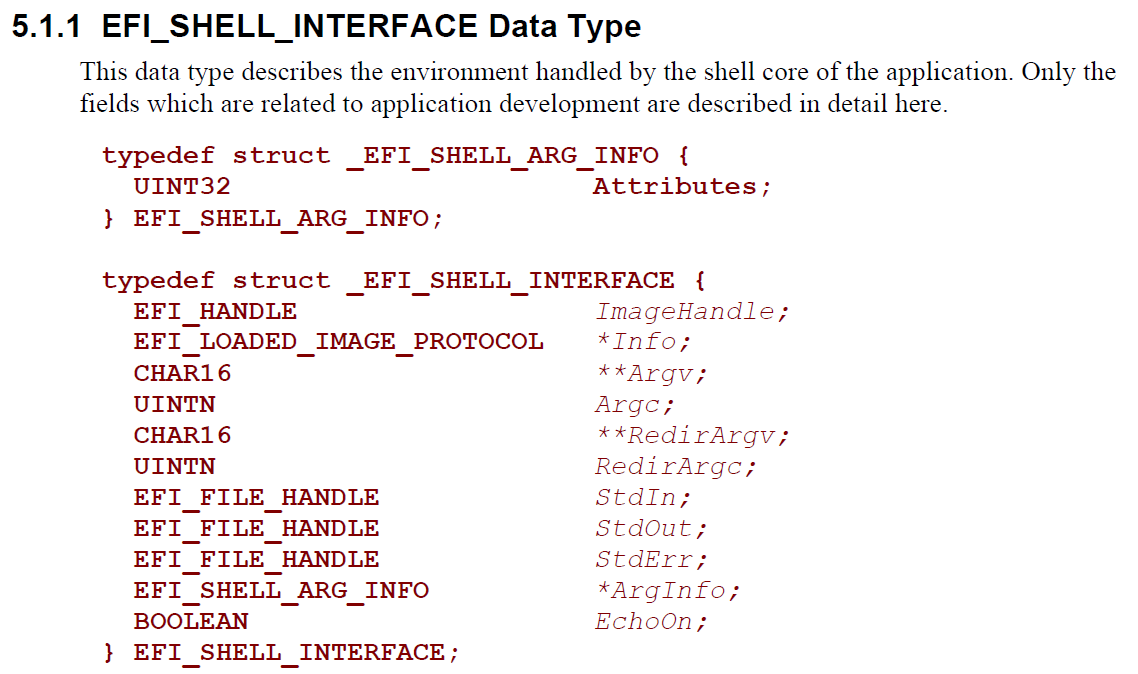
输出的结果是: TestA TestB TestE 和 TestC。 就是说这段代码尝试取 Shell Protocol 但是没有取到。再仔细看一下代码,这里没有取得到。因此,此路不通。再向下看发现初始化了EFI_SHELL_ENVIRONMENT2 *mEfiShellEnvironment2,再看了一下他的定义,在\ShellPkg\Include\Protocol\EfiShellEnvironment2.h 中
/// EFI_SHELL_ENVIRONMENT2 protocol structure.
typedef struct {
  SHELLENV_EXECUTE                        Execute;
  SHELLENV_GET_ENV                        GetEnv;
  SHELLENV_GET_MAP                        GetMap;
  SHELLENV_ADD_CMD                        AddCmd;
  SHELLENV_ADD_PROT                       AddProt;
  SHELLENV_GET_PROT                       GetProt;
  SHELLENV_CUR_DIR                        CurDir;
  SHELLENV_FILE_META_ARG                  FileMetaArg;
  SHELLENV_FREE_FILE_LIST                 FreeFileList;

  //
  // The following services are only used by the shell itself.
  //
  SHELLENV_NEW_SHELL                      NewShell;
  SHELLENV_BATCH_IS_ACTIVE                BatchIsActive;

  SHELLENV_FREE_RESOURCES                 FreeResources;

  //
  // GUID to differentiate ShellEnvironment2 from ShellEnvironment.
  //
  EFI_GUID                                SESGuid;
  //
  // Major Version grows if shell environment interface has been changes.
  //
  UINT32                                  MajorVersion;
  UINT32                                  MinorVersion;
  SHELLENV_ENABLE_PAGE_BREAK              EnablePageBreak;
  SHELLENV_DISABLE_PAGE_BREAK             DisablePageBreak;
  SHELLENV_GET_PAGE_BREAK                 GetPageBreak;

  SHELLENV_SET_KEY_FILTER                 SetKeyFilter;
  SHELLENV_GET_KEY_FILTER                 GetKeyFilter;

  SHELLENV_GET_EXECUTION_BREAK            GetExecutionBreak;
  SHELLENV_INCREMENT_SHELL_NESTING_LEVEL  IncrementShellNestingLevel;
  SHELLENV_DECREMENT_SHELL_NESTING_LEVEL  DecrementShellNestingLevel;
  SHELLENV_IS_ROOT_SHELL                  IsRootShell;

  SHELLENV_CLOSE_CONSOLE_PROXY            CloseConsoleProxy;
  HANDLE_ENUMERATOR                       HandleEnumerator;
  PROTOCOL_INFO_ENUMERATOR                ProtocolInfoEnumerator;
  GET_DEVICE_NAME                         GetDeviceName;
  GET_SHELL_MODE                          GetShellMode;
  SHELLENV_NAME_TO_PATH                   NameToPath;
  SHELLENV_GET_FS_NAME                    GetFsName;
  SHELLENV_FILE_META_ARG_NO_WILDCARD      FileMetaArgNoWildCard;
  SHELLENV_DEL_DUP_FILE                   DelDupFileArg;
  SHELLENV_GET_FS_DEVICE_PATH             GetFsDevicePath;
} EFI_SHELL_ENVIRONMENT2;
因此,尝试一下SHELLENV_CUR_DIR. 这个函数头文件也在同一个文件中
/**
  This function returns a string array containing the current directory on
  a given device.

  If DeviceName is specified, then return the current shell directory on that
  device.  If DeviceName is NULL, then return the current directory on the
  current device.  The caller us responsible to free the returned string when
  no longer required.

  @param[in] DeviceName         The name of the device to get the current
                                directory on, or NULL for current device.

  @return String array with the current directory on the current or specified device.

**/
typedef
CHAR16*
(EFIAPI *SHELLENV_CUR_DIR) (
  IN CHAR16 *DeviceName OPTIONAL
  );
最后的 C 代码如下
#include <Uefi.h>
#include <Library/UefiLib.h>
#include <Library/ShellCEntryLib.h>
#include <stdio.h>
#include <stdlib.h>
#include <wchar.h>
#include <Protocol/EfiShell.h>
#include <Library/ShellLib.h>
extern EFI_BOOT_SERVICES *gBS;
extern EFI_SYSTEM_TABLE *gST;
extern EFI_RUNTIME_SERVICES *gRT;
extern EFI_SHELL_ENVIRONMENT2 *mEfiShellEnvironment2;
/***
Demonstrates basic workings of the main() function by displaying a
welcoming message.
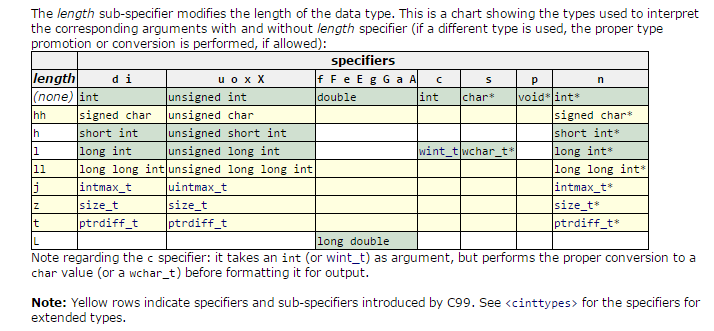
Note that the UEFI command line is composed of 16-bit UCS2 wide characters.
The easiest way to access the command line parameters is to cast Argv as:
wchar_t **wArgv = (wchar_t **)Argv;
@retval 0 The application exited normally.
@retval Other An error occurred.
***/
int
EFIAPI
main (
IN int Argc,
IN char **Argv
)
{
Print(L"%s",mEfiShellEnvironment2->CurDir(0));
return EFI_SUCCESS;
}
对应的 INF 代码如下
## @file
#   A simple, basic, application showing how the Hello application could be
#   built using the "Standard C Libraries" from StdLib.
#
#  Copyright (c) 2010 - 2011, Intel Corporation. All rights reserved.<BR>
#  This program and the accompanying materials
#  are licensed and made available under the terms and conditions of the BSD License
#  which accompanies this distribution. The full text of the license may be found at
#  http://opensource.org/licenses/bsd-license.
#
#  THE PROGRAM IS DISTRIBUTED UNDER THE BSD LICENSE ON AN "AS IS" BASIS,
#  WITHOUT WARRANTIES OR REPRESENTATIONS OF ANY KIND, EITHER EXPRESS OR IMPLIED.
##

[Defines]
  INF_VERSION                    = 0x00010006
  BASE_NAME                      = getcurdir
  FILE_GUID                      = 4ea97c46-7491-4dfd-0027-747010f3ce5f
  MODULE_TYPE                    = UEFI_APPLICATION
  VERSION_STRING                 = 0.1
  ENTRY_POINT                    = ShellCEntryLib

#
#  VALID_ARCHITECTURES           = IA32 X64 IPF
#

[Sources]
  GetCurDir.c

[Packages]
  StdLib/StdLib.dec
  MdePkg/MdePkg.dec
  ShellPkg/ShellPkg.dec

[LibraryClasses]
  LibC
  LibStdio
  ShellCEntryLib
  ShellLib

[Protocols]

[BuildOptions]
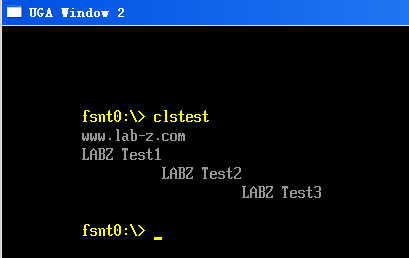
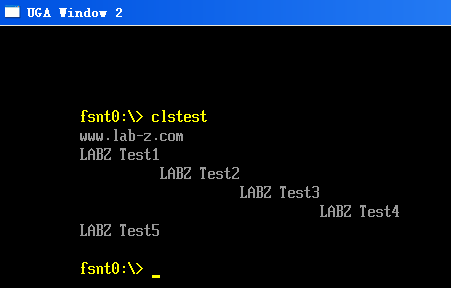
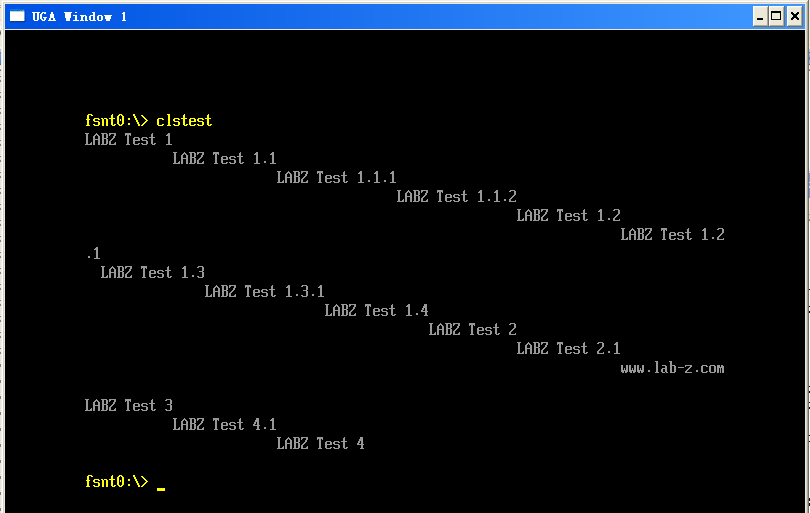
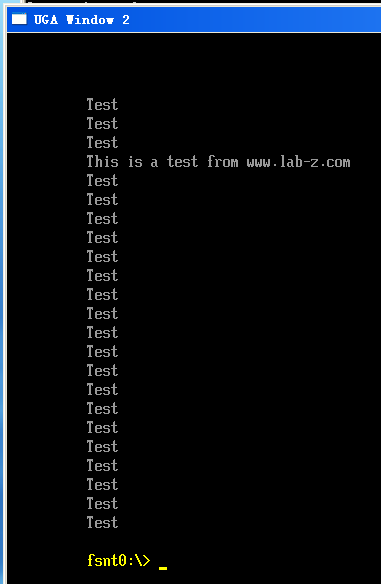
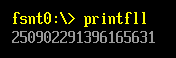
运行结果
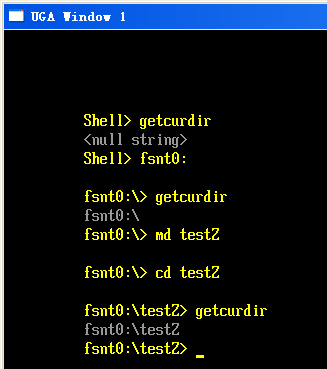
说明工作正常。
完整下载
参考:
1.UEFI Shell Specification July 2, 2014 EFI_SHELL_PROTOCOL.GetCurDir() P24