Step to UEFI (47) —– 偏移正确吗?

前面展示了在一个程序中调用另外一个程序的方法,还有加载过程中获取被加载程序的一些基本信息。其中的一个是ImageBase。这里做一个实验来验证上面显示的ImageBase是否正确。

上次的HelloWorld.c代码中我们还加入一条显示UefiMain在内存中的位置。

#include <Uefi.h>
#include <Library/PcdLib.h>
#include <Library/UefiLib.h>
#include <Library/UefiApplicationEntryPoint.h>


/**
  The user Entry Point for Application. The user code starts with this function
  as the real entry point for the application.

  @param[in] ImageHandle    The firmware allocated handle for the EFI image.  
  @param[in] SystemTable    A pointer to the EFI System Table.
  
  @retval EFI_SUCCESS       The entry point is executed successfully.
  @retval other             Some error occurs when executing this entry point.

**/
EFI_STATUS
EFIAPI
UefiMain (
  IN EFI_HANDLE        ImageHandle,
  IN EFI_SYSTEM_TABLE  *SystemTable
  )
{
  Print(L"Hello,World! \r\n");
  Print(L"www.lab-z.com \r\n");
  
  Print(L"UefiMain  [%X]",(UINTN)UefiMain);  
  
  return EFI_SUCCESS;
}


直接运行编译后的结果如下:
elipc1

可以看到,UefiMain被加载到了0x033E 36C5 的位置。运用之前的知识,我们在
\Build\AppPkg\RELEASE_MYTOOLS\IA32\AppPkg\Applications\HelloWorld\HelloWorld\OUTPUT\
能看到编译过程中生成的HelloWorld.map文件(特别注意:我是用build –a IA32 –p AppPkg\AppPkg.dsc –b RELEASE 来生成Release版本的,其他版本会出现在不同的目录中)。

  Address         Publics by Value              Rva+Base       Lib:Object
 0001:00000490       ??_C@_02PCIJFNDE@?$AN?6?$AA@ 00000690     BasePrintLib:PrintLibInternal.obj
 0001:00000494       ??_C@_01LIIJDEN@?$AN?$AA@  00000694     BasePrintLib:PrintLibInternal.obj
 0001:00000496       __ModuleEntryPoint         00000696 f   UefiApplicationEntryPoint:ApplicationEntryPoint.obj
 0001:000004c5       _UefiMain                  000006c5 f   HelloWorld:HelloWorld.obj
 0001:000004fa       _DebugAssert               000006fa f   BaseDebugLibNull:DebugLib.obj
 0001:000004fb       _DebugAssertEnabled        000006fb f   BaseDebugLibNull:DebugLib.obj


实际加载的偏移是 6C5 ( Rva+Base ,具体解释请看【参考1 2 3】)

再使用我们的exec2来加载这个EFI可执行程序

elipc2

因此从结果上看,我们用EFI_LOADED_IMAGE_PROTOCOL 获得的ImageBase是准确的。

参考:

1. http://blog.csdn.net/fantcy/article/details/4474604 PE格式深入浅出之RAV,AV,ImageBase之间的关系
2. http://www.cnblogs.com/lzjsky/archive/2011/09/22/2184942.html PE格式全分析
3. http://blog.sina.com.cn/s/blog_6cc1c52d0100t4wa.html PE文件格式学习笔记

Step to UEFI (46) —– EFILOADEDIMAGEPROTOCOL的使用

上次介绍了如何在一个程序中直接调用另外的程序,那么在调用过程中是否有机会获得一些加载起来的EFI的信息呢?经过一番搜索,发现EFI_LOADED_IMAGE_PROTOCOL【参考1】。这个protocol的作用就是 “Can be used on any image handle to obtain information about the loaded image.”

elip

从定义上看,我们能够得到加载的Image的一些基本信息。在上次程序的基础上,添加一些代码来实验。

#include  <Uefi.h>
#include  <Library/UefiLib.h>
#include  <Library/ShellCEntryLib.h>

#include  <stdio.h>
#include  <stdlib.h>
#include  <wchar.h>

#include <Protocol/EfiShell.h>
#include <Library/ShellLib.h>

extern EFI_BOOT_SERVICES           	 *gBS;
extern EFI_SYSTEM_TABLE				 *gST;
extern EFI_RUNTIME_SERVICES 		 *gRT;

extern EFI_SHELL_PROTOCOL            *gEfiShellProtocol;
extern EFI_SHELL_ENVIRONMENT2 		 *mEfiShellEnvironment2;

extern EFI_HANDLE					 gImageHandle;
/**
  GET  DEVICEPATH
**/
EFI_DEVICE_PATH_PROTOCOL *
EFIAPI
ShellGetDevicePath (
  IN CHAR16                     * CONST DeviceName OPTIONAL
  )
{
  //
  // Check for UEFI Shell 2.0 protocols
  //
  if (gEfiShellProtocol != NULL) {
    return (gEfiShellProtocol->GetDevicePathFromFilePath(DeviceName));
  }

  //
  // Check for EFI shell
  //
  if (mEfiShellEnvironment2 != NULL) {
    return (mEfiShellEnvironment2->NameToPath(DeviceName));
  }

  return (NULL);
}

int
EFIAPI
main (
  IN int Argc,
  IN char **Argv
  )
{
  EFI_DEVICE_PATH_PROTOCOL 	*DevicePath;
  EFI_HANDLE				NewHandle;
  EFI_STATUS				Status;
  UINTN			ExitDataSizePtr;  
  CHAR16 					*R=L"HelloWorld.efi";
  EFI_LOADED_IMAGE_PROTOCOL	*ImageInfo = NULL;
  
  Print(L"File [%s]\n",R);

  DevicePath=ShellGetDevicePath(R);

  //
  // Load the image with:
  // FALSE - not from boot manager and NULL, 0 being not already in memory
  //
  Status = gBS->LoadImage(
    FALSE,
    gImageHandle,
    DevicePath,
    NULL,
    0,
    &NewHandle);  

  if (EFI_ERROR(Status)) {
    if (NewHandle != NULL) {
      gBS->UnloadImage(NewHandle);
    }
	Print(L"Error during LoadImage [%X]\n",Status);
    return (Status);
  }

  Status = gBS -> HandleProtocol (
						NewHandle,
						&gEfiLoadedImageProtocolGuid,
						&ImageInfo
						);
  Print(L"ImageBase [%lX]\n",ImageInfo->ImageBase);
  Print(L"ImageSize [%lX]\n",ImageInfo->ImageSize);

  //
  // now start the image, passing up exit data if the caller requested it
  //
  Status = gBS->StartImage(
                     NewHandle,
                     &ExitDataSizePtr,
                     NULL
              );
  if (EFI_ERROR(Status)) {
    if (NewHandle != NULL) {
      gBS->UnloadImage(NewHandle);
    }
	Print(L"Error during StartImage [%X]\n",Status);
    return (Status);
  }
  
  gBS->UnloadImage (NewHandle);  
  return EFI_SUCCESS;
}


特别注意,我们代码中需要使用这个Protocol的GUID,在INF中添加下面的引用即可。

[Protocols]
  gEfiLoadedImageProtocolGuid    


运行结果

elip2

可以看到显示的ImageSize就是 HelloWorld.efi的大小。

elip3

实验调用的代码比较特殊,如果直接调用CLIB编写的程序会导致错误。至于具体的原因,后续再进行研究。

实验的 HelloWorld.EFI 的代码在下面

#include <Uefi.h>
#include <Library/PcdLib.h>
#include <Library/UefiLib.h>
#include <Library/UefiApplicationEntryPoint.h>


/**
  The user Entry Point for Application. The user code starts with this function
  as the real entry point for the application.

  @param[in] ImageHandle    The firmware allocated handle for the EFI image.  
  @param[in] SystemTable    A pointer to the EFI System Table.
  
  @retval EFI_SUCCESS       The entry point is executed successfully.
  @retval other             Some error occurs when executing this entry point.

**/
EFI_STATUS
EFIAPI
UefiMain (
  IN EFI_HANDLE        ImageHandle,
  IN EFI_SYSTEM_TABLE  *SystemTable
  )
{
  Print(L"Hello,World! \r\n");
  Print(L"www.lab-z.com \r\n");
  
  return EFI_SUCCESS;
}


对应的INF

[Defines]
  INF_VERSION                    = 0x00010005
  BASE_NAME                      = HelloWorld
  FILE_GUID                      = 6987936E-ED34-44db-AE97-1FA5E4ED2116
  MODULE_TYPE                    = UEFI_APPLICATION
  VERSION_STRING                 = 1.0
  ENTRY_POINT                    = UefiMain

#
# The following information is for reference only and not required by the build tools.
#
#  VALID_ARCHITECTURES           = IA32 X64 IPF EBC
#

[Sources]
  HelloWorld.c

[Packages]
  MdePkg/MdePkg.dec
  MdeModulePkg/MdeModulePkg.dec

[LibraryClasses]
  UefiApplicationEntryPoint
  UefiLib
  PcdLib

[FeaturePcd]

[Pcd]


实验完整代码下载

exec2
参考:

1.UEFI Spec 2.4 P265

Step to UEFI (43) —– 取得当前目录的 EFI_DEVICE_PATH_PROTOCOL

在 EFI_SHELL_PROTOCOL 中提供了 EfiShellGetDevicePathFromFilePath 函数

具体可以在 \ShellPkg\Application\Shell\ShellProtocol.h 看到原型

/**
  Converts a file system style name to a device path.

  This function converts a file system style name to a device path, by replacing any
  mapping references to the associated device path.

  @param[in] Path               The pointer to the path.

  @return                       The pointer of the file path. The file path is callee
                                allocated and should be freed by the caller.
  @retval NULL                  The path could not be found.
  @retval NULL                  There was not enough available memory.
**/
EFI_DEVICE_PATH_PROTOCOL *
EFIAPI
EfiShellGetDevicePathFromFilePath(
  IN CONST CHAR16 *Path
  )


在【参考1】中,可以看到下面的介绍

getcurdp

经过试验,这个函数结合之前我们获得当前目录的函数完全可以达到目标。但是,如同【参考2】提到的,某些情况下,因为 Shell 不提供 EFI_SHELL_PROTOCOL,这个函数无法使用。

再查查 EFI_SHELL_ENVIRONMENT2 发现其中有功能类似的 NameToPath 函数

Convert a file system style name to a device path.

This function will convert a shell path name to a Device Path Protocol path. This function will allocate any required memory for this operation and it is the responsibility of the caller to free that memory when no longer required.

If anything prevents the complete conversion free any allocated memory and return NULL.

Parameters
[in]	Path	The path to convert.
Return values
!NULL	A pointer to the callee allocated Device Path.
NULL	The operation could not be completed.


最后,决定仿照 ShellLib.h 中的 ShellGetCurrentDir,写一个混合上述两种函数的函数。最后的代码就是这样

#include  <Uefi.h>
#include  <Library/UefiLib.h>
#include  <Library/ShellCEntryLib.h>

#include  <stdio.h>
#include  <stdlib.h>
#include  <wchar.h>

#include <Protocol/EfiShell.h>
#include <Library/ShellLib.h>

extern EFI_BOOT_SERVICES           	 *gBS;
extern EFI_SYSTEM_TABLE				 *gST;
extern EFI_RUNTIME_SERVICES 		 *gRT;

extern EFI_SHELL_PROTOCOL            *gEfiShellProtocol;
extern EFI_SHELL_ENVIRONMENT2 		 *mEfiShellEnvironment2;
/**
  GET  DEVICEPATH
**/
EFI_DEVICE_PATH_PROTOCOL *
EFIAPI
ShellGetDevicePath (
  IN CHAR16                     * CONST DeviceName OPTIONAL
  )
{
  //
  // Check for UEFI Shell 2.0 protocols
  //
  if (gEfiShellProtocol != NULL) {
    return (gEfiShellProtocol->GetDevicePathFromFilePath(DeviceName));
  }

  //
  // Check for EFI shell
  //
  if (mEfiShellEnvironment2 != NULL) {
    return (mEfiShellEnvironment2->NameToPath(DeviceName));
  }

  return (NULL);
}

int
EFIAPI
main (
  IN int Argc,
  IN char **Argv
  )
{
  EFI_DEVICE_PATH_PROTOCOL *DevicePath;
  CHAR16 *R;
  
  R=(CHAR16 *)ShellGetCurrentDir(NULL);
  
  Print(L"Current dir [%s]\n",ShellGetCurrentDir(0));
  
  DevicePath=ShellGetDevicePath(R);
  
  Print(L"Type        [%d]\nSub-Type    [%d]\nLength      [%d]\n",
				DevicePath->Type,
				DevicePath->SubType,
				DevicePath->Length[0] + DevicePath->Length[1]*256);
  
  return EFI_SUCCESS;
}


运行结果

getCurDP

代码下载

GetCurDP

参考:

1.UEFI_Shell_Spec_2_1_July02release P28
2.http://www.lab-z.com/getcurdir2/ Shell GetCurDir 补遗
3.http://www.bluestop.org/edk2/docs/UDK2010.SR1/struct_e_f_i___s_h_e_l_l___e_n_v_i_r_o_n_m_e_n_t2.html EFI_SHELL_ENVIRONMENT2 Struct Reference

Step to UEFI (42) —– 给Shell加一个时间显示功能

目标是:在Shell的右上角实现一个时间显示,类似DOS下的那种内存驻留程序,不影响其他程序的运行一直显示时间。

方法:首先想到的最简单方法是修改Shell.bin的代码,在开始的地方加入一个定时器,触发之后,首先保存当前光标位置,然后移动光标到右上角,自动更新显示时间,最后再将光标移回原位置。

需要修改的文件是 \ShellPkg\Application\Shell 下面的 Shell.C

定时器触发之后动作的代码如下:

//LabZDebug_Start
/**
  The callback function for the timer event used to get map.

  @param[in] Event    The event this function is registered to.
  @param[in] Context  The context registered to the event.
**/
VOID
EFIAPI
Timeout (
  IN EFI_EVENT      Event,
  IN VOID           *Context
  )
{
  EFI_TIME   ET;
  UINTN		x;
  UINTN		y;
  

  //Get cursor postion
  x = gST->ConOut->Mode->CursorColumn;
  y = gST->ConOut->Mode->CursorRow;
  //Move cursor to Up-Left 
  gST -> ConOut -> SetCursorPosition(gST -> ConOut,70,0);  
  //Output current time
  gRT->GetTime(&ET, NULL);  
  Print(L"%2d:%2d:%2d",ET.Hour,ET.Minute,ET.Second);
  //Move cursor back
  gST -> ConOut -> SetCursorPosition(gST -> ConOut,x,y);  

  return ;
}
//LabZDebug_End


设置定时器的代码如下

	//LabZDebug_Start
	Status  = gBS->CreateEvent (
                    EVT_NOTIFY_SIGNAL | EVT_TIMER,
                    TPL_CALLBACK,
                    Timeout,
                    NULL,
                    &TimerOne
                    );

    if (EFI_ERROR (Status)) {
        Print(L"Create Event Error! \r\n");
    }
	else {
		Status = gBS->SetTimer (
                   TimerOne,
                   TimerPeriodic,
                   MultU64x32 (1000, 1)
                   );

    if (EFI_ERROR (Status)) {
        Print(L"Set Timer Error! \r\n");
		}
	}
	//LabZDebug_End


最后还要销毁定时器,否则会发生 exit 到 setup 之后崩溃的情况

FreeResources:
	//LabZDebug_Start
	    gBS->SetTimer (TimerOne, TimerCancel, 0);
		gBS->CloseEvent (TimerOne);	
	//LabZDebug_End


之后需要重新编译出来 Shell.efi 替换原先的文件。运行结果如下

stim

工作的视频:

http://www.tudou.com/programs/view/DcPCkOrO2lQ/?resourceId=414535982_06_02_99

完整的代码下载

ShellC

Step to UEFI (41) —– x64 的 FreqCalc程序

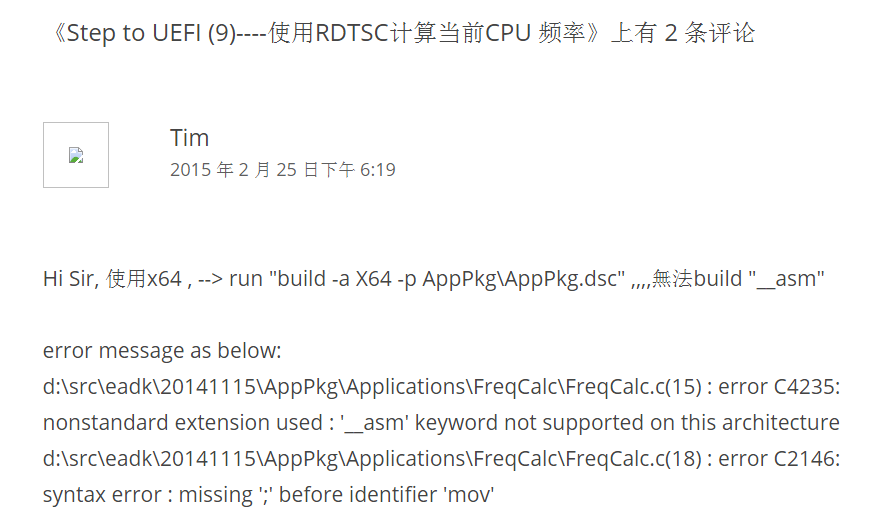
之前的一篇文章《Step to UEFI (9)—-使用RDTSC计算当前CPU 频率》【参考1】给出了一个计算当前CPU频率的方法。不过 Tim 给我留言,他说这篇文章的程序无法在 x64下正常编译:

freq

我猜测原因是因为我的程序使用的内嵌汇编,内嵌汇编无法被X64的编译器正常编译的。关于这个说法可以看【参考2】。

动手在 UDK2014 下面实验,不过在看到描述的问题之前还是要走一段路的。

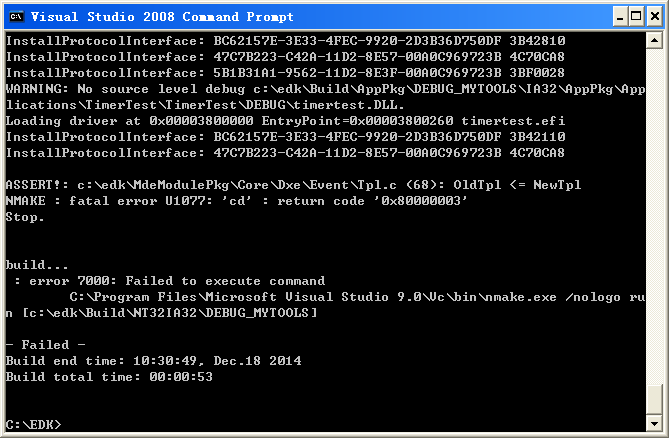
使用编译命令 build -a X64 -p AppPkg\AppPkg.dsc 得到下面的错误信息

c:\edk\AppPkg\AppPkg.dsc(94): error 000E: File/directory not found in workspace
        c:\edk\PerformancePkg\Library\DxeTscTimerLib\DxeTscTimerLib.inf


检查 AppPkg.dsc

修改

[LibraryClasses.X64]
  TimerLib|PerformancePkg/Library/DxeTscTimerLib/DxeTscTimerLib.inf


修改为

[LibraryClasses.X64]
  TimerLib|PerformancePkg/Library/TscTimerLib/DxeTscTimerLib.inf


再次编译,有下面的错误信息

Processing meta-data .. done!
Building ... c:\edk\MdePkg\Library\BaseLib\BaseLib.inf [X64]
        "C:\Program Files\Microsoft Visual Studio 9.0\Vc\bin\x86_amd64\cl.exe" /Foc:\edk\Build\AppPkg\DEBUG_MYTOOLS\X64\MdePkg\Library\BaseLib\BaseLib\OUTPUT\.\CheckSum.obj /nologo /c /WX /GS- /W4 /Gs32768 /Gy /D UNICODE /O1ib2 /GL /FIAutoG
en.h /EHs-c- /GR- /GF /Zi /Gm /X /Zc:wchar_t /X /Zc:wchar_t /GL- /Ic:\edk\MdePkg\Library\BaseLib\X64  /Ic:\edk\MdePkg\Library\BaseLib  /Ic:\edk\Build\AppPkg\DEBUG_MYTOOLS\X64\MdePkg\Library\BaseLib\BaseLib\DEBUG  /Ic:\edk\MdePkg  /Ic:\edk\M
dePkg\Include  /Ic:\edk\MdePkg\Include\X64 c:\edk\MdePkg\Library\BaseLib\CheckSum.c
'C:\Program' 不是内部或外部命令,也不是可运行的程序或批处理文件。
NMAKE : fatal error U1077: '"C:\Program Files\Microsoft Visual Studio 9.0\Vc\bin\x86_amd64\cl.exe' : return code '0x1' Stop.


build...
 : error 7000: Failed to execute command
        C:\Program Files\Microsoft Visual Studio 9.0\Vc\bin\nmake.exe /nologo tbuild 

build...
 : error 7000: Failed to execute command
        C:\Program Files\Microsoft Visual Studio 9.0\Vc\bin\nmake.exe /nologo tbuild 


build...
 : error F002: Failed to build module
        c:\edk\MdePkg\Library\BaseLib\BaseLib.inf [X64, MYTOOLS, DEBUG]

- Failed -
Build end time: 11:22:09, Mar.09 2015
Build total time: 00:00:03


尝试在命令行窗口直接运行”C:\Program Files\Microsoft Visual Studio 9.0\Vc\bin\x86_amd64\cl.exe” 错误提示是:

C:\EDK>"C:\Program Files\Microsoft Visual Studio 9.0\Vc\bin\x86_amd64\cl.exe"
系统找不到指定的路径。


这是因为目前的编译环境缺少 64位编译器。我使用的是 vs2008 express 版本,默认是没有 64位的cl.exe的。

找到 ‘x86_amd64’ 拷贝到 “C:\Program Files\Microsoft Visual Studio 9.0\VC\bin”

需要的朋友可以在这里下载到 x86_amd64

再次编译,然后就能看到 Tim 说的问题啦

C:\Program Files\Microsoft Visual Studio 9.0\VC\bin

Building ... c:\edk\AppPkg\Applications\FreqCalc\FreqCalc.inf [X64]
        "C:\Program Files\Microsoft Visual Studio 9.0\Vc\bin\x86_amd64\cl.exe" /Foc:\edk\Build\AppPkg\DEBUG_MYTOOLS\X64\AppPkg\Applications\FreqCalc\FreqCalc\OUTPUT\.\FreqCalc.obj /nologo /c /WX /GS- /W4 /Gs32768 /Gy /D UNICODE /O1ib2 /GL /
FIAutoGen.h /EHs-c- /GR- /GF /Zi /Gm /X /Zc:wchar_t /Ic:\edk\AppPkg\Applications\FreqCalc  /Ic:\edk\Build\AppPkg\DEBUG_MYTOOLS\X64\AppPkg\Applications\FreqCalc\FreqCalc\DEBUG  /Ic:\edk\MdePkg  /Ic:\edk\MdePkg\Include  /Ic:\edk\MdePkg\Includ
e\X64  /Ic:\edk\ShellPkg  /Ic:\edk\ShellPkg\Include  /Ic:\edk\MdeModulePkg  /Ic:\edk\MdeModulePkg\Include c:\edk\AppPkg\Applications\FreqCalc\FreqCalc.c
FreqCalc.c
c:\edk\AppPkg\Applications\FreqCalc\FreqCalc.c(15) : error C4235: nonstandard extension used : '__asm' keyword not supported on this architecture
c:\edk\AppPkg\Applications\FreqCalc\FreqCalc.c(18) : error C2146: syntax error : missing ';' before identifier 'mov'
c:\edk\AppPkg\Applications\FreqCalc\FreqCalc.c(18) : warning C4550: expression evaluates to a function which is missing an argument list
c:\edk\AppPkg\Applications\FreqCalc\FreqCalc.c(18) : error C2065: 'mov' : undeclared identifier
c:\edk\AppPkg\Applications\FreqCalc\FreqCalc.c(18) : error C2146: syntax error : missing ';' before identifier 'dword'
c:\edk\AppPkg\Applications\FreqCalc\FreqCalc.c(18) : error C2065: 'dword' : undeclared identifier
c:\edk\AppPkg\Applications\FreqCalc\FreqCalc.c(18) : error C2146: syntax error : missing ';' before identifier 'ptr'
c:\edk\AppPkg\Applications\FreqCalc\FreqCalc.c(18) : error C2065: 'ptr' : undeclared identifier
c:\edk\AppPkg\Applications\FreqCalc\FreqCalc.c(18) : error C2146: syntax error : missing ';' before identifier 'value'
c:\edk\AppPkg\Applications\FreqCalc\FreqCalc.c(19) : error C2065: 'eax' : undeclared identifier
c:\edk\AppPkg\Applications\FreqCalc\FreqCalc.c(19) : error C2146: syntax error : missing ';' before identifier 'mov'
c:\edk\AppPkg\Applications\FreqCalc\FreqCalc.c(19) : error C2065: 'mov' : undeclared identifier
c:\edk\AppPkg\Applications\FreqCalc\FreqCalc.c(19) : error C2146: syntax error : missing ';' before identifier 'dword'
c:\edk\AppPkg\Applications\FreqCalc\FreqCalc.c(19) : error C2065: 'dword' : undeclared identifier
c:\edk\AppPkg\Applications\FreqCalc\FreqCalc.c(19) : error C2146: syntax error : missing ';' before identifier 'ptr'
c:\edk\AppPkg\Applications\FreqCalc\FreqCalc.c(19) : error C2065: 'ptr' : undeclared identifier
c:\edk\AppPkg\Applications\FreqCalc\FreqCalc.c(19) : error C2109: subscript requires array or pointer type
c:\edk\AppPkg\Applications\FreqCalc\FreqCalc.c(20) : error C2065: 'edx' : undeclared identifier
c:\edk\AppPkg\Applications\FreqCalc\FreqCalc.c(20) : error C2143: syntax error : missing ';' before '}'
NMAKE : fatal error U1077: '"C:\Program Files\Microsoft Visual Studio 9.0\Vc\bin\x86_amd64\cl.exe"' : return code '0x2'
Stop.


build...
 : error 7000: Failed to execute command
        C:\Program Files\Microsoft Visual Studio 9.0\Vc\bin\nmake.exe /nologo tbuild 


build...
 : error F002: Failed to build module
        c:\edk\AppPkg\Applications\FreqCalc\FreqCalc.inf [X64, MYTOOLS, DEBUG]

- Failed -
Build end time: 11:26:31, Mar.09 2015
Build total time: 00:01:16


然后就考虑如何解决,网上搜索了一下,有人遇到同样的问题【参考3】,具体的解决方法在【参考4】

简单的说,就是单独写一个 asm 然后在对应的 Inf中声明一下即可。

针对我遇到的问题,程序如下

FreqCalc.inf

## @file
#  Sample UEFI Application Reference EDKII Module
#
#  This is a sample shell application that will print "UEFI Hello World!" to the 
#  UEFI Console based on PCD setting.
#
#  It demos how to use EDKII PCD mechanism to make code more flexible.
#
#  Copyright (c) 2008 - 2011, Intel Corporation. All rights reserved.<BR>
#
#  This program and the accompanying materials
#  are licensed and made available under the terms and conditions of the BSD License
#  which accompanies this distribution. The full text of the license may be found at
#  http://opensource.org/licenses/bsd-license.php
#  THE PROGRAM IS DISTRIBUTED UNDER THE BSD LICENSE ON AN "AS IS" BASIS,
#  WITHOUT WARRANTIES OR REPRESENTATIONS OF ANY KIND, EITHER EXPRESS OR IMPLIED.
#
#
##

[Defines]
  INF_VERSION                    = 0x00010005
  BASE_NAME                      = FreqCalc
  FILE_GUID                      = 6987936E-ED34-44db-AE97-2FA5E4ED2216
  MODULE_TYPE                    = UEFI_APPLICATION
  VERSION_STRING                 = 1.0
  ENTRY_POINT                    = UefiMain 

#
# The following information is for reference only and not required by the build tools.
#
#  VALID_ARCHITECTURES           = IA32 X64 IPF EBC
#

[Sources]
  FreqCalc.c
  ReadTsc1.asm

[Packages]
  MdePkg/MdePkg.dec
  ShellPkg/ShellPkg.dec
  MdeModulePkg/MdeModulePkg.dec

[LibraryClasses]
  UefiApplicationEntryPoint
  UefiLib
  PcdLib
  ShellCEntryLib
  ShellLib


[FeaturePcd]


[Pcd]


然后在FreqCalc.c 写成下面这样,特别注意要声明一下你用的那个汇编语言中的函数名

//
// FreqCalc.C
//

#include <Uefi.h>
#include <Library/UefiLib.h>
#include <Library/ShellLib.h>

EFI_SYSTEM_TABLE	*gST;
EFI_BOOT_SERVICES  	*gBS;

UINT64
EFIAPI
zReadTsc (
  VOID
);

//
// Entry point function - ShowVersion
//
EFI_STATUS
EFIAPI
UefiMain (
  IN EFI_HANDLE        ImageHandle,
  IN EFI_SYSTEM_TABLE  *SystemTable
  )
{

  UINT64  elsp;

  gST = SystemTable;
  gBS = SystemTable->BootServices;

  elsp=zReadTsc();

  gBS -> Stall(1000000);  
  Print(L"CPU Frequency: %ld \n",zReadTsc() - elsp);

  return EFI_SUCCESS;
}


然后还有一个ReadTsc1.asm (其实 uefi 里面提供了一个 x64的 ReadTsc.asm,可以直接使用,这里是为了让读者看的更清楚,取了一个不会重复的名称)

    .code

;------------------------------------------------------------------------------
; UINT64
; EFIAPI
; zReadTsc (
;   VOID
;   );
;------------------------------------------------------------------------------
zReadTsc  PROC
    rdtsc
    shl     rdx, 20h
    or      rax, rdx
    ret
zReadTsc  ENDP

    END


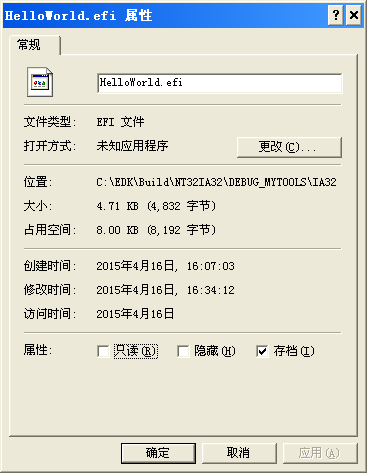
接下来就可以正常编译了,生成的 efi 文件会比 x64的大一些。然后我在实体机的 x64 shell下面运行成功。就是说上面的方法是没问题的。

FreqCalc

参考:

1.http://www.lab-z.com/rdtsc/ Step to UEFI (9)—-使用RDTSC计算当前CPU 频率

2.http://stackoverflow.com/questions/1295452/why-does-msvc-not-support-inline-assembly-for-amd64-and-itanium-targets 简单解释,说x64下无法支持 _ASM汇编

3.http://biosren.com/viewthread.php?tid=6822&highlight=%C4%DA%C7%B6%2B%BB%E3%B1%E0 請問如何在EDK2的AppPkg裡面使用asm (有人问同样的问题)

4.http://www.biosren.com/thread-6632-1-1.html 給個UEFI 內嵌彙編的小程序吧? 本文的主要参考,其中介绍了如何写单独写一个ASM文件

Step to UEFI (40) —– 从Shell下向Windows传值

很早之前,BIOS如果想把一些值传递给OS,通常都是使用CMOS的。但是这样的方法有着下面的缺点:复杂度高,需要和使用位置的人协商,否则没人知道你放在CMOS中什么地方
不确定性大,可能会在代码中冲突,无法确定别人是否也用到你选择的那个CMOS位
每次传递值少,CMOS一般也就128 BYTES,很容易耗尽。

现在进化到了UEFI的时代,可以在 Shell 上将一些内容存放在内存中,然后轻松的传输到Windows中。这里只是演示这种做法,总体来说还是非常简单的。

最关键的函数就是下面这个:

Status = pBS->AllocatePool(EfiReservedMemoryType, Hdr1->Length, &Ptr);


#include  <Uefi.h>
#include  <Library/UefiLib.h>
#include  <Library/ShellCEntryLib.h>

#include  <stdio.h>
#include  <stdlib.h>
#include  <wchar.h>
#include <Protocol/EfiShell.h>
#include <Library/ShellLib.h>

#include <Protocol/SimpleFileSystem.h>
#include <Protocol/BlockIo.h>
#include <Library/DevicePathLib.h>
#include <Library/HandleParsingLib.h>
#include <Library/SortLib.h>
#include <Library/MemoryAllocationLib.h>
#include <Library/BaseMemoryLib.h>

extern EFI_SYSTEM_TABLE			 *gST;
extern EFI_BOOT_SERVICES         *gBS;

int
EFIAPI
main (                                         
  IN int Argc,
  IN char **Argv
  )
{
  EFI_STATUS                Status;	
  UINT8                		*Buffer;  
  
  Status = gBS -> AllocatePool (EfiACPIMemoryNVS, 0x100 , & Buffer);

  * Buffer    = 'L';
  *(Buffer+1) = 'A';  
  *(Buffer+2) = 'B';  
  *(Buffer+3) = '-';  
  *(Buffer+4) = 'Z';  
  *(Buffer+5) = '.';  
  *(Buffer+6) = 'C';  
  *(Buffer+7) = 'O';  
  *(Buffer+8) = 'M';    
  *(Buffer+9) = '1';   
  printf("Memory1 [%x]\n",Buffer);
  
  //Status = gBS -> FreePool (Buffer);

    Status = gBS -> AllocatePool (EfiReservedMemoryType, 0x100 , & Buffer);

  * Buffer    = 'L';
  *(Buffer+1) = 'A';  
  *(Buffer+2) = 'B';  
  *(Buffer+3) = '-';  
  *(Buffer+4) = 'Z';  
  *(Buffer+5) = '.';  
  *(Buffer+6) = 'C';  
  *(Buffer+7) = 'O';  
  *(Buffer+8) = 'M';    
  *(Buffer+9) = '2';   
  printf("Memory2 [%x]\n",Buffer);
  
  return EFI_SUCCESS;
}


运行结果(虚拟机下面的测试)
mo1

直接查看,可以看到确实在内存中写入了
mo2

mo3

再检查一下E820 Table,可以看到放置字符串的内存已经被标记为占用
mo4

之后,我们在实体机器上运行,首先还是shell下面写,然后到Windows中读取对应的内存。可以看到我们在对应的内存中能够看到写入的String.
mo5

mo6

因此,这个方法是可行的。

代码下载
Mem2OS

Step to UEFI (39) —– 编写一个GetCursorPosition函数

我们知道,可以使用 ConOut 下面的 SetCursorPosition 来设置光标输出的位置【参考1】。

setcursorposition

但是,找了一圈也没有找到 GetCursorPosition ,我怎么知道当前光标在哪呢?查查C手册,通常使用conio.h 中的 wherex,wherey 来完成这个功能。问题是, clib 连这个头文件都没有……..

经过一番查找,在【参考2】中有人提到可以使用 Mode 中的 CursorColumn 和 CursorRow 来完成这个功能。于是,编写简单的程序验证一下,程序非常简单,随机生成一个位置显示X,然后在它后面输出当前这个X的位置:

#include  <Uefi.h>
#include  <Library/UefiLib.h>
#include  <Library/ShellCEntryLib.h>

#include  <stdio.h>
#include  <stdlib.h>
#include  <wchar.h>
#include <Protocol/EfiShell.h>
#include <Library/ShellLib.h>

#include <Protocol/SimpleFileSystem.h>
#include <Protocol/BlockIo.h>
#include <Library/DevicePathLib.h>
#include <Library/HandleParsingLib.h>
#include <Library/SortLib.h>
#include <Library/MemoryAllocationLib.h>
#include <Library/BaseMemoryLib.h>

extern EFI_SYSTEM_TABLE			 *gST;

/**
  Get the position of cursor
**/
VOID GetCursorPosition(
	IN	UINTN	*x,
	IN	UINTN	*y
)
{
	*x = gST->ConOut->Mode->CursorColumn;
	*y = gST->ConOut->Mode->CursorRow;
	
	return;
}

int
EFIAPI
main (                                         
  IN int Argc,
  IN char **Argv
  )
{
	UINTN wherex;
	UINTN wherey;
	UINTN i;
	
	for (i=0; i<5; i++)
	  {
		gST -> ConOut -> SetCursorPosition(gST -> ConOut,rand()%70,rand() % 20);
		GetCursorPosition(&wherex,&wherey);
		Print(L"x[%02d]:[%02d] ",wherex, wherey);
		
	  }
  
  return EFI_SUCCESS;
}


运行结果:

Getcur

完整代码下载:

GetCursor

参考:

1.UEFI Spec 2.4 P460
2.http://biosren.com/viewthread.php?tid=4164&highlight=%B9%E2%B1%EA EFI下对应wherex()作用的FUN是哪个?该怎么用?

Step to UEFI (38) —– SetTimer 设定定时器(下)

上一篇是直接输出一个计数器,我们还可以让他直接打印当前的时间,需要修改的代码不多,替换Timeout函数即可:

/**
  The callback function for the timer event used to get map.

  @param[in] Event    The event this function is registered to.
  @param[in] Context  The context registered to the event.
**/
VOID
EFIAPI
Timeout (
  IN EFI_EVENT      Event,
  IN VOID           *Context
  )
{
  EFI_STATUS  Status;
  EFI_TIME   ET;

  Status = gRT->GetTime(&ET, NULL);
  
  Print(L"%02d:%02d:%02d\r\n",ET.Hour,ET.Minute,ET.Second);
  return ;
}


settimes1

可以看到符合我们的期望。

接下来,我们之前的文章提到CLIB中也有时间相关的函数,我们尝试直接使用ctime函数。改动很小

/**
  The callback function for the timer event used to get map.

  @param[in] Event    The event this function is registered to.
  @param[in] Context  The context registered to the event.
**/
VOID
EFIAPI
Timeout (
  IN EFI_EVENT      Event,
  IN VOID           *Context
  )
{
  time_t t;

  time(&t);
 
  printf("%s\n",ctime(&t));
  
  return ;
}


但是会导致TPL错误

2b51136803959fa789bb6da4793609ad

b723a4c7633c0b1b141d33777dcc3942

错误原因不详。我请 HZZZ 帮忙看了一下,他发现如果我们使用默认的Shell_Full.efi就会出现问题,但是如果使用代码重新编译一个出来就不会有同样的问题(意思是:我们能够确定这是Shell本身的问题,但是没有会出现问题的Shell代码,因此无从得知Root Cause)。会出现下面的问题

timertest3

对于这个问题,HZZZ Debug的结果是:新编译出来的Shell不支持 SE2 这个Protocol…….

因此,如果想写一个兼容性强的程序,最好直接使用 UefiShellLib 提供的 ShellGetExecutionBreakFlag 函数。这个函数会自动判断当前有哪个Protocol,然后调用存在的功能。

Step to UEFI (37) —– SetTimer 设定定时器(上)

众所周知:UEFI中没有中断(UEFI唯一一个中断int 0,timer )【参考1】,如果想实现一个定时器的功能,必须使用 Event。

实现的思路是:

1. CreateEvent 创建 Timer Event
2. SetTimer 设定 Periodic 触发
3. SetTimer 关闭定时器
4. CloseEvent 销毁 Timer Event

首先研究 CreateEvent ,这个函数是Boot Service中提供的【参考3】

settimer1

第一个参数给出创建的类型,我们要选择EVT_TIMER;第二个参数是优先级,对我们来说影响不大;第三个参数给出当Event发生时对应的处理函数;第四个参数我的理解是自定义的数据;第五个参数是创建出来的Event。

接下来再看看SetTimer函数,同样也是 Boot Service 中提供的服务

settimer2

第一个参数是你创建的Event;然后是Timer的类型,比如:周期性触发;最后是设定Timer的时间,多久触发一次,单位是100ns。

CloseEvent就很简单了

settimer3

程序还参考了 ShellPkg\Library\UefiShellNetwork1CommandsLib\Ping.c 的代码。

最终代码如下

#include  <Uefi.h>
#include  <Library/UefiLib.h>
#include  <Library/ShellCEntryLib.h>

#include  <stdio.h>
#include  <stdlib.h>
#include  <wchar.h>

#include <Protocol/EfiShell.h>
#include <Library/ShellLib.h>

#include <Protocol/SimpleFileSystem.h>
#include <Protocol/BlockIo.h>
#include <Library/DevicePathLib.h>
#include <Library/HandleParsingLib.h>
#include <Library/SortLib.h>
#include <Library/MemoryAllocationLib.h>
#include <Library/BaseMemoryLib.h>

extern EFI_BOOT_SERVICES         *gBS;
extern EFI_SYSTEM_TABLE			 *gST;
extern EFI_RUNTIME_SERVICES 	 *gRT;

extern EFI_SHELL_ENVIRONMENT2    *mEfiShellEnvironment2;
extern EFI_HANDLE				 gImageHandle;

STATIC CONST UINTN SecondsToNanoSeconds = 10000000;

UINTN	Counter = 0;
/**
  The callback function for the timer event used to get map.

  @param[in] Event    The event this function is registered to.
  @param[in] Context  The context registered to the event.
**/
VOID
EFIAPI
Timeout (
  IN EFI_EVENT      Event,
  IN VOID           *Context
  )
{
  Print(L"www.lab-z.com [%d]\r\n",++ Counter);
  return ;
}

int
EFIAPI
main (                                         
  IN int Argc,
  IN char **Argv
  )
{
  EFI_STATUS                Status;
  EFI_HANDLE                TimerOne = NULL;
  BOOLEAN					ExitMark=FALSE;
  
  Status  = gBS->CreateEvent (
                    EVT_NOTIFY_SIGNAL | EVT_TIMER,
                    TPL_CALLBACK,
                    Timeout,
                    NULL,
                    &TimerOne
                    );
    
    if (EFI_ERROR (Status)) {
        Print(L"Create Event Error! \r\n");
		return ;
    }

    Status = gBS->SetTimer (
                   TimerOne,
                   TimerPeriodic,
                   MultU64x32 (SecondsToNanoSeconds, 1)
                   );
    
    if (EFI_ERROR (Status)) {
        Print(L"Set Timer Error! \r\n");
		return ;
    }

	while (!ExitMark)
	{
		if (mEfiShellEnvironment2 -> GetExecutionBreak()) {ExitMark=TRUE;}
	}
    gBS->SetTimer (TimerOne, TimerCancel, 0);
    gBS->CloseEvent (TimerOne);	

  return EFI_SUCCESS;
}


运行结果如下
TimerTest

完整代码下载
TimerTest

后记:这部分对我来说还是比较复杂,在描述上定义概念可能会有偏差,如果阅读中发现,欢迎通知我及时改正。

参考:

1. http://blog.csdn.net/celiaqianhj/article/details/7180783 UEFI Events
2. http://biosren.com/viewthread.php?tid=2095&highlight=%B6%A8%CA%B1 什么是EFI Events?
3. UEFI Spec 2.4 P118

Step to UEFI (36) —– 枚举Shell下的全部盘符

目标:写一个小程序来枚举当前系统中的盘符。比如:FS0: FS1: 等等。

和这个需求最相近的参考文件是 map 功能,每次启动shell的时候他都会展示一下当前系统中的全部盘符。这个功能的代码在 ShellPkg\Library\UefiShellLevel2CommandsLib\Map.c 。大概研究了一下,实现的方法是分别枚举有 Simple File Protocol 和 Block IO Protocol 的Handle (在 PerformMappingDisplay 函数中),然后取每的 Device Path Protocol(在 PerformSingleMappingDisplay 函数中),最后从这个Protocol中获取对应的盘符。

map.c中使用 gEfiShellProtocol->GetMapFromDevicePath 功能取得名称,但是在实际测试过程中我的程序中取得到的 gEfiShellProtocol 不知为何一直为0. 最后只得使用 mEfiShellEnvironment2 -> GetFsName 来完实现这个功能。

ShellPkg\Include\Protocol\EfiShellEnvironment2.h 有 EFI_SHELL_ENVIRONMENT2的定义

/// EFI_SHELL_ENVIRONMENT2 protocol structure.
typedef struct {
  SHELLENV_EXECUTE                        Execute;
  SHELLENV_GET_ENV                        GetEnv;
  SHELLENV_GET_MAP                        GetMap;
  SHELLENV_ADD_CMD                        AddCmd;
  SHELLENV_ADD_PROT                       AddProt;
  SHELLENV_GET_PROT                       GetProt;
                          CurDir;
  SHELLENV_FILE_META_ARG                  FileMetaArg;
  SHELLENV_FREE_FILE_LIST                 FreeFileList;

  //
  // The following services are only used by the shell itself.
  //
  SHELLENV_NEW_SHELL                      NewShell;
  SHELLENV_BATCH_IS_ACTIVE                BatchIsActive;

  SHELLENV_FREE_RESOURCES                 FreeResources;

  //
  // GUID to differentiate ShellEnvironment2 from ShellEnvironment.
  //
  EFI_GUID                                SESGuid;
  //
  // Major Version grows if shell environment interface has been changes.
  //
  UINT32                                  MajorVersion;
  UINT32                                  MinorVersion;
  SHELLENV_ENABLE_PAGE_BREAK              EnablePageBreak;
  SHELLENV_DISABLE_PAGE_BREAK             DisablePageBreak;
  SHELLENV_GET_PAGE_BREAK                 GetPageBreak;

  SHELLENV_SET_KEY_FILTER                 SetKeyFilter;
  SHELLENV_GET_KEY_FILTER                 GetKeyFilter;

  SHELLENV_GET_EXECUTION_BREAK            GetExecutionBreak;
  SHELLENV_INCREMENT_SHELL_NESTING_LEVEL  IncrementShellNestingLevel;
  SHELLENV_DECREMENT_SHELL_NESTING_LEVEL  DecrementShellNestingLevel;
  SHELLENV_IS_ROOT_SHELL                  IsRootShell;

  SHELLENV_CLOSE_CONSOLE_PROXY            CloseConsoleProxy;
  HANDLE_ENUMERATOR                       HandleEnumerator;
  PROTOCOL_INFO_ENUMERATOR                ProtocolInfoEnumerator;
  GET_DEVICE_NAME                         GetDeviceName;
  GET_SHELL_MODE                          GetShellMode;
  SHELLENV_NAME_TO_PATH                   NameToPath;
  SHELLENV_GET_FS_NAME                    GetFsName;
  SHELLENV_FILE_META_ARG_NO_WILDCARD      FileMetaArgNoWildCard;
  SHELLENV_DEL_DUP_FILE                   DelDupFileArg;
  SHELLENV_GET_FS_DEVICE_PATH             GetFsDevicePath;
} EFI_SHELL_ENVIRONMENT2;


同一个文件中

/**
  Converts a device path into a file system map name.

  If DevPath is NULL, then ASSERT.

  This function looks through the shell environment map for a map whose device
  path matches the DevPath parameter.  If one is found the Name is returned via
  Name parameter.  If sucessful the caller must free the memory allocated for
  Name.

  This function will use the internal lock to prevent changes to the map during
  the lookup operation.

  @param[in] DevPath                The device path to search for a name for.
  @param[in] ConsistMapping         What state to verify map flag VAR_ID_CONSIST.
  @param[out] Name                  On sucessful return the name of that device path.

  @retval EFI_SUCCESS           The DevPath was found and the name returned
                                in Name.
  @retval EFI_OUT_OF_RESOURCES  A required memory allocation failed.
  @retval EFI_UNSUPPORTED       The DevPath was not found in the map.
**/
typedef
EFI_STATUS
(EFIAPI *SHELLENV_GET_FS_NAME) (
  IN EFI_DEVICE_PATH_PROTOCOL     * DevPath,
  IN BOOLEAN                      ConsistMapping,
  OUT CHAR16                      **Name
  );


根据上面的函数,编写程序如下

#include  <Uefi.h>
#include  <Library/UefiLib.h>
#include  <Library/ShellCEntryLib.h>

#include  <stdio.h>
#include  <stdlib.h>
#include  <wchar.h>

#include <Protocol/EfiShell.h>
#include <Library/ShellLib.h>

#include <Protocol/SimpleFileSystem.h>
#include <Protocol/BlockIo.h>
#include <Library/DevicePathLib.h>
#include <Library/HandleParsingLib.h>
#include <Library/SortLib.h>
#include <Library/MemoryAllocationLib.h>
#include <Library/BaseMemoryLib.h>

extern EFI_BOOT_SERVICES         *gBS;
extern EFI_SYSTEM_TABLE			 *gST;
extern EFI_RUNTIME_SERVICES 	 *gRT;

extern EFI_SHELL_ENVIRONMENT2    *mEfiShellEnvironment2;
extern EFI_HANDLE				 gImageHandle;

EFI_STATUS
EFIAPI
PerformSingleMappingDisplay(
  IN CONST EFI_HANDLE Handle
  )
{
  EFI_DEVICE_PATH_PROTOCOL  *DevPath;
  EFI_DEVICE_PATH_PROTOCOL  *DevPathCopy;
  CHAR16                    *CurrentName;

  CurrentName = NULL;
  DevPath = DevicePathFromHandle(Handle);
  DevPathCopy = DevPath;
  mEfiShellEnvironment2->GetFsName(DevPathCopy,FALSE,&CurrentName);

  Print (L"%s \r\n", CurrentName);  
	
  if ((CurrentName) != NULL) { FreePool((CurrentName)); CurrentName = NULL; }

  return EFI_SUCCESS;
}

int
EFIAPI
main (                                         
  IN int Argc,
  IN char **Argv
  )
{
  EFI_STATUS                Status;
  EFI_HANDLE                *HandleBuffer=NULL;
  UINTN                     BufferSize=0;
  UINTN                     LoopVar;
  BOOLEAN                   Found;
  //Copy from ShellLibConstructorWorker in \ShellPkg\Library\UefiShellLib\UefiShellLib.c
  //
  // UEFI 2.0 shell interfaces (used preferentially)
  //
  Status = gBS->OpenProtocol(
    gImageHandle,
    &gEfiShellProtocolGuid,
    (VOID **)&gEfiShellProtocol,
    gImageHandle,
    NULL,
    EFI_OPEN_PROTOCOL_GET_PROTOCOL
   );
   
  if (EFI_ERROR(Status)) {
    //
    // Search for the shell protocol
    //
    Status = gBS->LocateProtocol(
      &gEfiShellProtocolGuid,
      NULL,
      (VOID **)&gEfiShellProtocol
     );
    if (EFI_ERROR(Status)) {
      gEfiShellProtocol = NULL;
     }
  }
  
  //
  // Look up all SimpleFileSystems in the platform
  //
  Status = gBS->LocateHandle(
    ByProtocol,
    &gEfiSimpleFileSystemProtocolGuid,
    NULL,
    &BufferSize,
    HandleBuffer);
	
  if (Status == EFI_BUFFER_TOO_SMALL) {
		HandleBuffer = AllocateZeroPool(BufferSize);
		if (HandleBuffer == NULL) {
			return (SHELL_OUT_OF_RESOURCES);
		}
		Status = gBS->LocateHandle(
			ByProtocol,
			&gEfiSimpleFileSystemProtocolGuid,
			NULL,
			&BufferSize,
			HandleBuffer);
   }

  //
  // Get the map name(s) for each one.
  //
  for ( LoopVar = 0, Found = FALSE
      ; LoopVar < (BufferSize / sizeof(EFI_HANDLE)) && HandleBuffer != NULL
      ; LoopVar ++
     ) {
    Status = PerformSingleMappingDisplay(HandleBuffer[LoopVar]);
    if (!EFI_ERROR(Status)) {
      Found = TRUE;
    }
  }
  
  FreePool(HandleBuffer);
	
  return EFI_SUCCESS;
}


运行结果,和 Map命令的对比

ShowMap

完整的代码下载
ShowMap